GE MEDICAL SYSTEMS
D
IRECTION 2380207, REVISION 7 LOGIQ™ 5 PRO SERVICE MANUAL
Chapter 8 Replacement Procedures 8 - 89
8-7-1-4 Removal Procedure (cont’d)
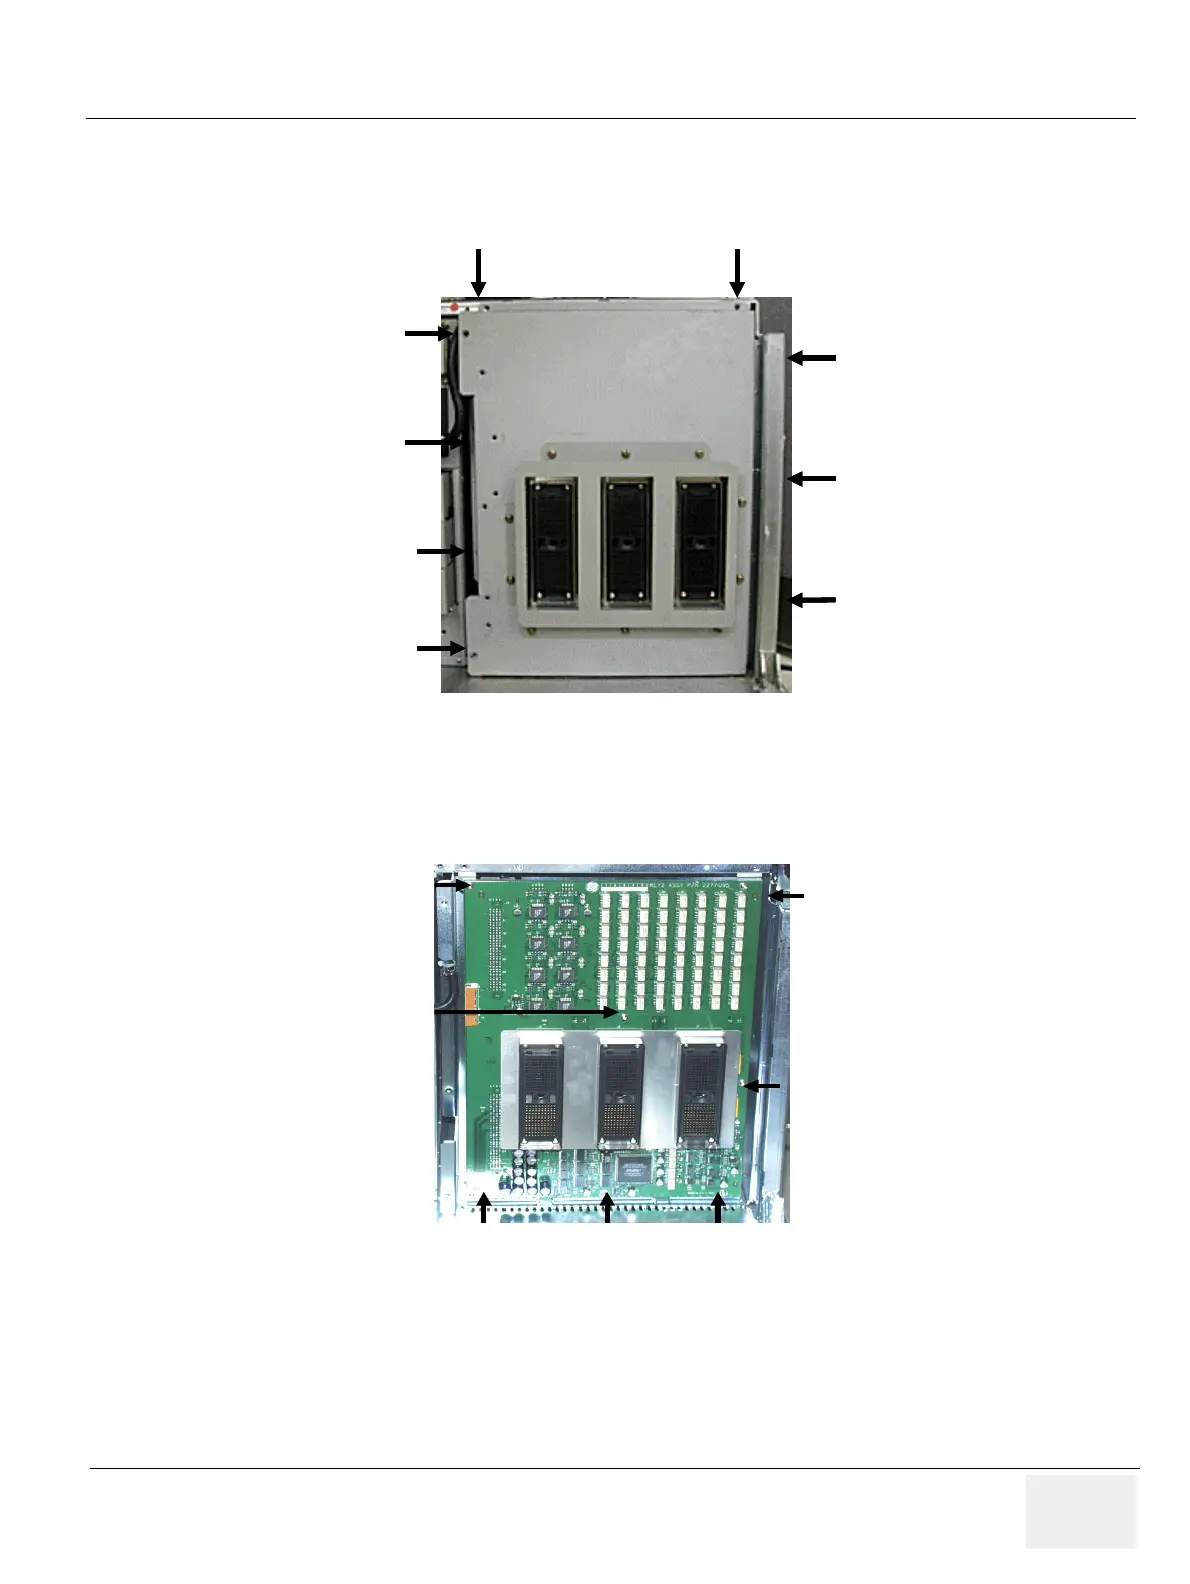
4.) Unscrew nine (7) screws (5-13) to open the RLY Board Cover. Refer to Figure 8-80.
NOTE: Bind head screw is used at the location number (6).
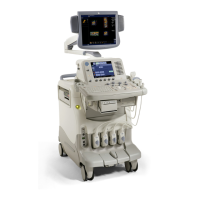
5.) Unscrew seven (7) screws (14-20) to remove the RLY Board. Refer to Figure 8-81.
6.) Get the probe connector and pull the RLY board Out.
Figure 8-80 Removing the RLY board Cover
Figure 8-81 Unscrew 7 screws to remove the RLY Board
5
6
7
8
9
10
11
12
13
5
6
7
8
9
10
11
12
13
19
20
15
14
16 17 18
19
20
15
14
16 17 18


 To Next Page