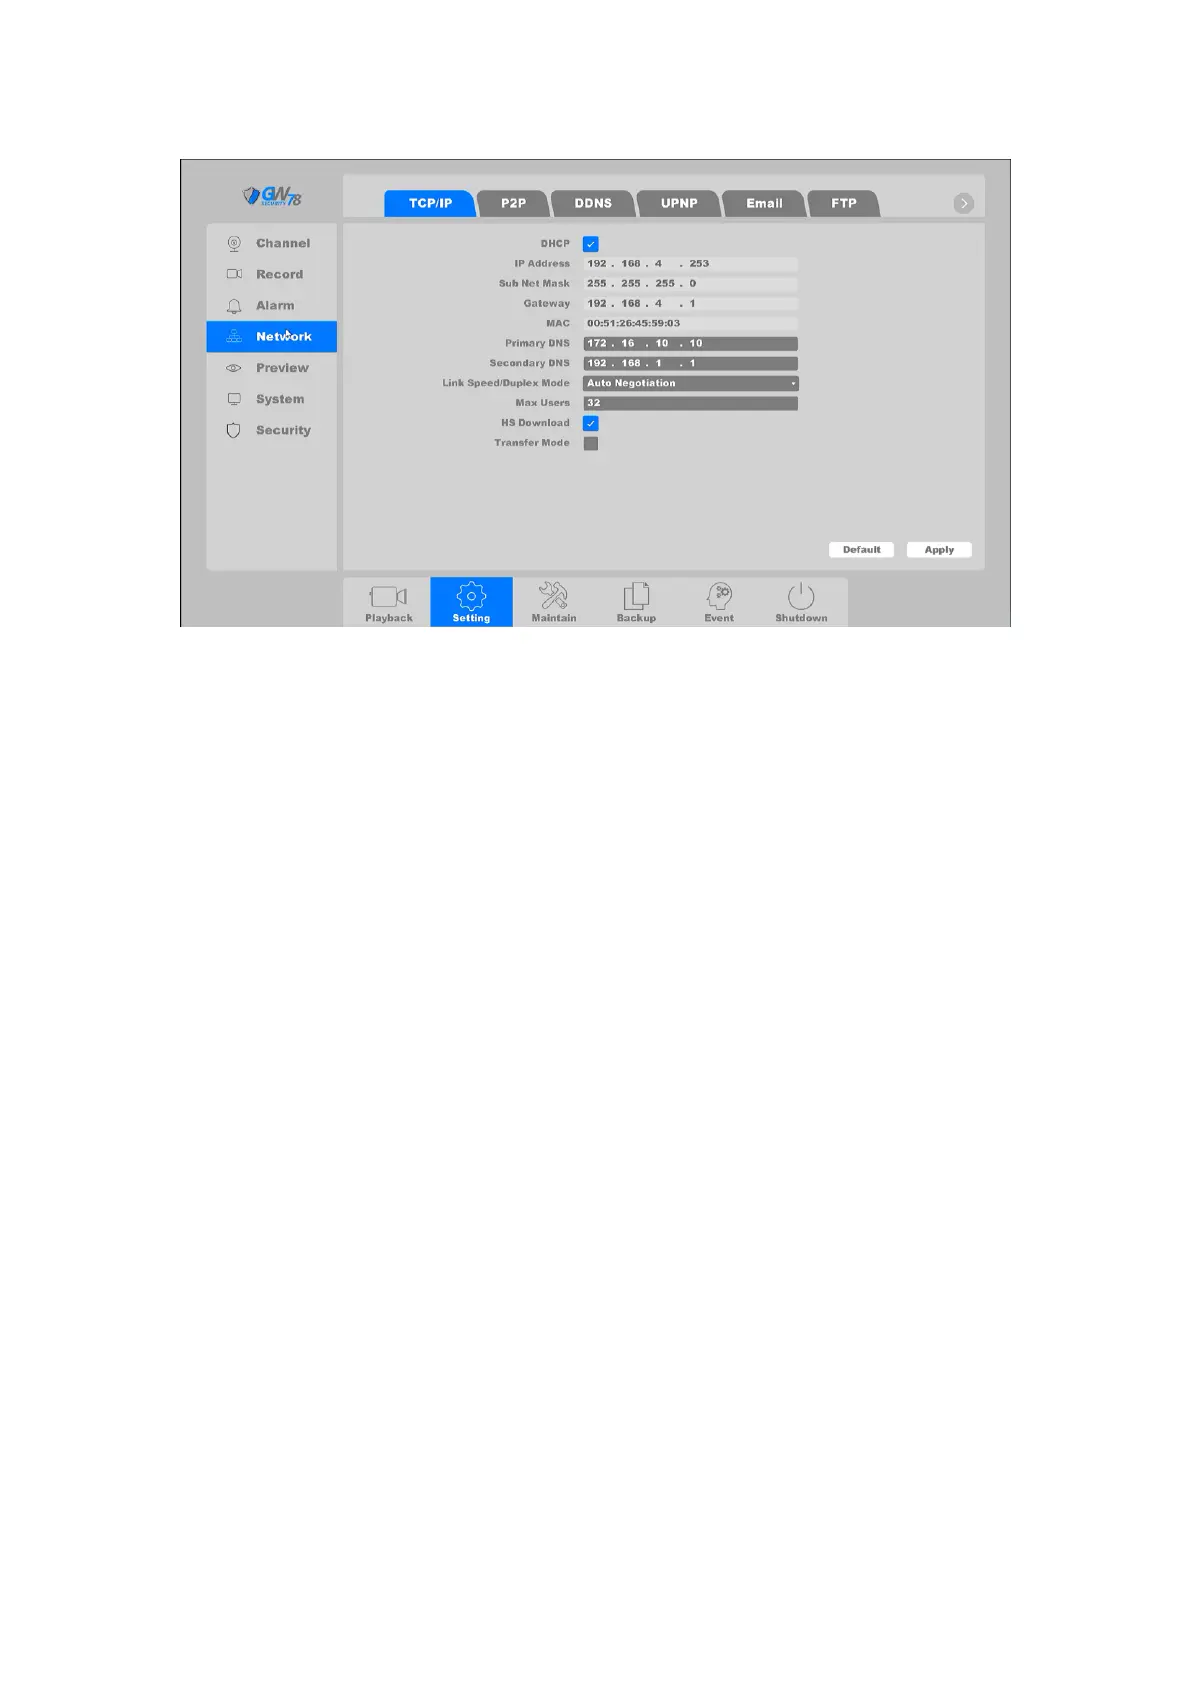
Figure 4-25 Basic Setting of Network
DHCP: Obtain IP address automatically.
IP Address: Set the IP address of NVR. Default is 192.168.1.10
Subnet Mask: Default is 255.255.255.0.
Gateway: Default is 192.168.1.1.
MAC: the physical address of NVR.
DNS setup: Domain Name Server, it translates the domain name into IP address, it
contain primary DNS and secondary DNS.
Internal IP (Of Built-in POE Switch): Set the beginning of IP addresses of those IP
Cameras connected to POE panel. Default is 192.168.3.10. Make sure that this value should
not be at the same subnet with the IP address of NVR. (You'll only see this field if your NVR
has a built-in PoE)
Max Users: The maximum number of users can simultaneously access the NVR. Default
value is 10.
HS Download: Download at a high speed on the network side.
Transfer Mode: There are three modes: quality preferred, fluency preferred and
adaptive. The code stream will adjust itself according to the setup, adaptive is the tradeoff
between the image quality preferred and fluency preferred, fluency preferred and adaptive
are valid only when the sub-stream is turned on, otherwise, quality preferred is valid.
Note:
You can’t set internal IP address if the NVR does not support POE function.
4.3.3.2 P2P
The peer-to-peer connection is allows you to seamlessly and securely access your NVR via your