5 - 6
Figure 5.1-13 Cleaning the Anode 1 Figure 5.1-14 Cleaning the Anode 2
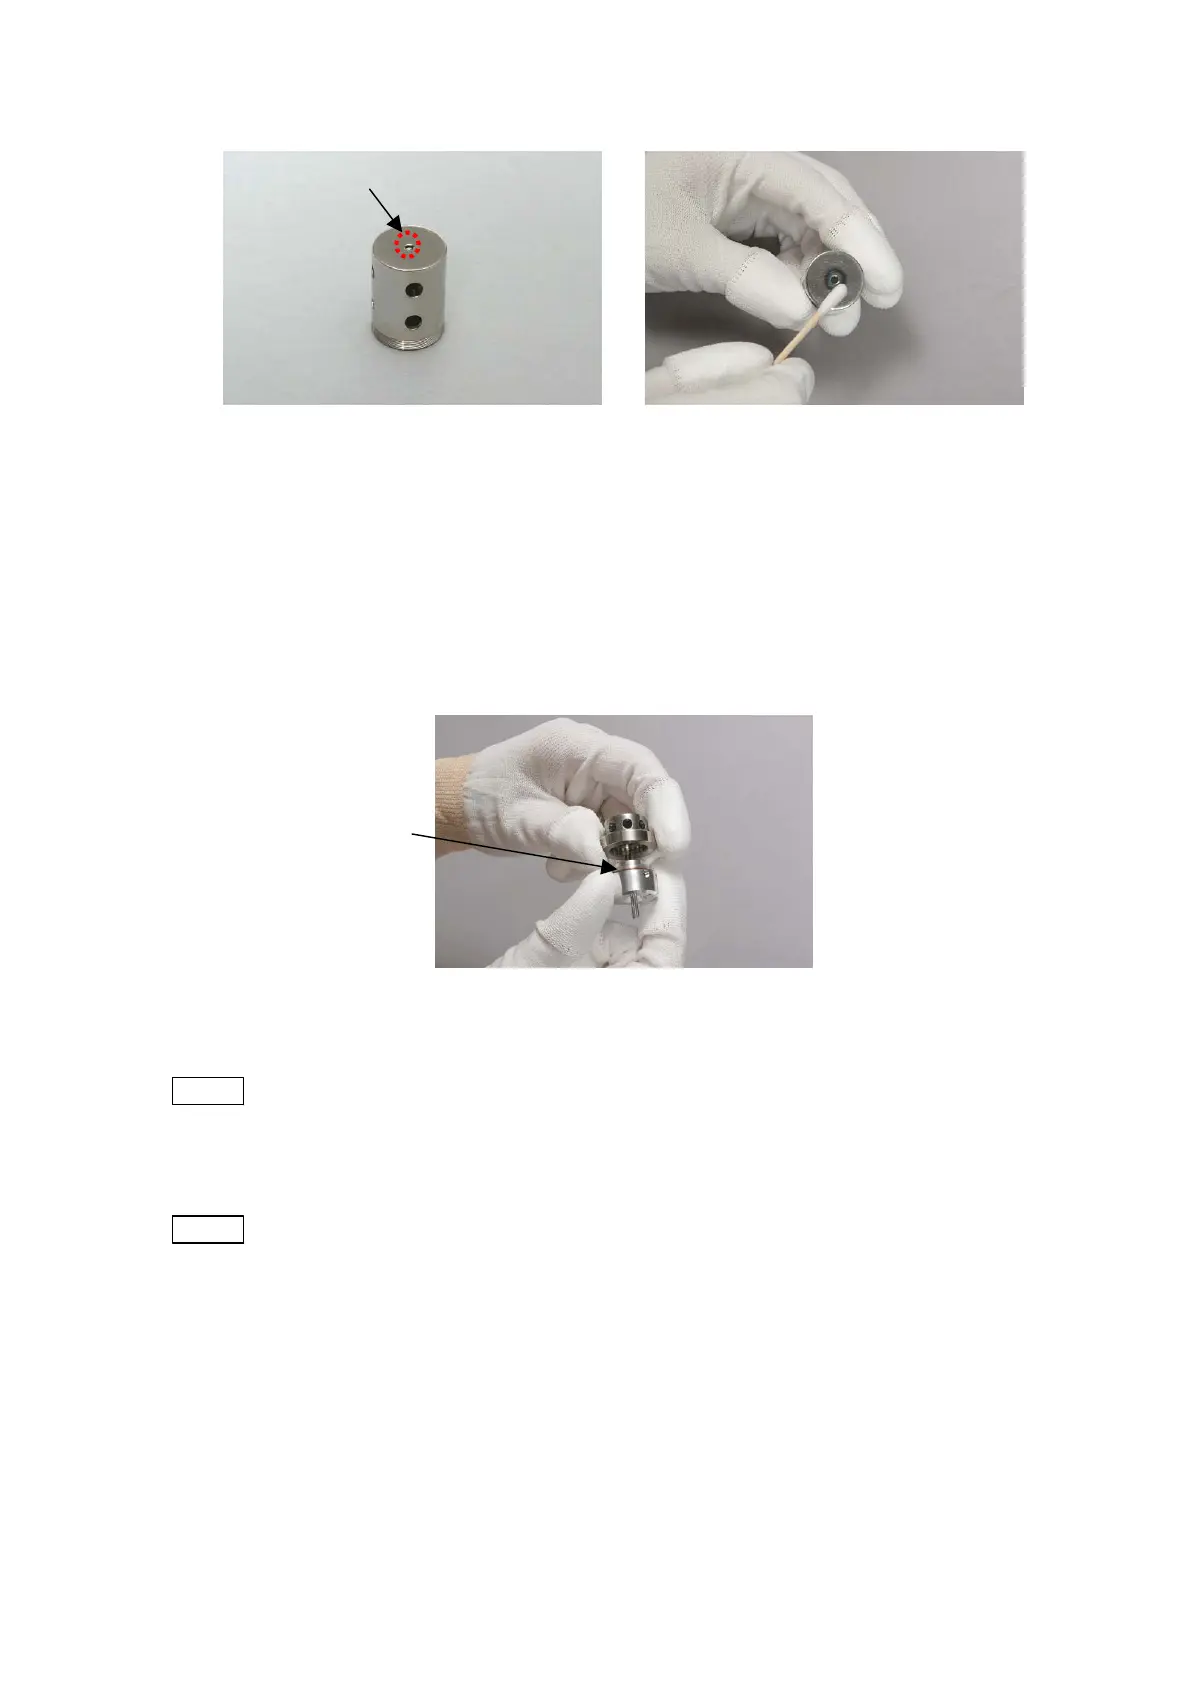
10. Fasten the Wehnelt onto the new cartridge filament.
The tip of the filament is like an extremely thin wire. Touching it ever slightly can deform it,
rendering it unusable. Fasten the Wehnelt with great care. Insert the copper spacer ring,
supplied with each cartridge filament, between the cartridge filament and the Wehnelt, and
attach the Wehnelt by turning it clockwise.
Figure 5.1-15 Fastening the Wehnelt onto the Cartridge Filament
NOTE
: Each cartridge filament is supplied with a spacer for adjusting the height of the
filament. When replacing the cartridge filament and if a spacer is provided with the
new cartridge filament, be sure to mount the spacer.
NOTE
: The brightness of the image can vary to some extent from adjustment guidelines
due to the particular combination of filament and Wehnelt.
If the image is dark, reduce the number of spacers supplied with the cartridge
filament by one. Conversely, if the image is too bright, increase the number of
spacers by one. Two adjustment spacers are provided on the lid of the cartridge
filament. Using fewer spacers could reduce the life length of the filament.
Cu spacer ring
Location to be cleaned
 Loading...