22
Galaxy 2 Series Installation Manual
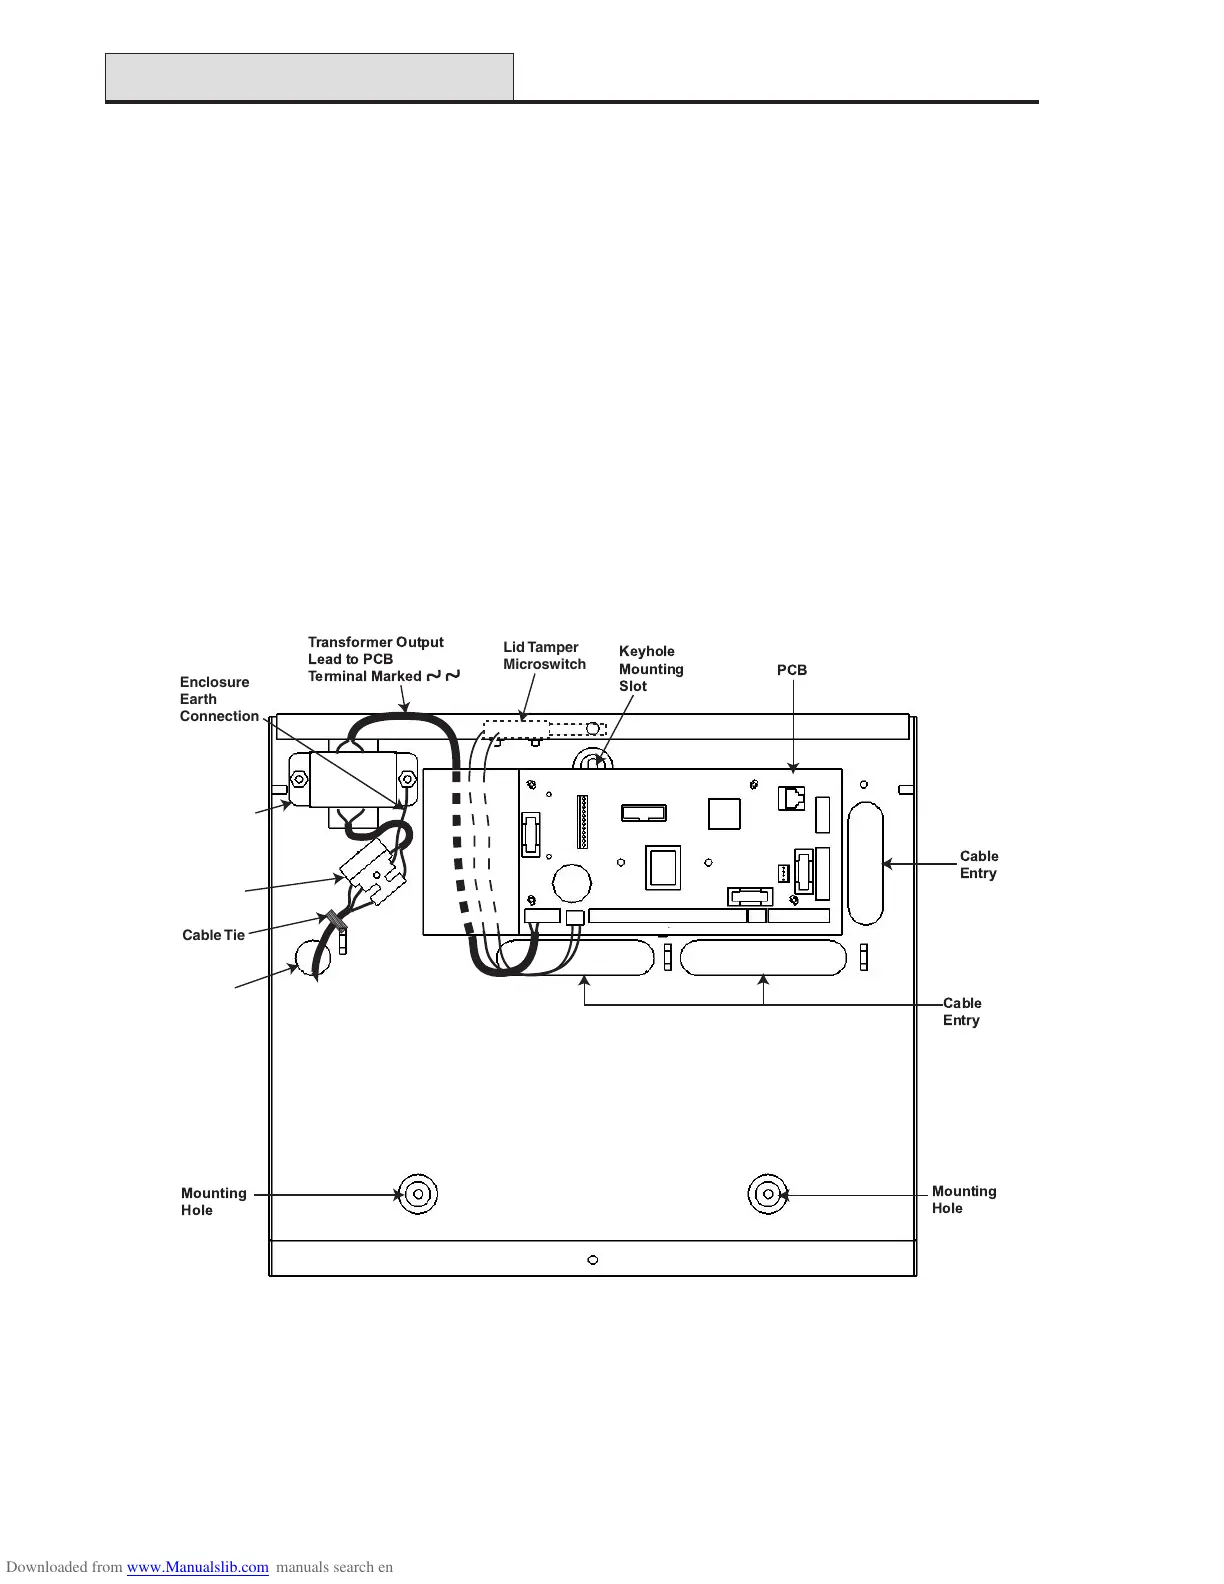
Panel Mounting (Metal Box)
Installation Kit
The Galaxy 2 Series metal box comes with an installation kit. It contains two No.8 x 12 mm self-tapping lid
screws, 6160 Text Programming Overlay, two battery leads (one red and one black), 10 mm cable staple and
24, 1K resistors.
WARNING: The lid of the metal box must not be removed before isolating the mains supply.
Illumination of the keypad power LED indicated the presence of a.c. mains supply.
Removing and Installing the Enclosure Lid
1. Remove the two self-tapping screws that secures the lid to the enclosure base.
2. Slide the lid forward on the locating slots then lift clear.
3. To install the lid, simply reverse the process.
NOTE: The top self-tapping screw activates the Lid Tamper Microswitch.
Figure 17. Galaxy 2 Series Metal Box Layout
Panel Mounting (cont’d)
Mains Cable
Entry Hole
Mains
Terminal block
with 200mA Fuse
Transformer
Enclosure
Earth
Connection
Lid Tamper
Microswitch
Cable Tie

 Loading...