B_configure.doc 107 Tue Jul 2 15:27:17 1996
107
Changing Your Workstation’s Hardware Configuration
Installing Storage Devices
Installing a Floppy Drive
Perform the following procedure to install a floppy drive in the disk tray:
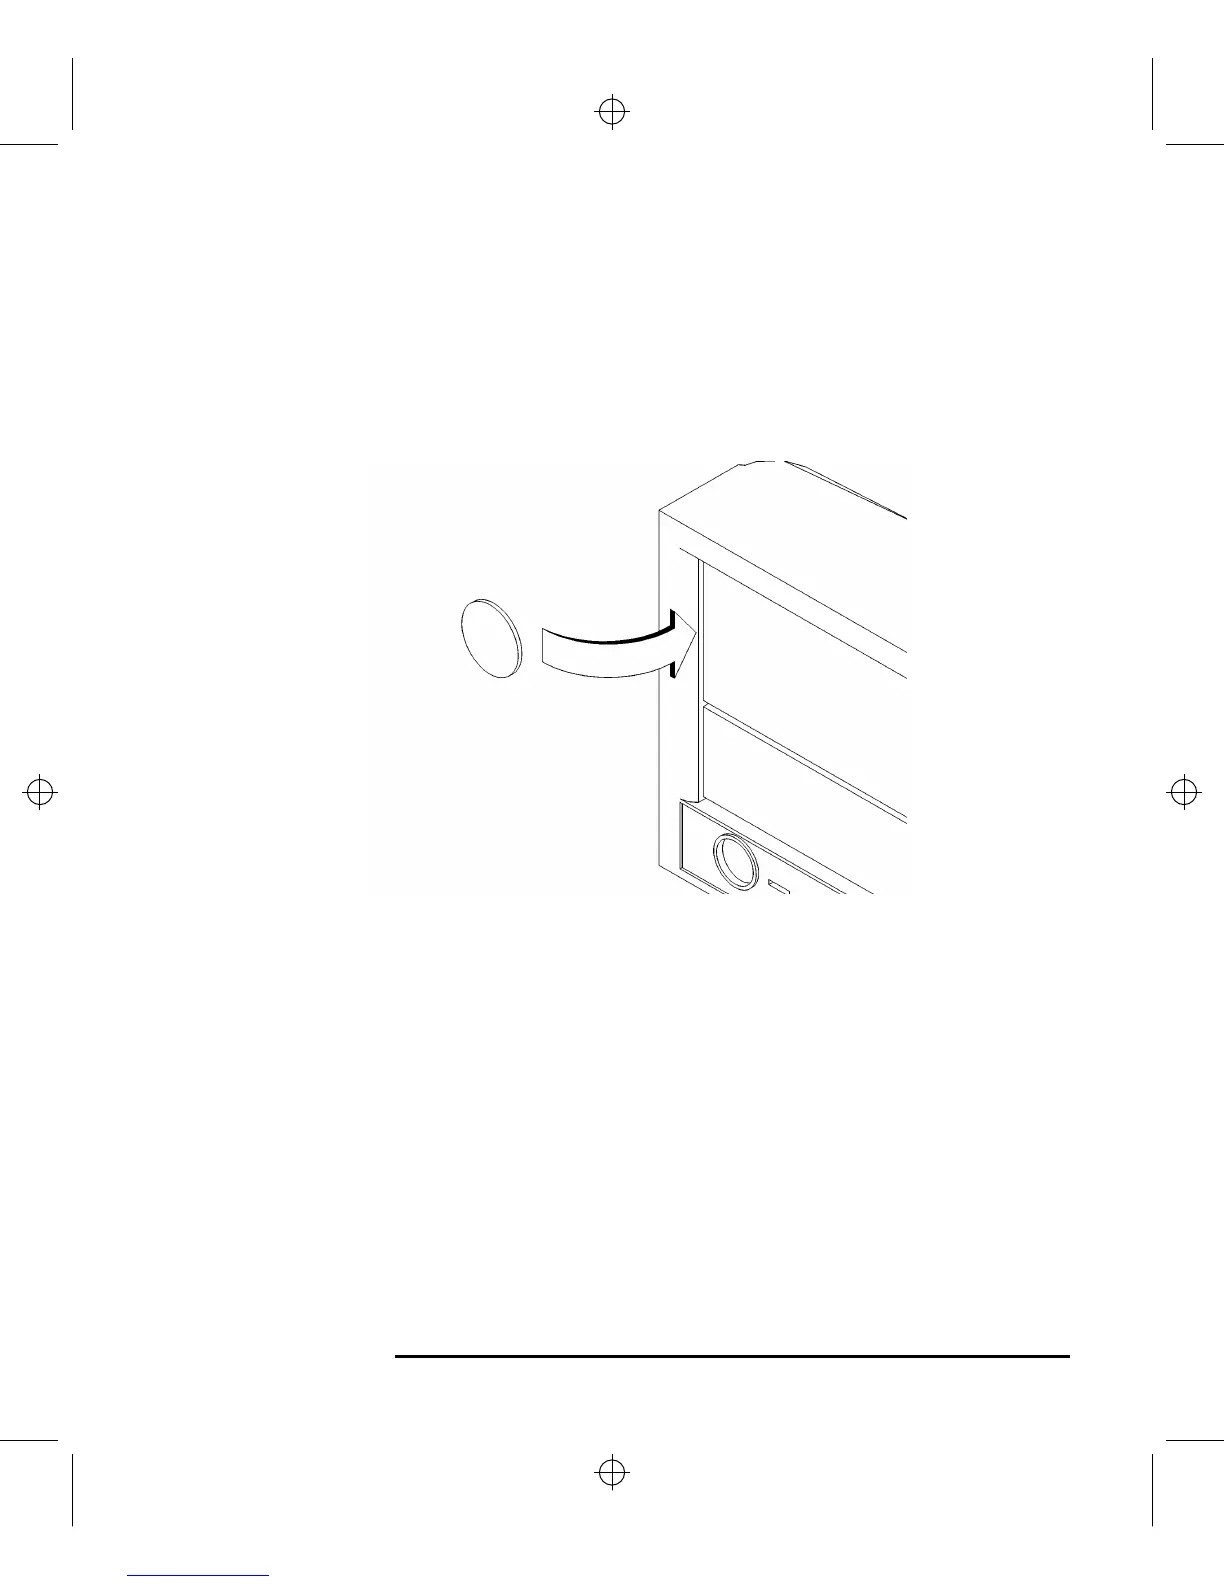
1 Remove the disk filler panel from the bottom location of the bezel by using a coin
or other flat, blunt object to pry it from the front, as shown in Figure 30.
Figure 30 Removing a Disk Filler Panel
2 Reach into the storage bay and locate the power and data cables for the floppy
drive.
Refer to the cable routing label on the storage tray. See Figure 31.
3 Connect the cables to the drive.