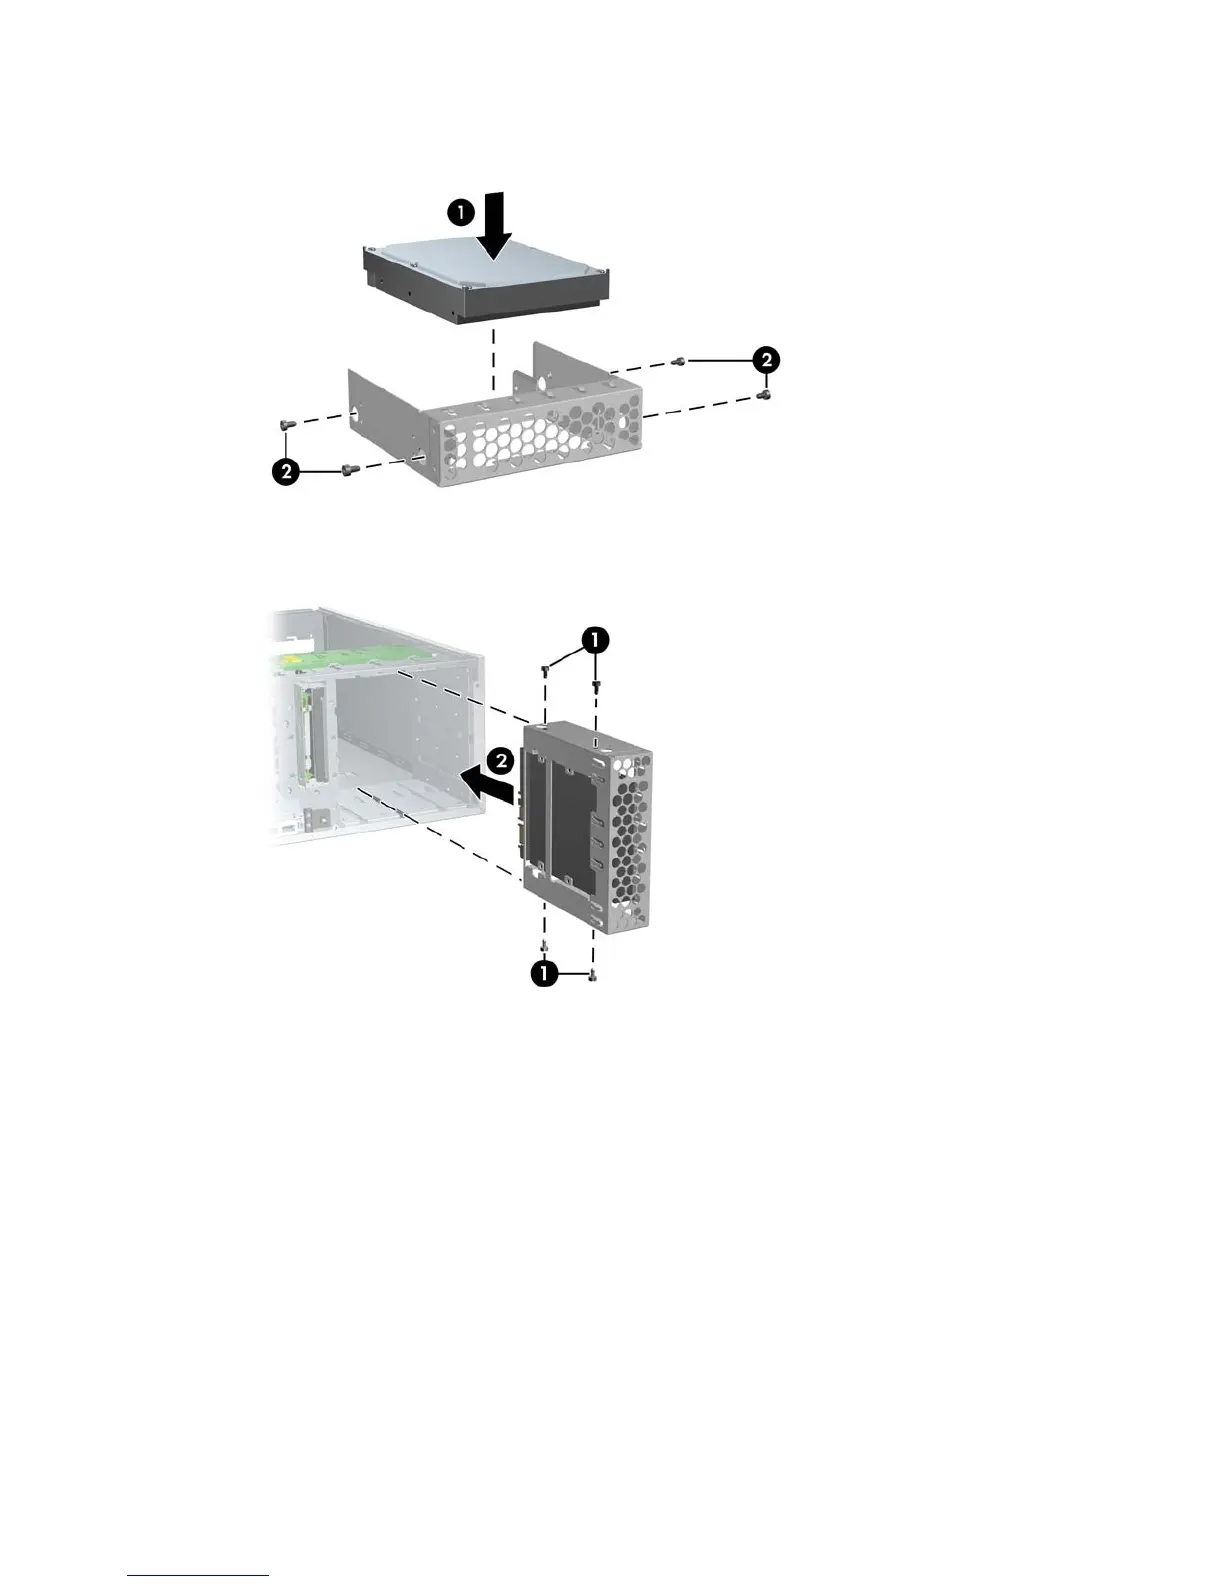
2. Place the hard drive in the bracket 1 and secure with American National screws 2 as shown in the
following illustration.
Figure 4-51 Installing hard drive into bracket
3. Screw four screws to the bracket 1. Align the screws with the grooves in the optical drive bay and
slide the drive in 2 the chassis.
Figure 4-52 Installing hard drive into optical drive bay
4. Connect the data cable to the hard drive 1 and to the system board 2. SATA installation is shown.
ENWW Steps for removal and replacement of components 97

 Loading...


