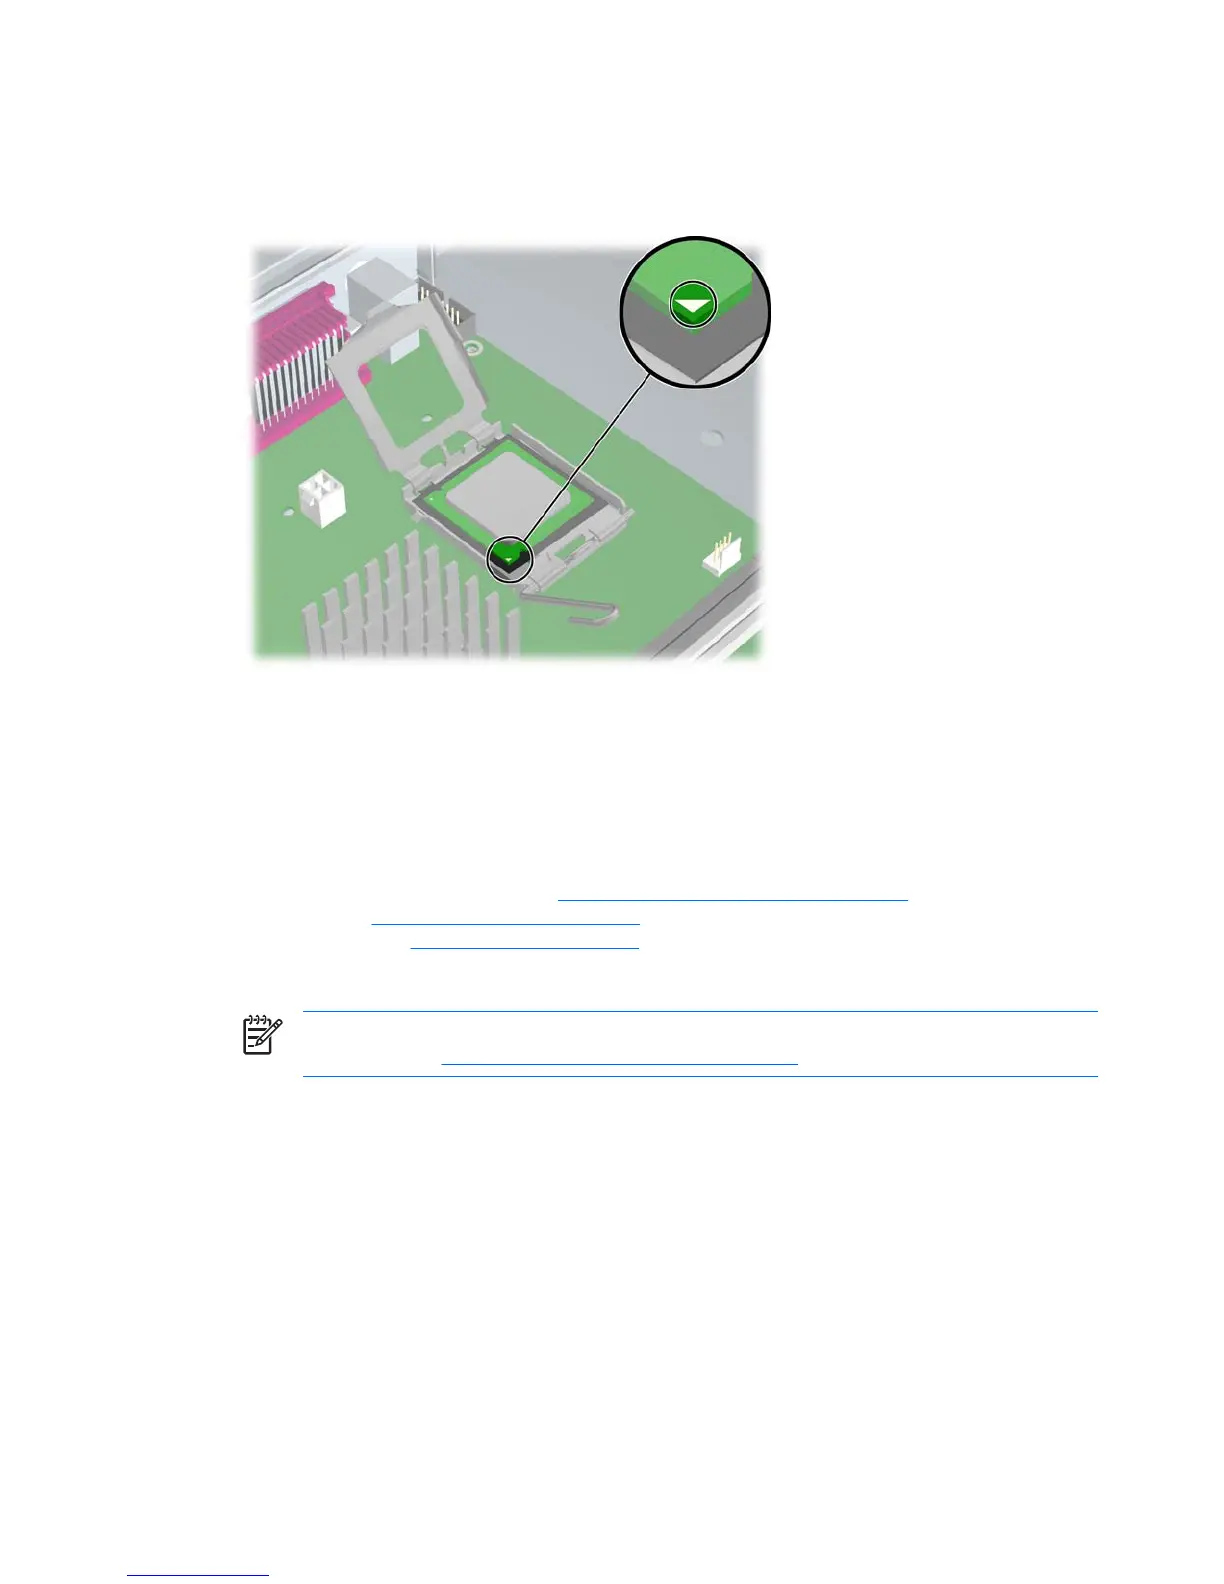
3. Align the triangle on the top of the processor with the triangle on the corner of the processor socket
and install the processor into the socket. Ensure that the underside of the processor is level with
the top of the processor socket. Lightly press down on the top of the processor while closing the
socket lever.
Figure 4-57 Seating the processor
4. Check for proper processor seating in the socket by carefully trying to lift the processor out of the
socket with your fingers. A properly seated processor does not lift out of the socket.
System board
To remove the system board:
1. Disconnect power from the system (
Predisassembly procedures on page 60) and remove the side
access panel (
Side access panel on page 66), remove all expansion boards, graphics cards, and
the CPU heatsink (
CPU heatsink on page 98)
2. Disconnect all cabling from the system board.
NOTE Make note of the cable connections before disconnecting them from the system
board. Refer to
Power connections to drives on page 84 for more information.
3. Press the release tab 1 as shown in the following illustration.
102 Chapter 4 Removal and replacement procedures ENWW

 Loading...


