Verifying the added capacity in the StoreVirtual Management Console
Procedure
1. On the StoreVirtual menu, select Storage Systems.
2. Select the upgraded storage system in the navigation pane.
The page displays all configured RAID arrays and you can validate that the arrays are healthy and in a
normal state.
3. Select Storage from the Storage System menu on the content pane.
4. Scroll down under the Drive Info section. You can see all added drives with their respective drive
models, serial numbers, capacity level, and firmware revision details.
5. Scroll down further to the Drive Status section. Newly configured drives show a status of Active or
Hot Spare depending upon the configuration chosen during the Add RAID operation.
6. On the StoreVirtual menu, select Storage Pool.
7. Verify that the cluster space has increased as a result of the scale-up.
Adding disk drives
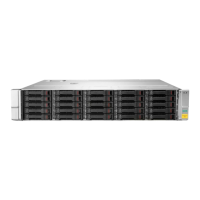
When adding disk drives to the storage system, observe the following guidelines.
• Insert disks contiguously within the enclosure.
• Install SSD drives into the array enclosure. Do not put SSD drives into the expansion disk enclosure.
• When installing expansion disks, use the same pattern as the original disk sets in either the existing
chassis or in the new chassis.
Procedure
1. It is a best practice that enclosures of the same type (SFF, LFF) have an equal number of drives or
one less than the enclosure with the most disk drives. However, you can add a 25-slot SFF or a 12-
slot LFF enclosure and populate it with only a few drives.
IMPORTANT:
When drives are added to a configuration, the existing drives must not be moved and the new
drives must be added as indicated.
2. When installing a disk drive, press firmly to make sure that the drive is fully seated in the drive bay
before closing the latch handle.
3. Tiering guidelines:
a. Two tiers of storage are supported:
24 Verifying the added capacity in the StoreVirtual Management Console
 Loading...
