7. ____ Go to “Connecting the NAS to the Display and Keyboard in the 37U
Rack”.
Connecting the NAS to the Display and Keyboard in the 37U Rack
1. ____ See Figure 1-18 on page 1-15 to route and locate the cables. See
Figure 1-19 on page 1-15 to locate the connectors at the rear side of the NAS.
Attach the cables as follows:
a. ____ Connect the display signal cable «A¬ to the NAS connector «1¬.
b. ____ Plug one «T¬ connector (PN 80G0638) into the APC connector 4.
c. ____ Route and plug cable «B¬ (PN 10K8667) from the connector 6 of the
APC card into the Ethernet card connector «5¬.
d. ____ Route and plug cable «C¬ (PN 80G0637) from the «T¬ connector
located on connector 4 of the APC card into the tailgate connector J2.
e. ____ Plug the mouse cable «D¬ into NAS connector «3¬.
f. ____ Plug the keyboard cable «E¬ into NAS connector «2¬.
g. ____ Plug the power cable «F¬ into NAS connector «6¬.
2. ____ Plug the power cords «F¬ and «G¬ into correctly grounded (earthed)
electrical outlets.
3. ____ Secure keyboard cable «E¬ and mouse cable «D¬ to the rack using tie
clamps «H¬ (PN 1159519).
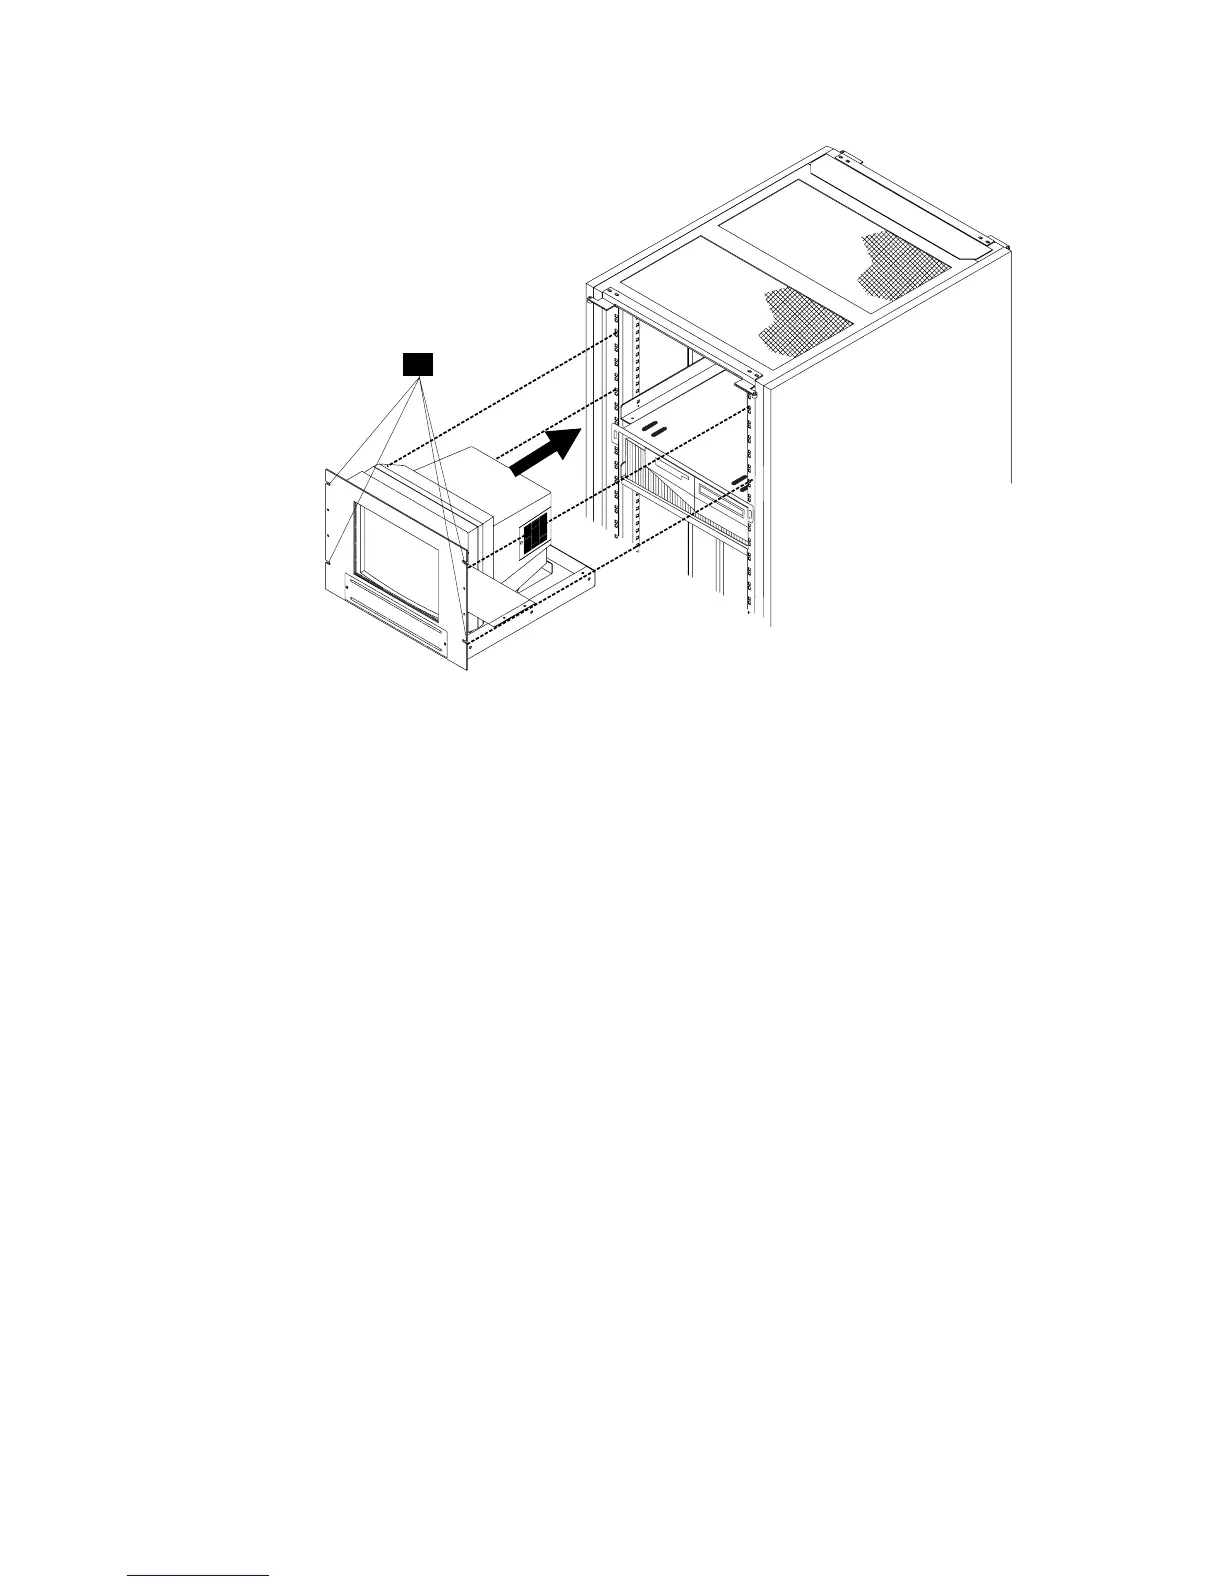
B
Figure 1-17. Display Assembly Installation in a 37U Rack
Installing the NAS and Its Modem
1-14
2220 Setup and Service Guide