14. Power on the modem while pressing the Enter key at the same time. Release
the Enter key when the message DATAPUMP TEST appears.
After this, the modem performs the dial through the switchboard without
looking for a dial tone (Blind dial ATX1). This setting is maintained even if the
modem is powered off and on again.
15. If you have a problem while using the modem, see the “Problem
Determination” chapter in the
IBM 7858 Professional Modem Guide to
Operation
, GA13-1981.
Saving the Configuration of the 7858
If you want to save the configuration and have it loaded again at the next modem
reset, perform the following steps:
1. ____ Press the ↓ key until the CONFIGURATIONS message appears on the top
row.
2. ____ Press the → key until the Store User Conf. message appears on the
bottom row.
3. ____ Press the Enter key to select the option.
4. ____ Press the ↑ key to select the User Configuration Location where the
current modem configuration must be saved (0 to 9).
5. ____ Press the Enter key to save the current modem configuration.
6. ____ The defined configuration now active and saved.
Now every time the modem is reset (power on), the last user configuration which
was saved is loaded as the current modem configuration.
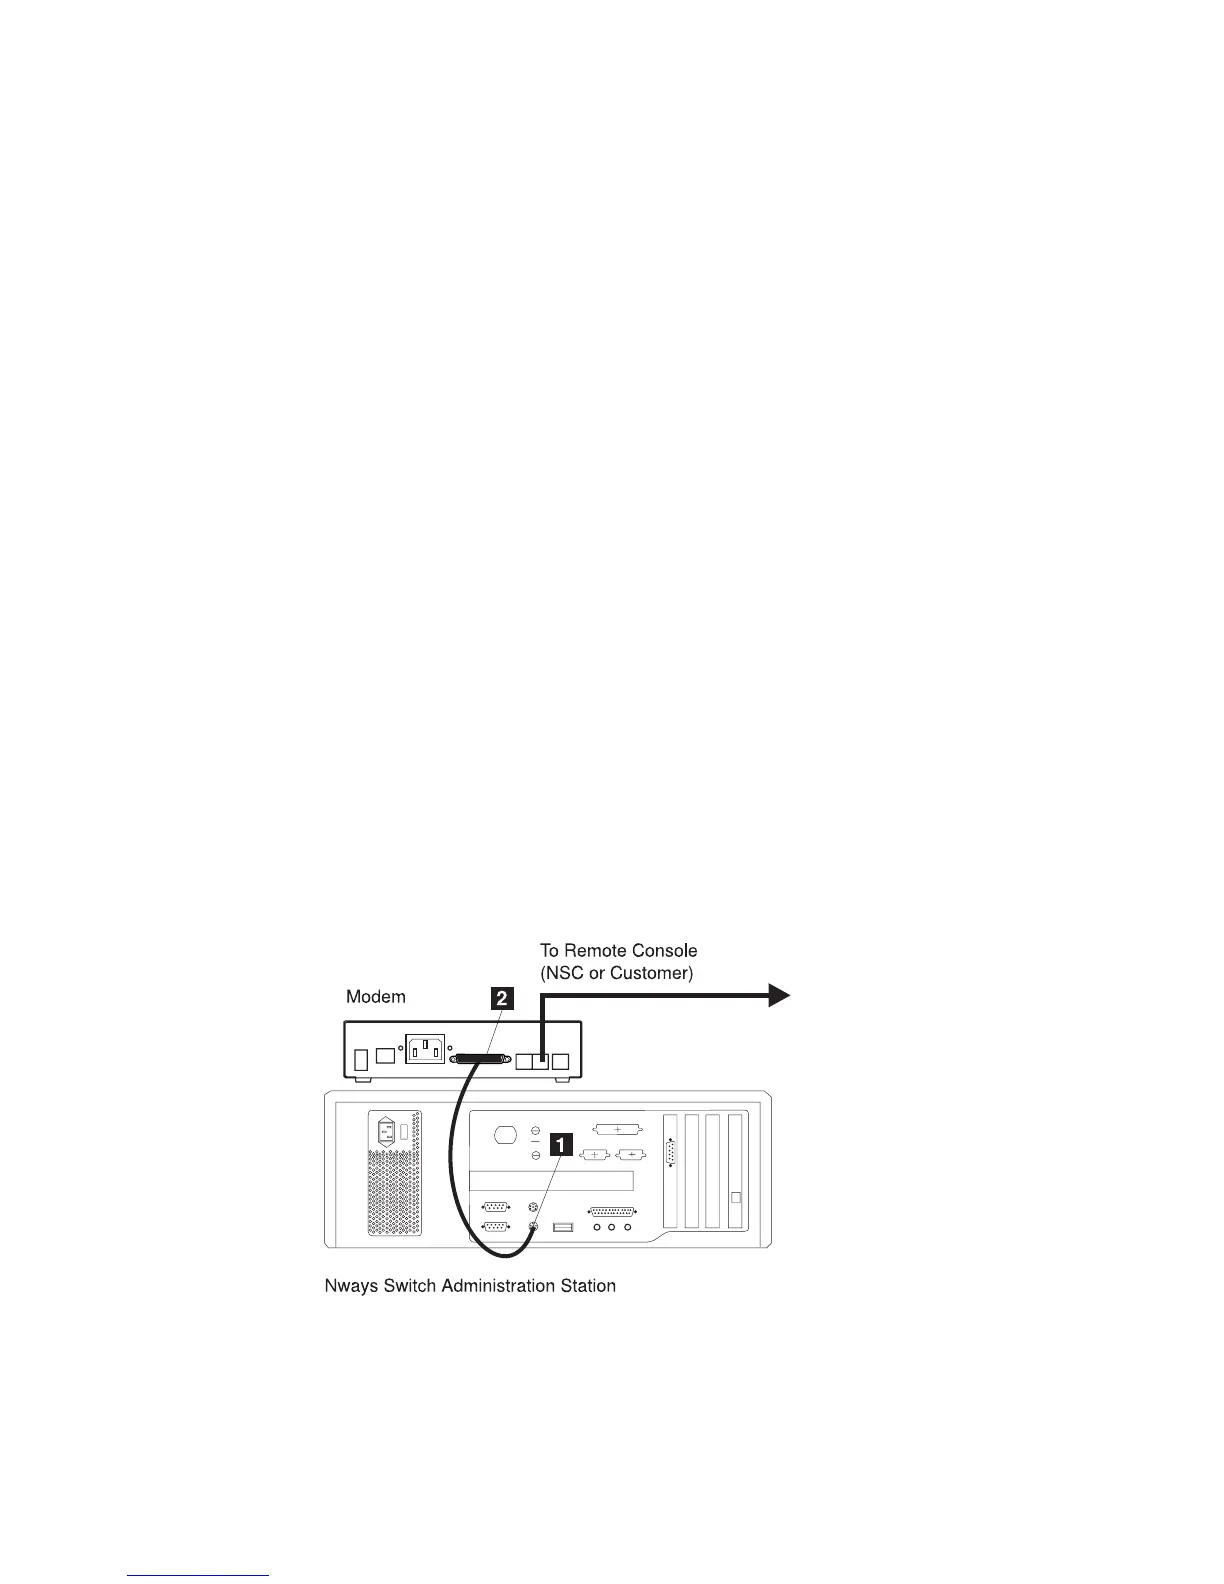
Connecting the 7858
1. ____ Connect the cable (PN 782985) to the connector «1¬ of the NAS.
2. ____ On the modem’s rear panel, connect the other end of the cable into the
25-pin connector «2¬ .
End of NAS and modem installation. Continue with the
2220 Nways BroadBand
Switch Setup Guide
, SY33-2105 (PN 59G0544).
Figure 1-48. Connecting the NAS to the 7858
Installing the NAS and Its Modem
1-42
2220 Setup and Service Guide