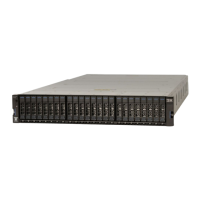
Figure 86. Fascia removed from the PSUs
Replace the fascia
4. To reinstall the front or PSU fascia, or replace them with parts from FRU stock, follow the procedure in
“Installing or replacing the fascia: 2076-92F ” on page 70.
Removing and installing a SAS cable: 2076-92F
Use the following procedures to attach SAS cables to the 2076-92F enclosure during the initial
installation process. You can also remove a faulty SAS cable and replace it with a new one received from
FRU stock.
About this task
Be careful when you are replacing the hardware components that are located in the back of the system.
Do not inadvertently disturb or remove any cables that you are not instructed to remove.
If you replace more than one cable, record which two ports, canisters, and enclosures each cable
connects, so you can match the connections with the replacement cables. The system cannot operate if
the SAS cabling to the expansion enclosure is incorrect.
When the 2076-92F expansion enclosure is installed in the rack, the expansion canisters are upside
down. The input cable connects to the right port (port 1) on the expansion canister. The output cable
connects to the left port (port 2) on the canister.
Procedure
Removing a SAS cable
1. Locate the connector at the end of the SAS cable that is to be removed from the expansion enclosure.
2. Grasp the connector by its blue tag. Pull the tag.
3. Release the connector and slide it out of the SAS port.
4. Repeat steps “2” on page 76 and “3” on page 76 on the other end of the SAS cable.
Replacing a SAS cable
76
Storwize V7000 : Gen3 Quick Installation Guide for MTM 2076-724, 2076-U7B, 2076-12F, 2076-24F, and
2076-92F
 Loading...


