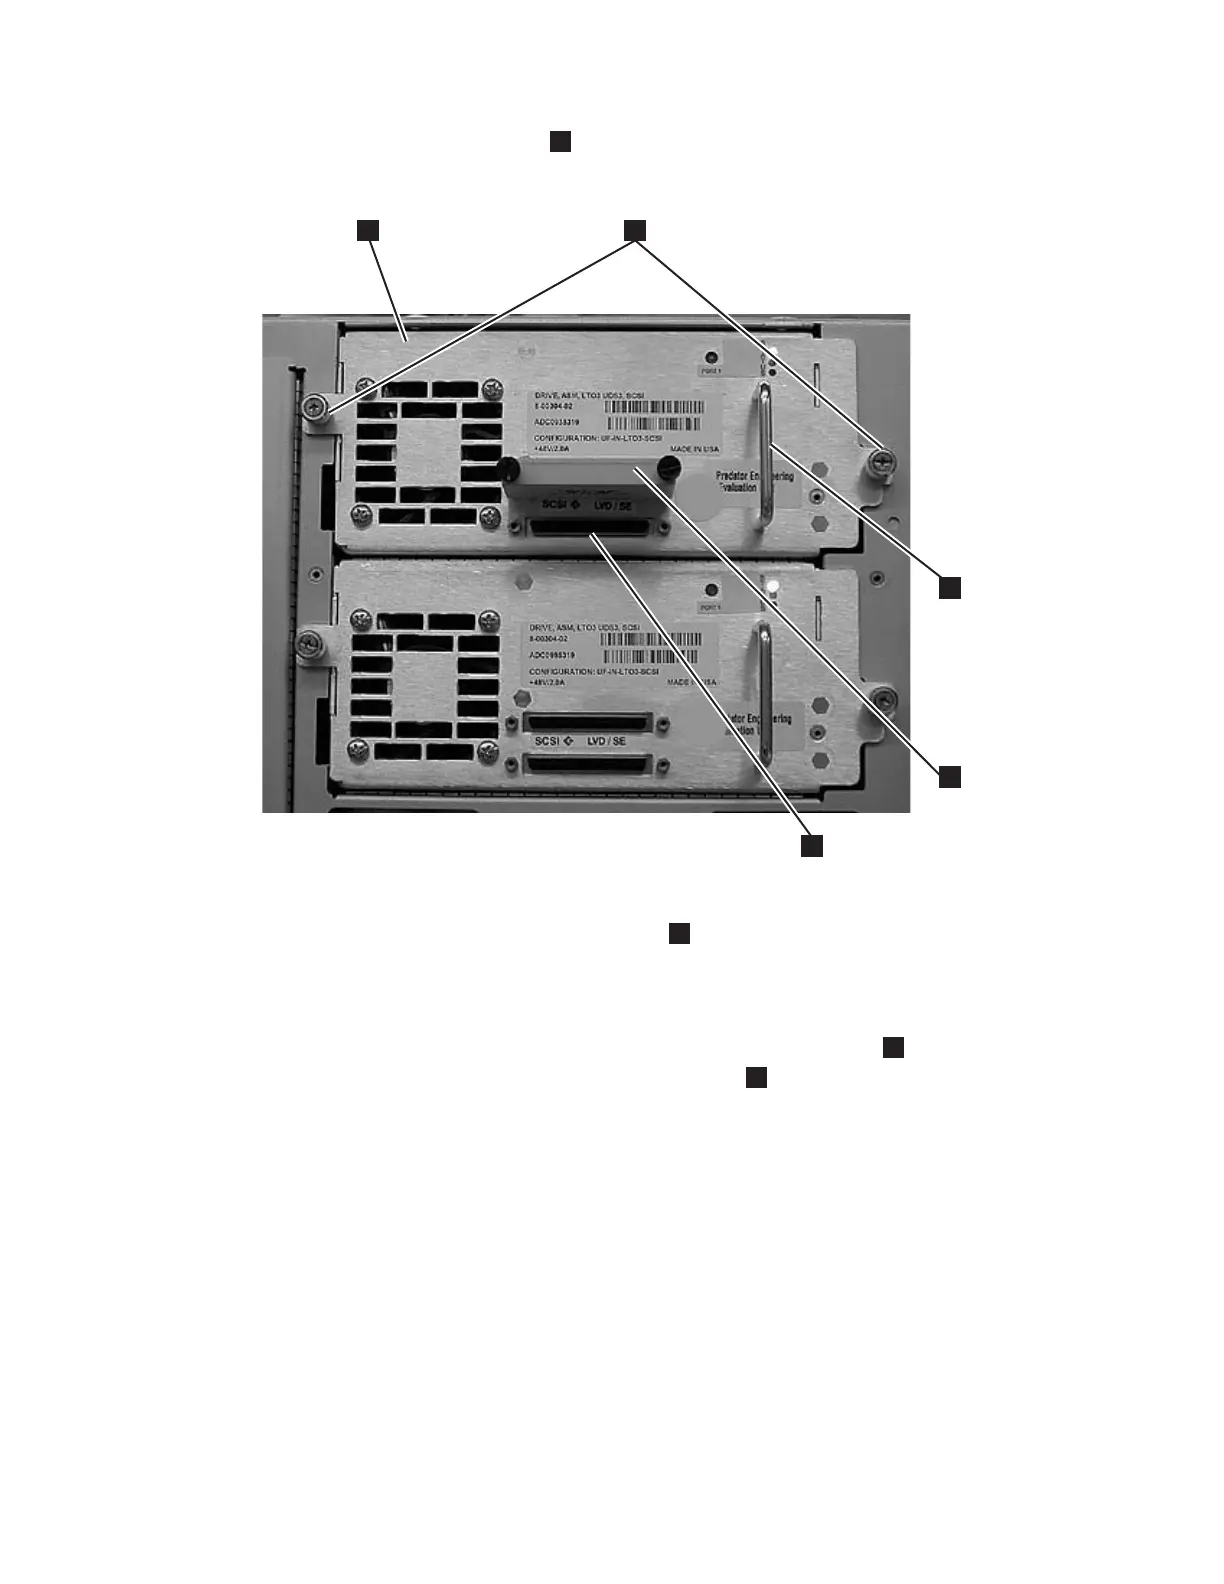
2. Grasp the handle (
5
in Figure 3-13) and slowly slide the drive sled into the
drive slot, while supporting the drive sled from underneath.
3. Tighten the two thumb screws (
2
in Figure 3-13) that hold the drive sled in
place by turning them clockwise.
4. Reconnect the drive sled cable.
a. For a SCSI drive sled, plug the cable and terminator into the drive sled.
Tighten the thumb screws that hold the SCSI cable (
4
in Figure 3-13 shows
the SCSI receptacle) and terminator (
3
in Figure 3-13) in place by turning
them clockwise.
b. For a Fibre Channel drive sled, connect the fibre cable.
5.
Repeat this procedure for all drives to be re-installed in the library.
6. Record drive location and other information on the Appendix D, “Library
Configuration Form,” on page D-1.
Replacing a Power Supply
a66mi023
2
3
4
5
1
Figure 3-13. Tape Drive (detail)
Chapter 3. Installing the Library 3-15

 Loading...


