4 Operation and maintenance
4.1 Operation
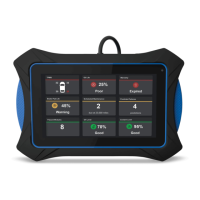
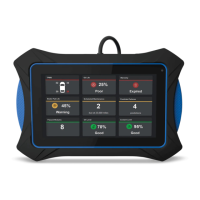
The system is operated via the touch screen interface on the topside unit, or the web interface if
this is set up. On the screen, the left side buttons (CONTROL, LINK, STATUS, SETUP and
ALARM) switches between different modes. The modes are:
CONTROL : For system operation (power on/off to the various channels) and configuring of
outputs.
LINK : Diagnostics information about the fibre system
STATUS : Diagnostics information about the system.
SETUP : Setting up the network interface.
ALARM : Review and clear out alarms.
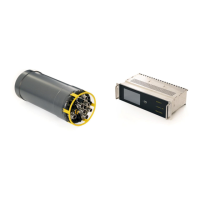
The LED indicators on the front of the unit has the following functionality:
POWER : Located on the side of the POWER button. Red colour indicates that power is
applied, but the system is off. Green colour indicates that the system is on and
ready.
When the LED is red, press the POWER button for 2 seconds to start the boot
process. The LED turns off during boot, and turns green when the system is
ready.
LINK : Green colour indicates communication between the topside and subsea unit.
ALARM : Red colour indicates that an alarm is activated. This can be water alarm,
ground fault alarm or loss of communication. Press the “ALARM” button on
the touch screen to view and dismiss the alarm.
To enable power on a subsea connector, go to the CONTROL screen and press the
corresponding button (C1, C2 etc). The button will light up when selected, and the circular
indicator will turn green when power is applied subsea. Measured current and voltage will be
displayed inside the button when on.
If the auto-reset fuse is triggered, the indicator will change to red, and the output is turned off. To
verify or change the fuse trigger current, press the “EDIT” button and review the settings (see
also section 3.4.3).
IMPORTANT: If the water alarm is triggered, the system should be retrieved to
deck immediately and opened, by authorized personell, to dry and check for
damage. Great care must be exercised during opening as there may be an over
pressure inside the pod. Bleed of the pressure by carefully removing the Swagelok
cap with great caution.