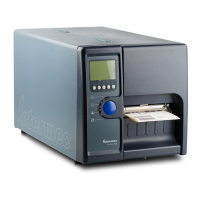
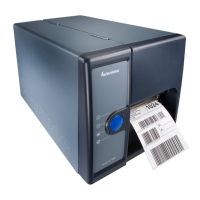
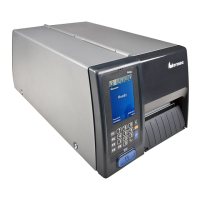
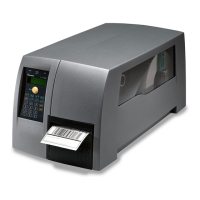
How to fix uneven darkness across media path on Intermec EasyCoder PD41 Printer?
- RRyan HardySep 6, 2025
If you're experiencing uneven darkness across the media path with your Intermec Printer, check the printhead balance.
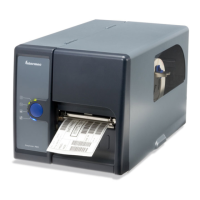
 Loading...


How to fix uneven darkness across media path on Intermec EasyCoder PD41 Printer?
If you're experiencing uneven darkness across the media path with your Intermec Printer, check the printhead balance.
Why Intermec Printer is skipping pages when printing?
If your Intermec Printer is skipping pages during printing, try these solutions: * Perform a Test Feed or check your Media Settings. * Check the label gap sensor for any disturbances caused by media or dust.
How to fix weak printout on Intermec EasyCoder PD41?
If the printout from your Intermec Printer is weak, check the following: * Density setting. * If the thermal printhead needs cleaning. * Printhead pressure. * Printhead dot line position.
Why part of the print image was not printed along the feed direction on Intermec EasyCoder PD41 Printer?
If the print image is partially missing along the feed direction on your Intermec Printer, check for: * Ribbon wrinkles and creases. * A thermal printhead that needs cleaning. * A damaged printhead. * Printhead balance issues. * Errors in the application program. * Power supply functionality.
Why is printing missing along the feed direction on Intermec Printer?
If the print image is missing along the feed direction on your Intermec Printer, try the following: * Check the transfer ribbon for wrinkles and creases, and reload if necessary. * Clean the printhead of any dirt, adhesive residue, or contamination. * Consider replacing the printhead if one or more heat-sensitive resistors are damaged. * Readjust the printhead balance, especially when switching between media of different widths.
What to do if Intermec EasyCoder PD41 jams or tangles labels when printing?
If your Intermec Printer is jamming or tangling labels during printing, clear the media jam. If a label is stuck on the thermal printhead, remove it with a soft cloth soaked in isopropyl alcohol or use a cleaning card.
What to do if the Error LED is off, but Ready-to-Work LED is flashing on Intermec EasyCoder PD41?
If the Intermec Printer's Ready-to-Work LED is flashing, ensure that the printhead is closed and locked.
What to do if the Error LED is turned on (flashing light) on Intermec EasyCoder PD41 Printer?
If the Intermec Printer's Error LED is flashing, it indicates a bad software setting. Check for bad software setting.
What to do when Intermec EasyCoder PD41 shows error during printing?
If your Intermec printer experiences an error during printing, consider the following: * Check if the printer is out of media or transfer ribbon. * Ensure the printhead lever is closed and locked. * If the printhead is closed and locked, but the problem persists, check connection to P34 on the main board. Check headlift microswitch. * Inspect for jammed or tangled media and clear any obstructions. * Examine the label gap sensor for obstructions and clean if necessary. * Recalibrate the sensors by running a testfeed.
What to do if the Error LED is turned on (solid light) on Intermec Printer?
If the Intermec Printer's Error LED is on with a solid light, it indicates a problem. Check the following: * Ensure the printer has media or ribbon. * Verify the printhead is closed and locked. * Check for jammed or tangled media. * Make sure the label gap sensor isn't blocked. * Inspect the cutter, if there is one.
| Print technology | Direct thermal |
|---|---|
| Maximum resolution | 203 x 203 DPI |
| Standard interfaces | RS-232, USB 2.0 |
| Internal memory | 16 MB |
| Power requirements | 100-240 VAC ±10%, 45-65 Hz |
| Media thickness | 2.3 - 9.8 mm |
| Maximum label width | 104 mm |
| Maximum label length | 0.15 m |
| Maximum roll diameter | 213 mm |
| Maximum internal memory | 1 GB |
| Supported network protocols | TCP/IP, LPR/LPD, FTP, BOOTP, DHCP, HTTP, SNMPv3, SMTP, SNMP-MIB II |
| Operating temperature (T-T) | 40 - 104 °F |
| Operating relative humidity (H-H) | 20 - 85 % |
| Depth | 453 mm |
|---|---|
| Width | 273 mm |
| Height | 270 mm |
| Weight | 13000 g |
Provides a detailed overview of the EasyCoder PD41 printer's features and capabilities.
Instructions for safely unpacking the printer and its included accessories.
Details on locating and understanding the machine and serial number labels on the printer.
Illustrates and labels the front panel components of the EasyCoder PD41 printer.
Explains the function of the front panel LEDs and the Print button.
Diagram showing the rear panel of the printer and its various ports and connectors.
Details the available connection sockets on the rear of the printer.
Illustrates the internal media compartment of the printer.
Diagram showing the internal print mechanism of the printer.
Step-by-step guide for setting up and connecting the printer.
Guidance on connecting the printer via USB, Serial, Network, or Parallel interfaces.
Procedure to print a test label for verifying printer functionality and configuration.
Instructions for loading various types of media into the printer.
Describes how to use the printer for manual tear-off of printed labels.
Explains the procedure for self-adhesive labels where the liner is separated.
Step-by-step guide for loading thermal transfer ribbon into the printer.
Details the printer states indicated by LEDs and the functions of the Print button.
Provides recommendations for regular inspection and care of the printer.
Instructions on how to clean the printer's printhead to maintain print quality.
Guidance on cleaning the printer's media compartment to prevent jams.
Instructions for cleaning the exterior of the printer to prevent dust ingress.
Lists common printer operation issues and their potential solutions.
Details issues affecting print quality and how to resolve them.
Explains the meaning of the Ready-to-Work LED status and troubleshooting tips.
Provides detailed solutions for common printer adjustments and issues.
Guides on how to adjust ribbon tension and shield to prevent wrinkling.
Step-by-step instructions for clearing media jams from the print mechanism.
Covers adjustments for printhead balance, pressure, and dot line alignment.
Instructions for adjusting the label gap sensor position for accurate media detection.
Describes the printer's startup process and how firmware affects it.
Methods for modifying printer configuration via PrintSet, Home Page, or Command Line.
Explains how to use Testmode and Extended Testmode for diagnostics and setup.
Procedure for downloading and installing the latest printer firmware updates.
Lists detailed technical specifications, including physical dimensions and power.
A comprehensive table detailing the printer's physical, power, printing, and firmware specs.
Specifies the required dimensions for media rolls, including core and roll diameter.
Details the required dimensions for thermal transfer ribbon rolls.
Describes various paper types and their specific width and length requirements.
Specifies media width and paper type setup for non-adhesive strips.
Details media width, liner requirements, and setup for self-adhesive strips.
Covers media width, liner, label width, length, and gap specifications for labels.
Specifies dimensions and detection requirements for tickets with gaps.
Details specifications for tickets and marks used for detection.
Overview of setup parameters and how they affect printer behavior.
Configuration options for serial communication parameters like Baud Rate and Parity.
Parameters controlling media feed before and after printing, including Start and Stop Adjust.
Parameters for configuring media size, type, and print window settings.
Settings related to print speed, contrast, and testfeed modes.
Overview of setup parameters for IPL firmware and their functions.
Information on printing test labels for software, hardware, and network settings.
Configuration of serial communication parameters for IPL firmware.
Parameters for media characteristics like type and sensitivity number.
Settings for emulation, print speed, cutter, and label taken sensor.
Procedure to restore printer settings to factory defaults.
Details the RS-232 serial interface, protocol, and pinout.
Information on using the USB interface, including driver requirements.
Describes the EasyLAN Ethernet interface, its speed, and status LEDs.
Details the Parallel IEEE 1284 interface and its pinout.
Adds network capability to the printer.
Adds a parallel port to the printer.
Enables cutting of continuous paper stock or liner between labels.
Device for peel-off operation and rolling up label batches.
Replacement or complete kit for 203dpi or 300dpi printheads.
