Балансировка и установка грузов
Balancing and weights Fitting
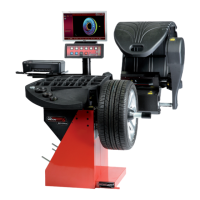
8.2.2 Использование лазерных указателей
Alu 2P 3P
.
Примечание:
, .
,
,
.
.
,
•
.
•
.
•
.
•
.
•
.
•
(Рис. 8-16).
•
. (7.8).
8.2.2 Using the Laser Pointer
InAlu 2P andAlu 3P modes the correction planes for adhesive
weights are precisely indicated by the laser pointer directly
on the rim.
Note:
When the indication is given by the laser, the weight
must not be fitted at 12 o'clock, but at the bottom of
the rim, precisely where indicated by the pointer.
There are at least two positions where the adhesive weights
can be fitted, indicated by the Laser pointer, depending on
the wheel type and the balancing mode.
When a run is completed correctly the BALANCING screen
shows the correction values and the position where the
weights must be fitted.
To make the corrections,
Select an adhesive weight of the indicated size and
adjust it to the wheel radius by bending.
If necessary, index the wheel precisely into the
correction position for the left plane. When the
correction position is reached, the two arrows on the
screen light up green.
Press the pedal of the main shaft lock to hold the wheel
in this position.
Clean the fitting position before attaching the adhesive
weights.
Fit the balancing weight and firmly press the adhesive
weight onto the rim.
Fit the second adhesive weight in the same manner
(Fig. 8-16).
The position for fitting the weights indicated by the Laser
pointer can be varied for each correction plane.
See ATION (section 7.8).