Калибровка станка оператором
Readjustment by the operator
operator
12. Калибровка станка оператором
.
.
12. User Calibration
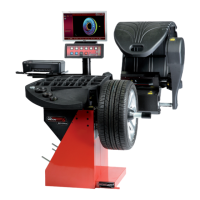
If numerous measuring runs are required to balance a wheel
because the balance weight sizes and positions need to be
repeatedly adjusted, it means the machine is not operating
with sufficient measuring precision. If this is the case the
operator can electronically calibrate the rotating masses on
the machine; which is called User Calibration.
A calibration run takes longer than a regular
measuring run. Following User Calibration any
residual compensation will be cancelled.
ВАЖНО:
КАЛИБРОВКА ДОЛЖНА ПРОИЗВОДИТЬСЯ БЕЗ
ДОПОЛНИТЕЛЬНЫХ ЭЛЕМЕНТОВ НА ГЛАВНОМ
ВАЛУ И БЕЗ КАКИХ-ЛИБО ИНСТРУМЕНТОВ НА
ДЕРЖАТЕЛЕ КОЛЕСА. ТОЛЬКО СТАНКИ С
МЕХАНИЧЕСКИМ ЗАЖИМОМ (МОДЕЛИ "P")
ДОЛЖНЫ КАЛИБРОВАТЬСЯ ВМЕСТЕ С
ЗАЖИМНЫМ ПРИСПОСОБЛЕНИЕМ.
Калибровка
• ,
(
).
• F6 (Рис. 13-1)
(1, Рис. 13-1).
(Рис. 13-2).
• START,
(
).
•
(Рис. 13-3).
• START
(
).
.
•
.
• F1
(1, Рис. 13-4).
IMPORTANT:
USER CALIBRATION SHOULD ONLY BE
PERFORMED WITH NOTHING ON THE SHAFT; AND
WITH NO EXTERNAL TOOLS WHATSOEVER ON
THE WHEEL HOLDER.ONLY FOR MACHINES WITH
A POWER CLAMP:WITH "P" MODELS ONLY THE
CLAMPING TOOL SUPPLIED WITH THE MACHINE
SHOULD BE LOCKED.
Readjustment
• Make sure that only the clamping tool (and no other
wheel or clamping device) is clamped on the machine
shaft.
• Press the F6 key in the SETTINGS menu (Fig. 13-1)
and select the CALIBRATION item (1, Fig. 13-1).
The CALIBRATION screen (Figure 13-2) will open.
• Close the wheel guard, press the START key and launch
the first calibration run (if the run takes a long time it
means residual imbalances have been detected).
• Screw the Calibration weight onto the threaded hole in
the wheel support flange (Figure 13-3).
• Press the START key and launch a second calibration
run (to detect correction values).
After the second run the electronic control unit processes
the values taken during the calibration runs and writes them in
the permanent memory. When this has finished an audible
3-tone signal is heard to indicate that User Calibration has
terminated.
• Unscrew the Calibration weight from the flange and put it
back in its designated place in the Weight Holder Tray.
• Press the F1 key to return to the INTRODUCTION
screen and select the relative item (1, Fig. 13-4).