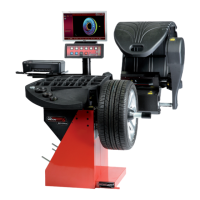
Руководство по эксплуатации
Определение диаметра диска и расстояния до него
•
( )
.
Alu2P Alu3P:
•
.
.
• .
• Alu2P Alu3P
( 8.1).
Определение ширины диска
:
•
(Рис. 7-5)
F5.
•
.
• F3 (2, Рис. 7-5a)
.
• F3
.
Alu
.
.
Alu
; Alu0, Alu1,
Alu2/2p, Alu3/3p, Alu4 Alu5 (Рис. 7-6).
ALU, , Alu 2P (Рис 7-6a).
Примечание:
Alu
.
.
• F2 н.
Rim distance and diameter reading
Move the internal gauge arm gauge into position on
the rim to select the initial weight application
position (internal rim side). Keep it in this position
until an audible signal is heard.
For Alu2P and Alu3P:
Position and hold the internal gauge in the second
position on the rim to select the application position
on the right side of the rim.
Shortly afterwards the machine emits an audible signal
to indicate that the machine automatically saves the
weight application coordinates.
Move the gauge to the idle posi tion.
For Alu2P and Alu3P you can proceed with a measuring
run (Chapter 8.1).
Rim width detection
To set rim width:
Access the ENTERING RIM DATA screen and select
the EDIT MEASUREMENTS item (Fig. 7-5) by
selecting the Menu key F5.
Measure the width with the appropriate gauge or read
the data stamped on the wheel.
Press the menu key F3 (2, Figure 7-5a) and scroll
until the required value is reached.
Press the menu key F3 to set the value.
If the internal position is read first, all the wheel dimensions
required and the Alu type are read on the basis of the
contact points chosen by the operator on the rim.
Rim width, distance and the rim diameter are read out on
the screen RIM DATA ENTRY. The machine automatically
detects the type of Alu according to the contact points
on the rim worked on;
Alu0, Alu1, Alu2/2p, Alu3/3p, Alu4 or Alu5 (Fig. 7-6).
An ALU Type in use identification icon will be displayed in
the Status Bar at top left;in the example, Alu 2P (Fig. 7-6a).
Note:
After the run, the Alu selection can be changed and
the values re-calculated as required. The machine
automatically recalculates the results. Another
measuring run is not required.
On the BALANCING screen press the F2 Menu.