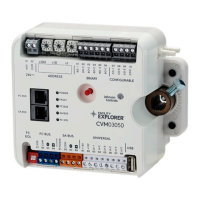
FMS-2000C
LIT-12013504
27
Conguring the analog outputs to control pressure
If you are controlling pressure, congure the corresponding analog output to the analog input as required by the specic application.
Refer to the wiring diagrams in the submittal package and the FMS-2000C Critical Environment Controller Installation Guide
(LIT-12013508) to map the output correctly.
Specifying the operating mode
Each of the four analog outputs of the FMS-2000C controller can be congured for the following operating modes:
• Direct operating mode
• PID operating mode
In direct operating mode, the output tracks the mapped analog input directly or inversely. The PID operating mode may or may not
employ the proportional-integral-derivative scheme for closed-loop control of the analog output. The range of the output may or may not
include an oset. This is independent of the mode the analog output is congured to.
To change the operating mode, complete the following steps:
1. On the home screen, tap the Settings icon to enter the Settings menu.
2. To view analog input settings, tap Analog I/O.
3. To nd the analog output you want to change the operating mode for, swipe left.
4. On the ANALOG screen, tap Output.
5. To change the operating mode, expand the Operating Mode arrow and tap Direct Analog or PID Analog.
6. Collapse Operating Mode to save the new settings.
Specifying the output range
When you select the 0-5V, 0-10V, 0-20mA range, the analog output swings from zero to maximum specied by the hardware DIP switch
selection. The 1-5V, 2-10V, 4-20mA range includes an oset from zero. To specify the output range, complete the following steps:
1. On the home screen, tap the Settings icon to enter the Settings menu.
2. To view analog input settings, tap Analog I/O.
3. To nd the analog output you want to change, swipe left.
4. On the ANALOG screen, tap Output.
5. To specify the output range, expand Range.
6. To select a range, tap one of the following:
• 0-5V, 0-10V, 0-20mA
• 1-5V, 2-10V, 4-20mA
7. Collapse Range to save the new settings.
Specifying the action mode
The action mode determines the polarity of the output based on sensor input. The action mode can be used to invert the polarity of
the incoming analog signal when the pressure sensor has been installed outside of the monitored space. To specify the action mode,
complete the following steps:
1. On the home screen, tap the Settings icon to enter the Settings menu.
2. To view analog input settings, tap Analog I/O.
3. To nd the analog output you want to change the action mode for, swipe left.
4. On the ANALOG screen, tap Output.
5. To specify the action mode, tap the Action Mode arrow and tap Direct or Reverse.
6. Collapse Action Mode to save the new settings.
Mapping the corresponding analog input channel
Map the corresponding analog input channel to the analog output channel.
1. On the home screen, tap the Settings icon to enter the Settings menu.
2. To view analog input settings, tap Analog I/O.
3. To nd the analog output you want to change, swipe left.
4. On the ANALOG screen, tap Output.
5. To select a corresponding analog input channel for this analog output, tap the Input Channel arrow.
6. Scroll to the corresponding analog input channel and tap the Checkmark icon to conrm your settings.
Setting up limits
Limits prevent the analog output from going beyond a predetermined voltage or current output. You can specify the minimum and
maximum limits for the analog output in percentage. The default minimum is zero and the default maximum is 100%.
1. On the home screen, tap the Settings icon to enter the Settings menu.
2. To view the Analog Input/Output settings, tap Analog I/O.
3. On the Analog screen, tap Output.
4. To nd the analog output you want to change the limit for, swipe left.
5. To set an upper and lower limit, tap the Limit arrow.
6. Move the sliders towards the Plus icon to increase or towards the Minus icon to decrease the Upper Limit.
7. Move the sliders towards the Plus icon to increase or towards the Minus icon to decrease the Lower Limit.
8. To conrm the new settings, tap the Checkmark icon.
 Loading...
