FX-3R Maintenance Guide
5-12
Rev. 1.00
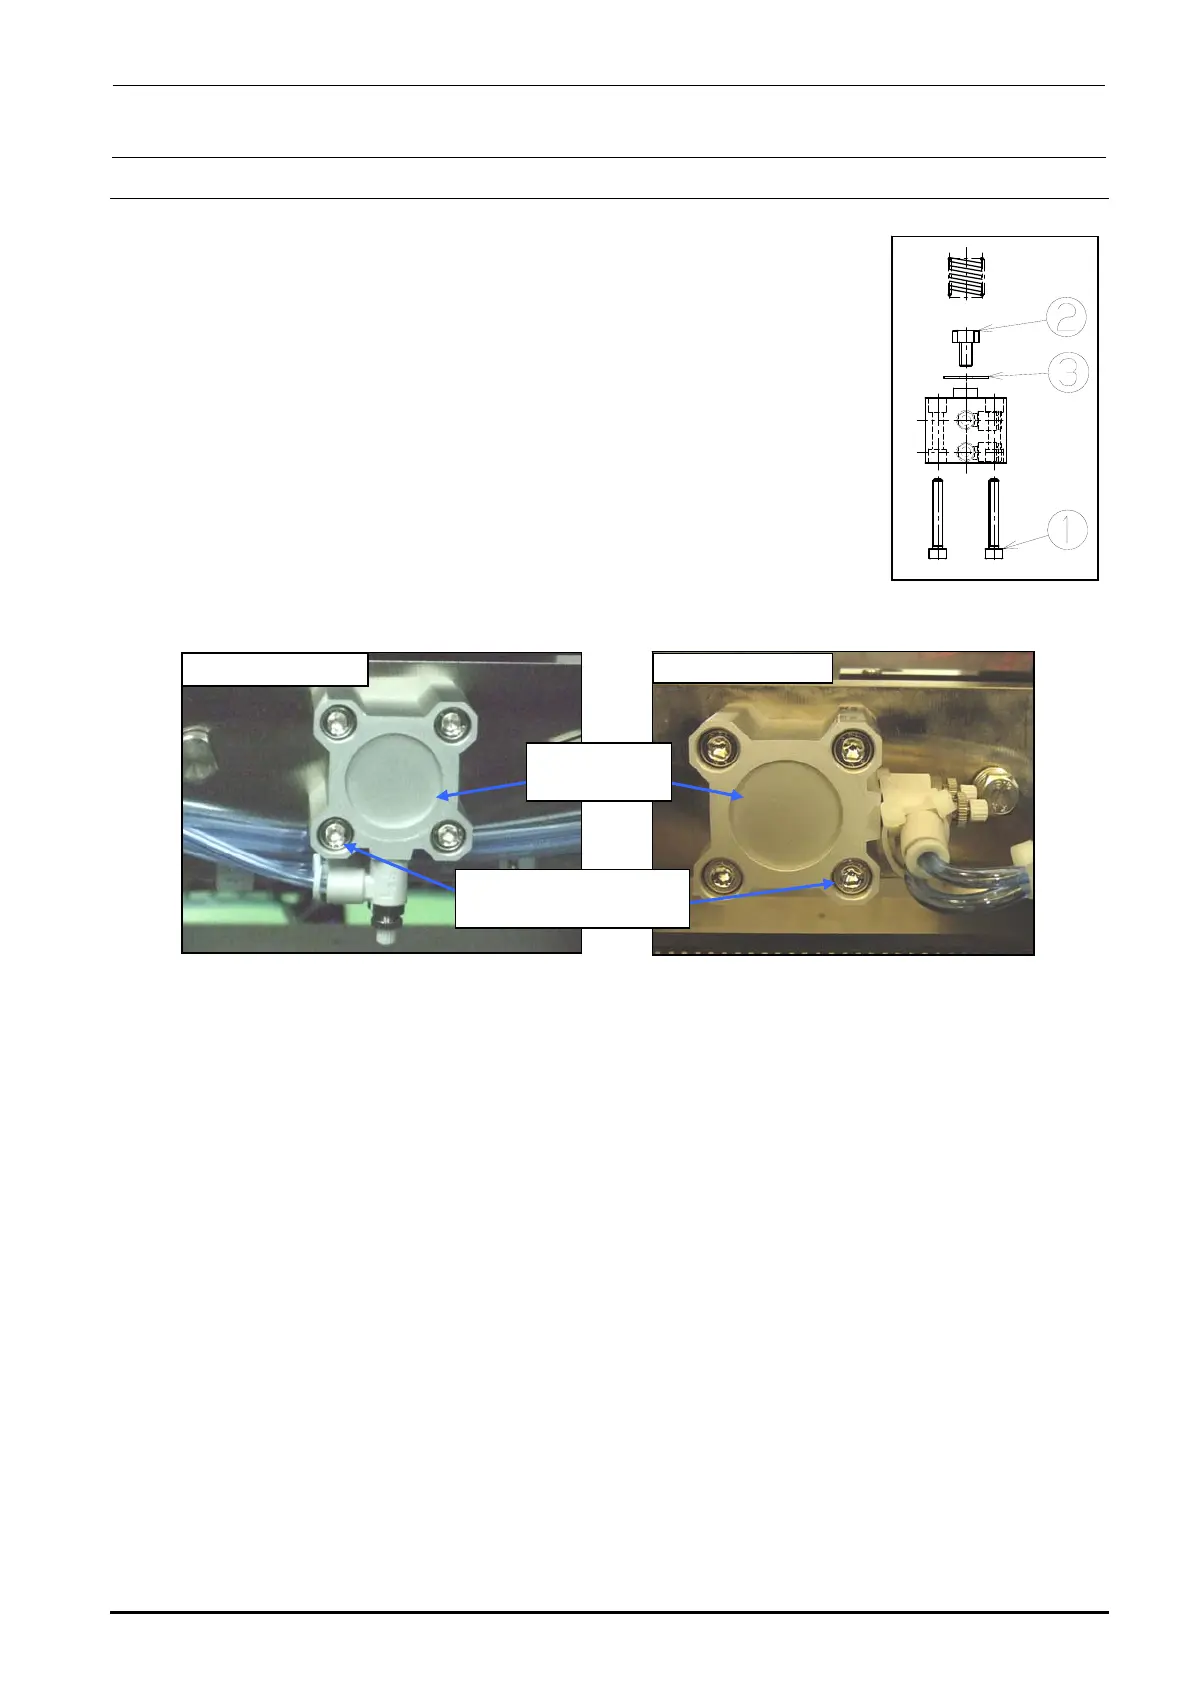
5-9. Replacing the Pusher Y Cylinder (Outer Shape Reference)
1) Remove the parts c to detach the cylinder. As the cylinder is detached,
the spring is also then removed.
2) Detach the speed controller from the cylinder. (At this time, check what
side the speed controller has been mounted.)
3) With the cylinder rod secured with a spanner, remove the part d with
another spanner.
4) Reassemble the components in the order of steps 3) to 1).
5) After the cylinder components have been assembled, supply the air
(0.49 MPa) to check that the cylinder moves smoothly.
∗ The cylinder mounting direction of the front reference machine is different from that of the rear
reference machine.
∗ For the rear reference machine, secure the speed controller with a tie-up band so that it does not
interfere with the width adjustment timing belt when the PWB width is set at its maximum level.
∗ The speed controller of the cylinder has been adjusted (page 5-9 in QA Table). No adjustment is
needed even after replacement of the parts.
Figure 5-9-1
Pusher Y-Cylinder
[Front reference] [Rear reference]
PA250100100
Cylinder
SM6053502TN
SEMS cap bolt M5×35
Figure 5-9-2
Pusher Y-Cylinder (Front Reference)
Figure 5-9-3
Pusher Y-Cylinder (Rear Reference)