FX-3R Maintenance Guide
8-11
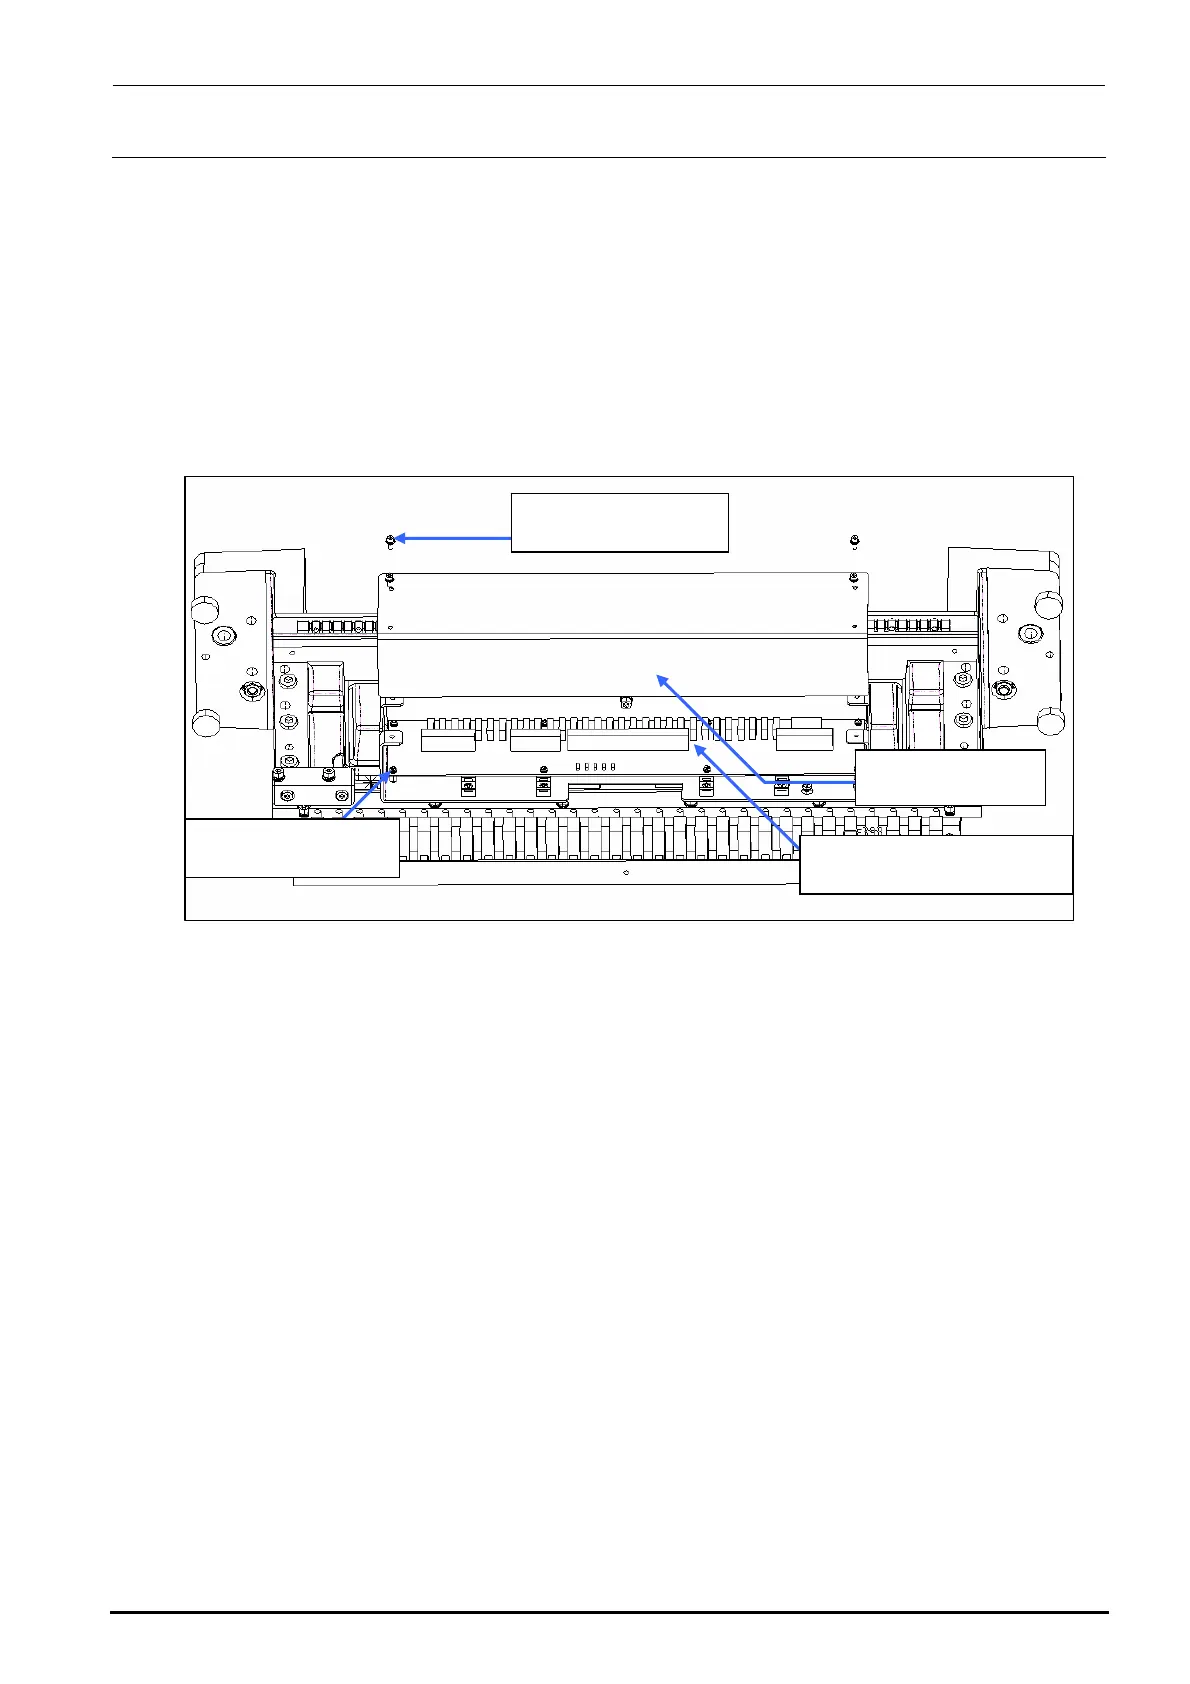
8-2-5. Replacing the Bank PCB
1) Remove the mounting screws to detach the front panel.
2) Disconnect the connectors (cables) from the mechanical bank PCB.
3) Remove the round head screws (8 pcs.) to detach the mechanical bank PCB and replace it with
a new one.
4) Reassemble the components in the reverse order of disassembly.
SL6030692TN
SEMS cap bolt M3×6
40047311
Front panel
40082808
Mechanical bank PCB ASM
SL4030681SC
SEMS cap bolt M3×6
Figure 8-2-5-1 Bank PCB (When Viewed Slantwise from the Lower Portion)
Rev. 1.00

 Loading...