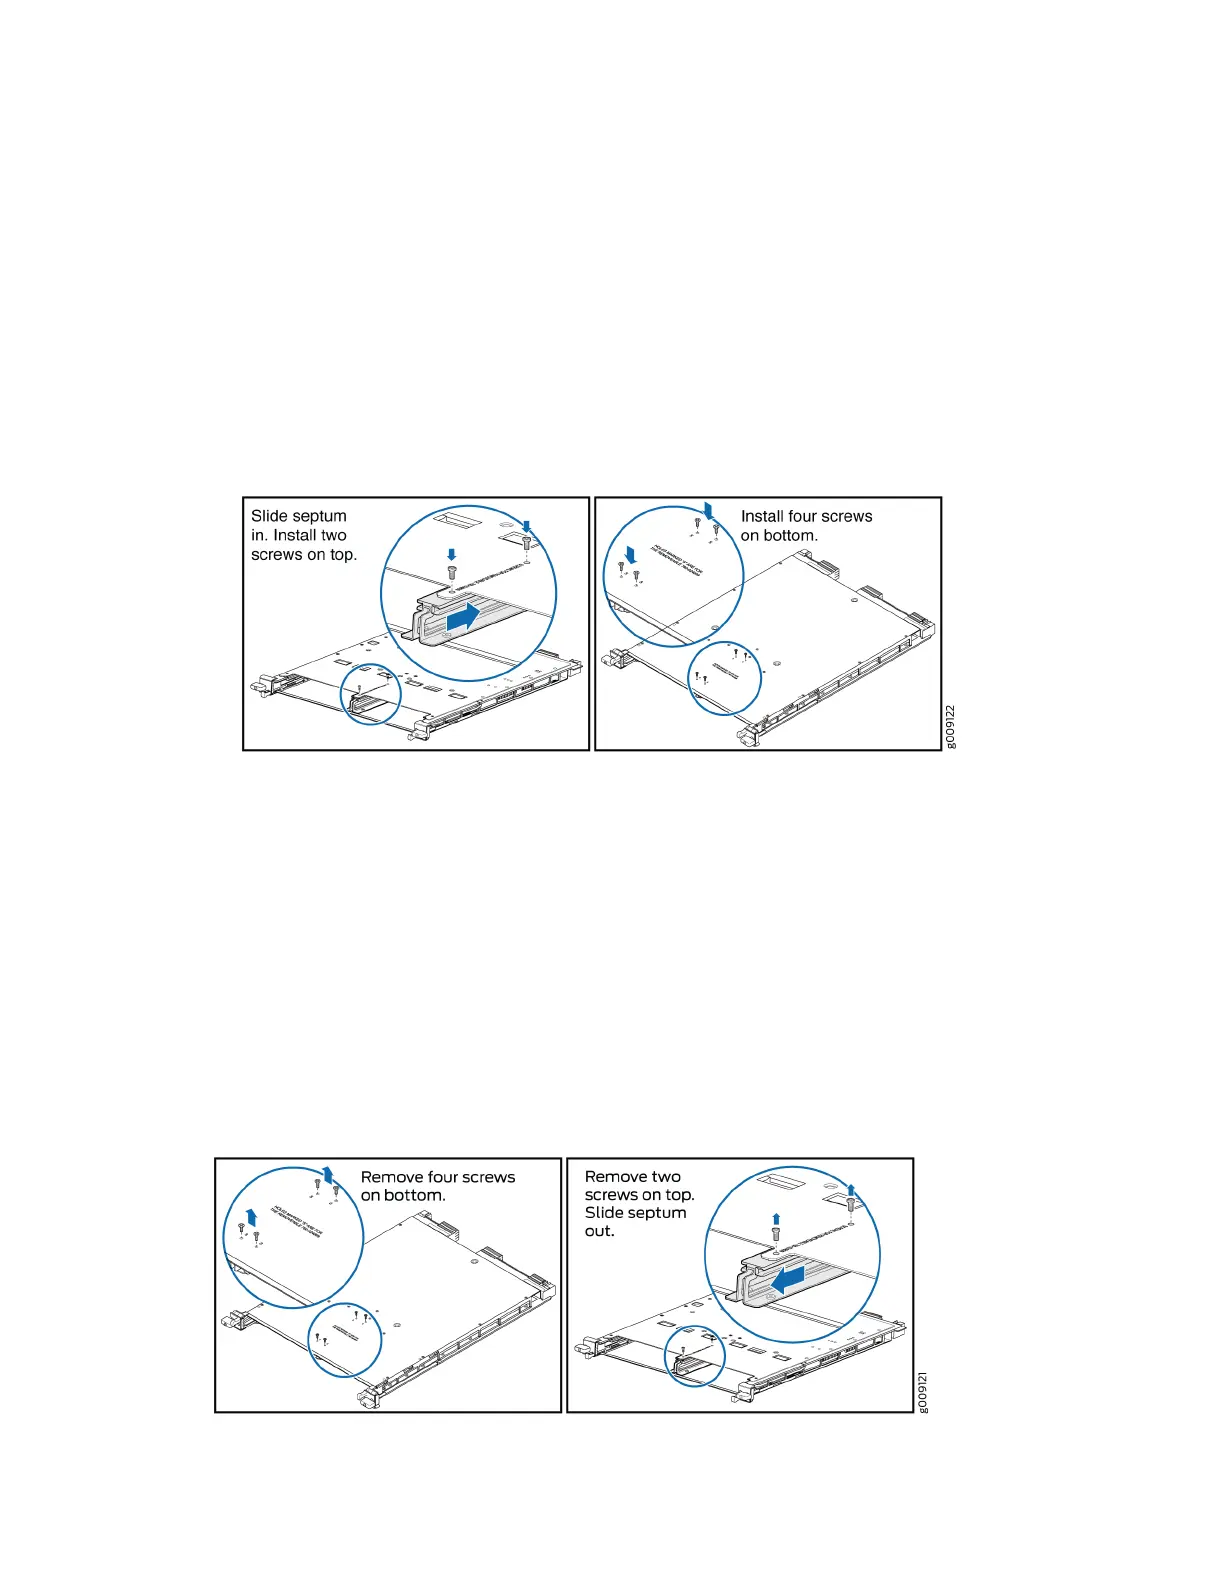
a. Posion the septum in the center of the MIC slot on the line card so that it is aligned with the
holes labeled S on the top and boom surfaces of the line card.
b. Insert a screw each into the holes labeled S on the top surface of the line card and ghten the
screws by using the screwdriver.
c. Insert a screw each into the holes labeled S on the boom surface of the line card and ghten
the screws by using the screwdriver.
Figure 82: Installing the Septum
4. If you are installing an EX9200-40T-MIC and if there is a septum installed in the line card, remove
the septum (see Figure 83 on page 262):
a. Remove the screws labeled S on the boom surface of the line card.
b. Remove the two screws labeled S on the top surface of the line card.
c. Slide the septum out of the line card.
d. Save the septum and screws for later use.
Figure 83: Removing the Septum
262