ENGLISH
Chapter 5: KGUARD Web Client
DVR User’s Manual
85
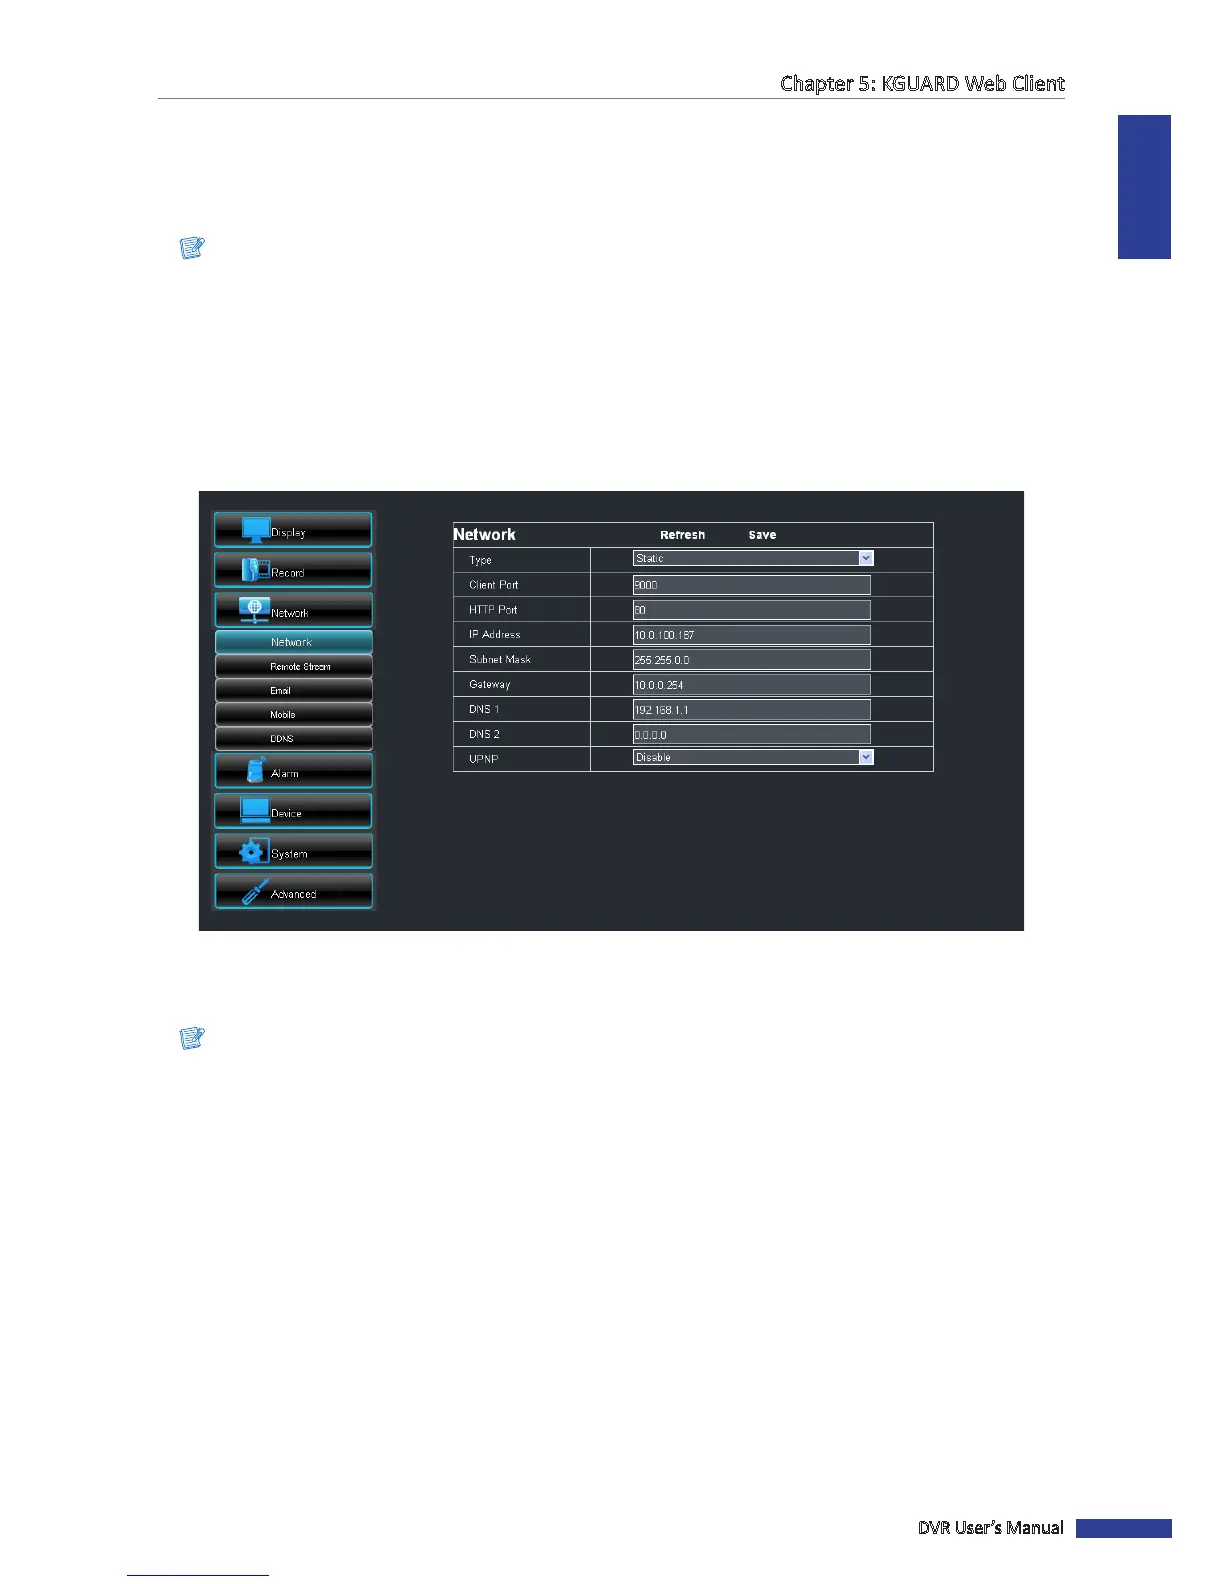
5.5.3 Seng the Network Conguraon
You can use the Network menu to setup how the DVR connects to the network. It provides 3 network connecon
opons: Stac IP, DHCP, and PPPoE. From this menu, you can also setup DDNS (Dynamic Domain Name System) and
Email.
Note:
Consult your network administrator or the Internet Service Provider (ISP) to determine the type of connecon you
are using and the required parameters to complete the setup.
Seng Up with Stac IP
If your network uses a xed IP address, do the following:
1 On the Main Menu, click Remote Seng.
2 On the le panel, click Network > Network. The Network screen appears.
3 On Type, select Stac IP.
4 Specify the Client Port, HTTP Port, IP Address, Subnet Mask, Gateway, DNS 1, and DNS 2.
Note:
• Obtain these informaon from your network administrator or your Internet Service Provider (ISP).
• If you cannot use the either of the two default ports, 80 or 9000, the specied port may be occupied by other
programs or it is being blocked by your service provider. Enter other port number. In this case, you need to
add the port number aer the IP address. For example, if you set the HTTP Port as 85, you need to enter the
IP address as “192.168.3.103:85”.
5 Enable UPnP if you are using Universal Plug and Play (UPnP) devices.
6 Aer all sengs are complete, click Save.
« TIP »
To cancel any modicaons and retain the exisng sengs, click Refresh.