2GN/2GP/2GR-2
1-5-41
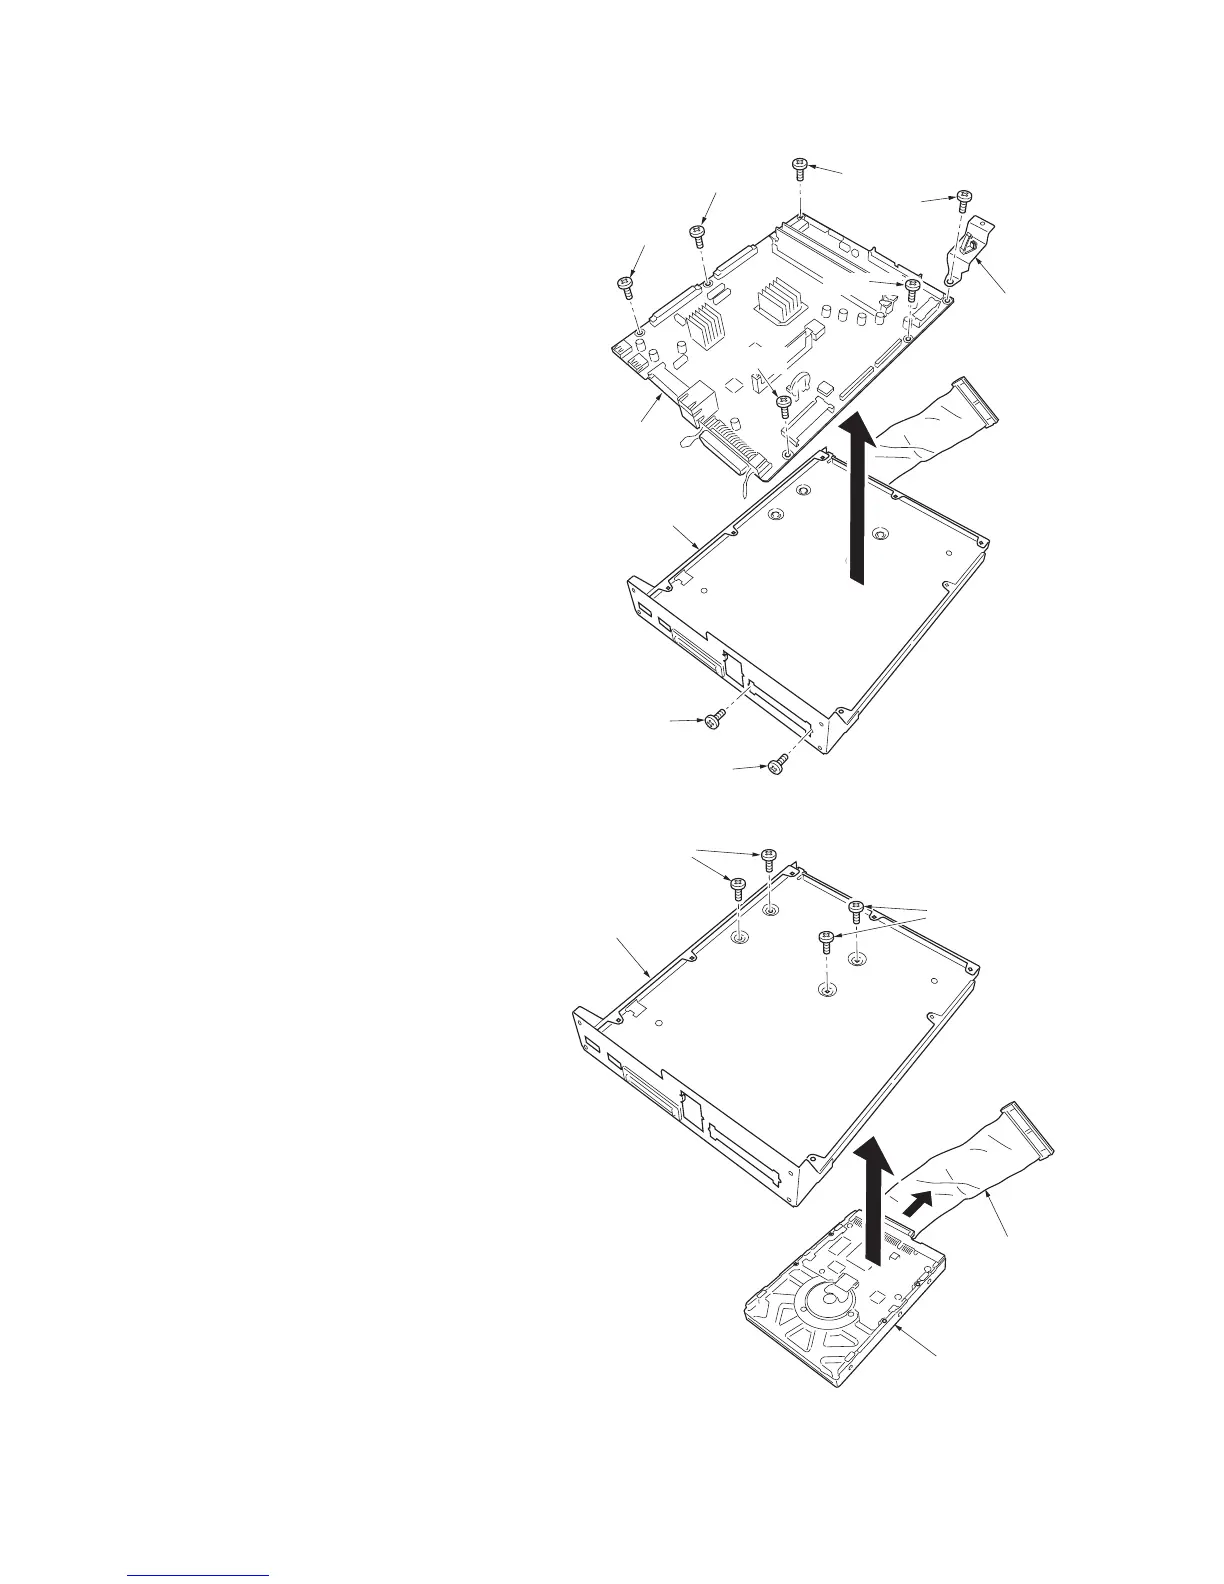
9. Remove eight screws and PWB holder.
10. Remove the main PWB from the main PWB/
HDD mount.
Figure 1-5-80
11. Remove four screws and then remove the
main PWB/HDD mount from the hard disk.
12. Remove the cable from the hard disk.
13. Replace the hard disk. Install the hard disk
to the main PWB/HDD mount.
14. Refit the main PWB to the main PWB/HDD
mount.
15. Refit the main PWB/HDD mount.
16. Refit the inner cover and rear cover.
17. Run maintenance item U024 to initialize the
hard disk.
When the optional fax backup kit is installed,
perform the following procedures.
18. Run maintenance item U933 and press
[FAX IMAGE] to print out the FAX image.
19. Run maintenance item U933 and press
[JOB ACCOUNTING] to restore the job
accounting data to the hard disk.
20. Run maintenance item U933 and press
[INITIALIZE CF] to initialize the fax backup
kit.
Figure 1-5-81
Screw
Screw
Main PWB
Main PWB/HDD mount
Screw
Screw
Screw
Screw
Screw
Screw
PWB holde
Screws
Hard disk
Cable
Screws
Main PWB/HDD
mount

 Loading...


