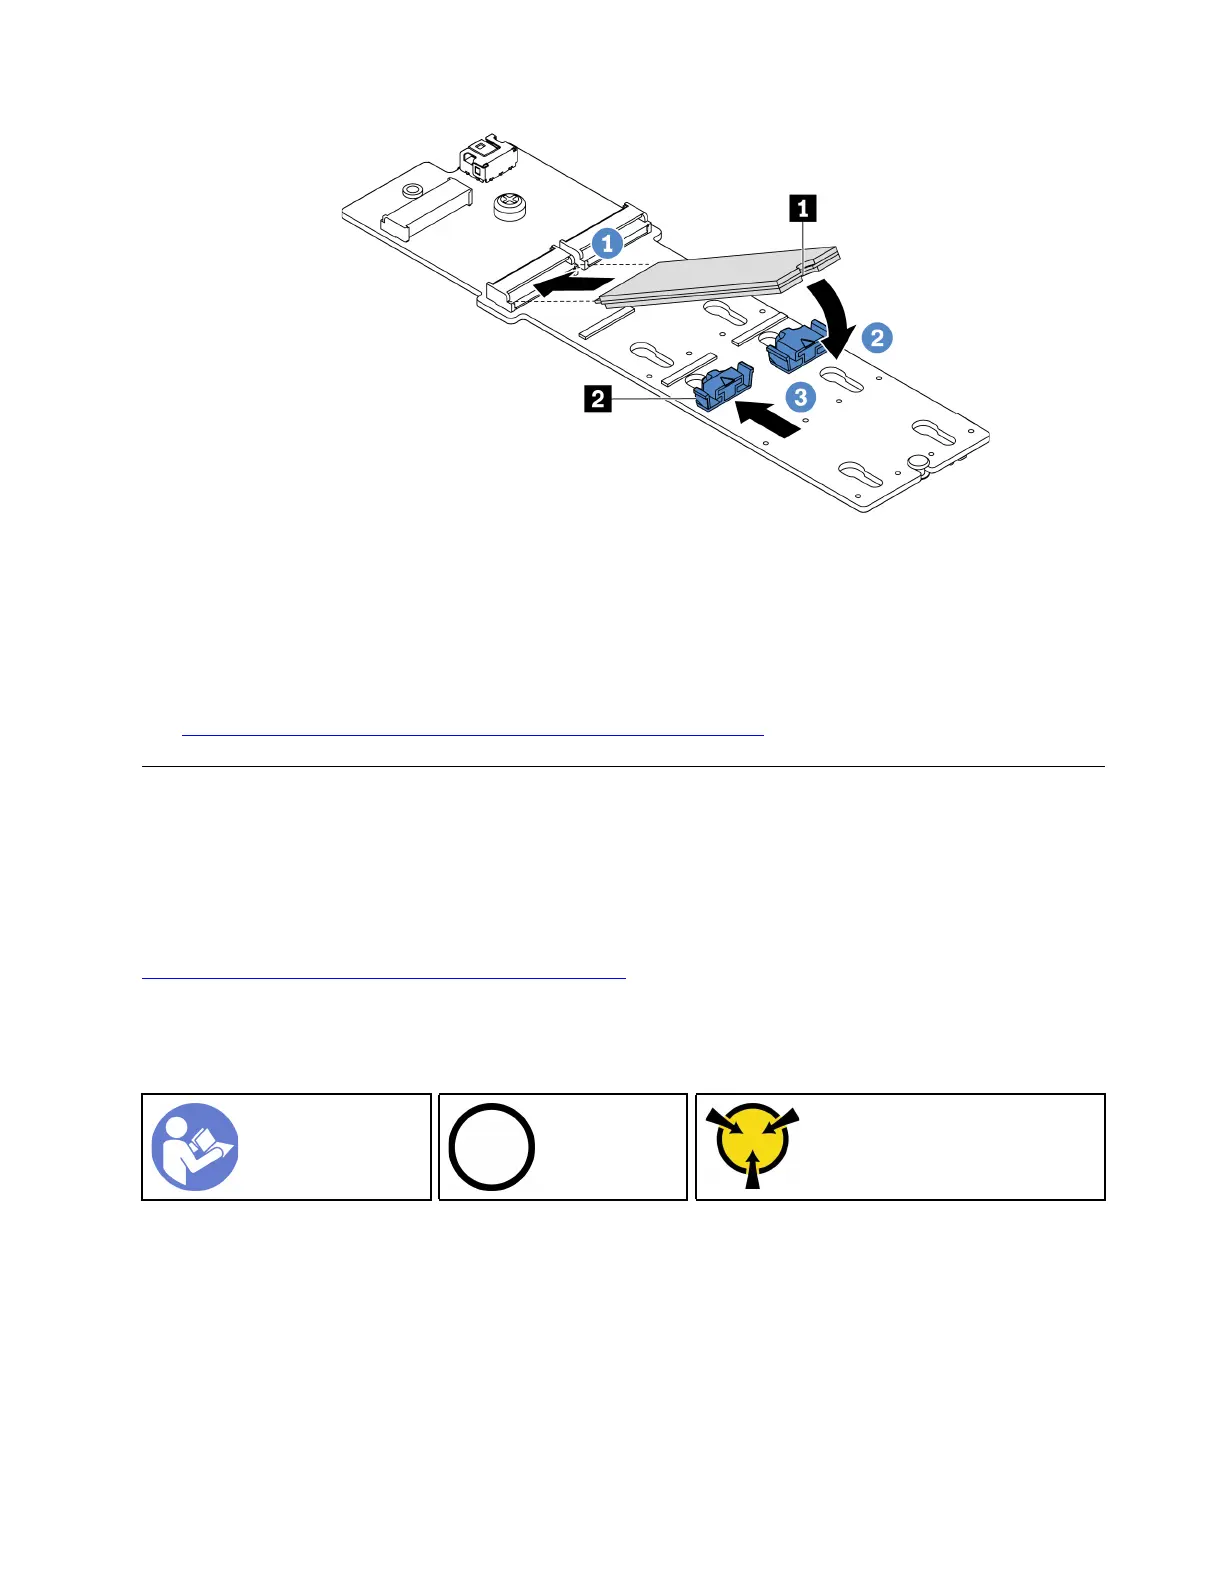
Figure 150. M.2 drive installation
After installing the M.2 drive and M.2 adapter:
1. Connect the cables of the M.2 adapter. See “M.2 module cable routing” on page 67.
2. Complete the parts replacement. See “Complete the parts replacement” on page 203.
3. Use the Lenovo XClarity Provisioning Manager Lite to configure the RAID. For more information, see:
https://sysmgt.lenovofiles.com/help/topic/lxpml_v2/Introduction.html
RAID super capacitor module replacement
Use this information to remove and install a RAID super capacitor module.
The RAID super capacitor module protects the cache memory on the installed RAID adapter. You can
purchase a RAID super capacitor module from Lenovo.
For a list of supported options, see:
https://static.lenovo.com/us/en/serverproven/index.shtml
Remove a super capacitor module on the M.2/riser support bracket
Use this information to remove a super capacitor module.
“Read the
installation
Guidelines” on
page 79
“Power off
the server for
this task” on
page 11
“ATTENTION:
Static Sensitive Device
Ground package before opening”
on page 82
Before removing a super capacitor module:
1. Remove the top cover. See “Remove the top cover” on page 89.
2. Remove the internal riser assembly. See “Remove the internal riser assembly” on page 115.
3. Remove the M.2 module and remove the M.2 adapter bracket if installed. See “Remove the M.2 adapter
and M.2 drive” on page 159.
4. Disconnect the cable of the super capacitor module.
To remove a super capacitor module, complete the following steps:
Chapter 3. Hardware replacement procedures 167

 Loading...


