Setting Unit Policies
www.lsi.com/channel/products 107
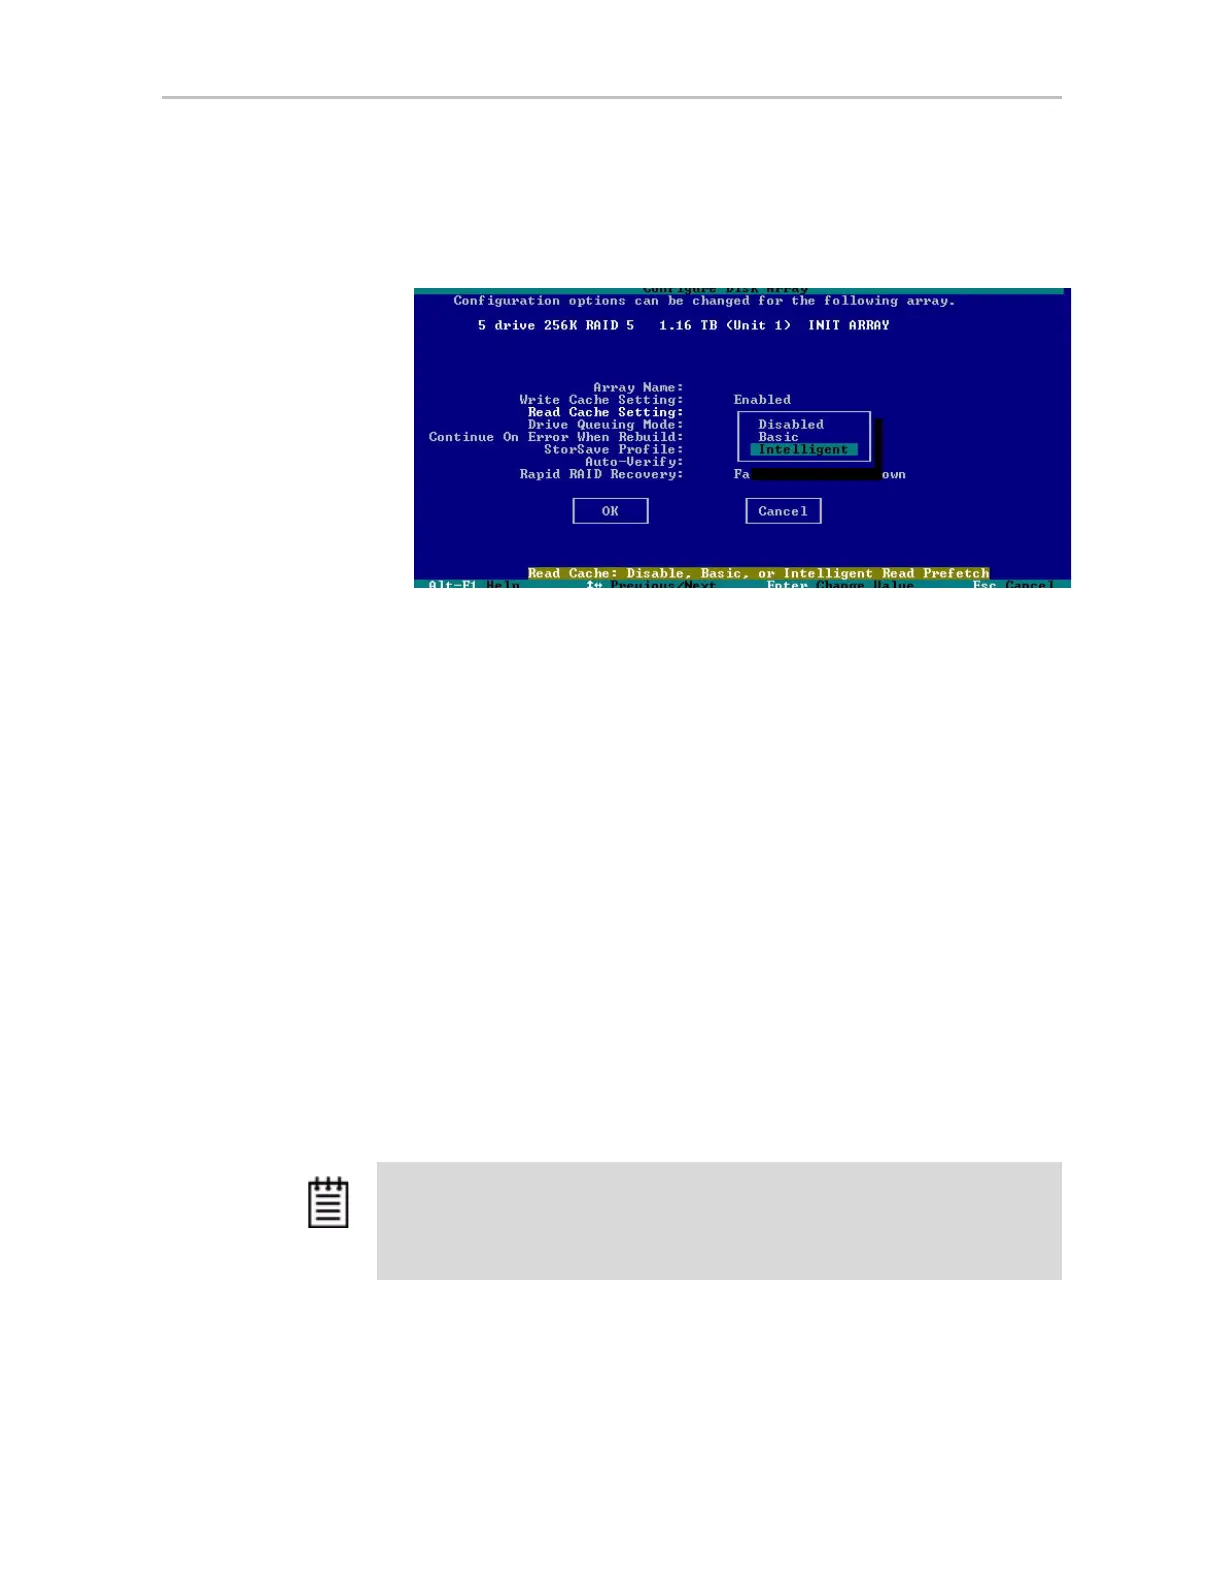
5 Press Enter to display the choices, use the arrow keys to select the setting
you want (Figure 61), and press
Enter again to choose it.
Figure 61. Read Cache Setting on the Configure screen
6Tab to the OK button and press Enter to select it.
You return to the main 3BM screen.
7 When you are finished making changes, press
F8 to save them and exit
3BM.
Enabling or Disabling Auto-Verify for a Unit
Auto-Verify can help insure that a unit is verified on a regular basis. This is
important, as it can provide early warning of unstable units and possible data
loss due to a failing drive.
Auto-Verify is set on a per-unit basis, and works in conjunction with the
Verify Schedule, which is set on a controller-wide basis. By default, the Verify
Schedule is set to “Basic,” which specifies a weekly day and time for
verification to occur when Auto-Verify is enabled.
The steps below describe how to enable or disable Auto-Verify for an existing
unit. For more detailed information, see “Using Auto Verification” on
page 152. For how to view or change the Verify Schedule, see “Selecting
Advanced or Basic Verify Schedules” on page 166.
Note: If Auto-Verify is disabled for a unit, then verification will only run if you start it
manually or in the event of an unclean shutdown.
You can start a verify manually at any time. See “Starting a Verify Manually” on
page 152.