38 Chapter 4
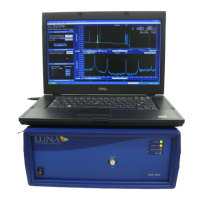
Performing Measurements
7 Align the connector key to fit in the groove in the bulkhead adaptor.
Turn the screw ring around the connector clockwise until it is just
tightened.
8 Click
OK
.
A dialog box appears as calibration proceeds.
9 A prompt appears instructing the user to disconnect the reference fiber
and reflector. After doing so, click OK.
10 Click OK in the dialog box indicating that the instrument has been
successfully calibrated.
After calibrating, it is advisable to check if the calibration was successful, to ensure
that the system will provide accurate data.
Checking the
Calibration
1 Follow all the instructions above, under “To calibrate the system” on
page 37.
2 Reattach the gold reflector, after cleaning its connector.
3 In the System Control area, enter a Center Wavelength and select a
Wavelength Range from the pull-down menu. These settings must fall
within the range of the calibration just performed or currently loaded.
4 Click
Scan
.
The
instrument
performs the
measurement
and the software displays the test data
in the upper graph.
5 From the parameters menu or Title Bar in the upper graph, select
Amplitude. This may already be displayed, as it is the default setting.
6 Turn on the vertical cursors in the upper graph by clicking .
7 Select the cross-hair tool, then click and drag the yellow cursor
to about 1.0 m, the location of the gold reflector.
8 Click the button, which moves the cursors to a local peak.
9 In the Data
Processing
area, set
Integration
Width (or
Sensing
Range)
to 0.2
m.