12 Chapter 2
Assembly and Startup
5 If necessary, install the drivers for local or network printers that will be
used for printing data sheets.
Important
Do not install any software on the OBR PC other than a
printer driver or software supplied by Luna Technologies.
Third-party software installed on the PC may impair the
proper function of the OBR.
6 Optional: To connect the OBR to a network, connect a network cable
(not provided) to the ethernet port on the PC.
7 Do not connect the OBR instrument to the PC with the USB cable until
instructed in the next section.
8 On the front of the instrument, there is a white plastic cap installed to
protect the source port. Leave this cap on when the instrument is not in
use. To remove the cap for measurements, turn the white cap
counterclockwise.
9 Attach the power cords provided to the instrument and to the PC. To
ensure safe operation, place the instrument to allow easy disconnection
of the power cord. Note that the OBR
requires surge-protected,
grounded
outlets.
Initial Startup
1 After full assembly above, turn on the PC (according to manufacturer’s
instructions), allowing it to fully load up Microsoft
®
Windows
®
7 or XP.
(Note that the screen appearance shown in this User Guide may vary
according to Windows
®
version and options.)
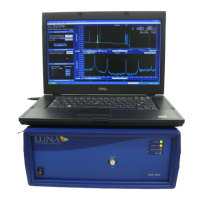
2 If you purchased a PC from Luna Technologies, it comes with the OBR
control software already installed. If not, install the OBR software now.
(From the Luna Technologies CD provided, open the OBR 4600 folder
and run setup.exe, following on-screen instructions.)
3 Ensure that the OBR is powered OFF.
4 Connect the OBR to the PC using a standard USB cable (provided).
5 Turn on the OBR using the power switch on the front panel.