42 Chapter 4
Performing Measurements
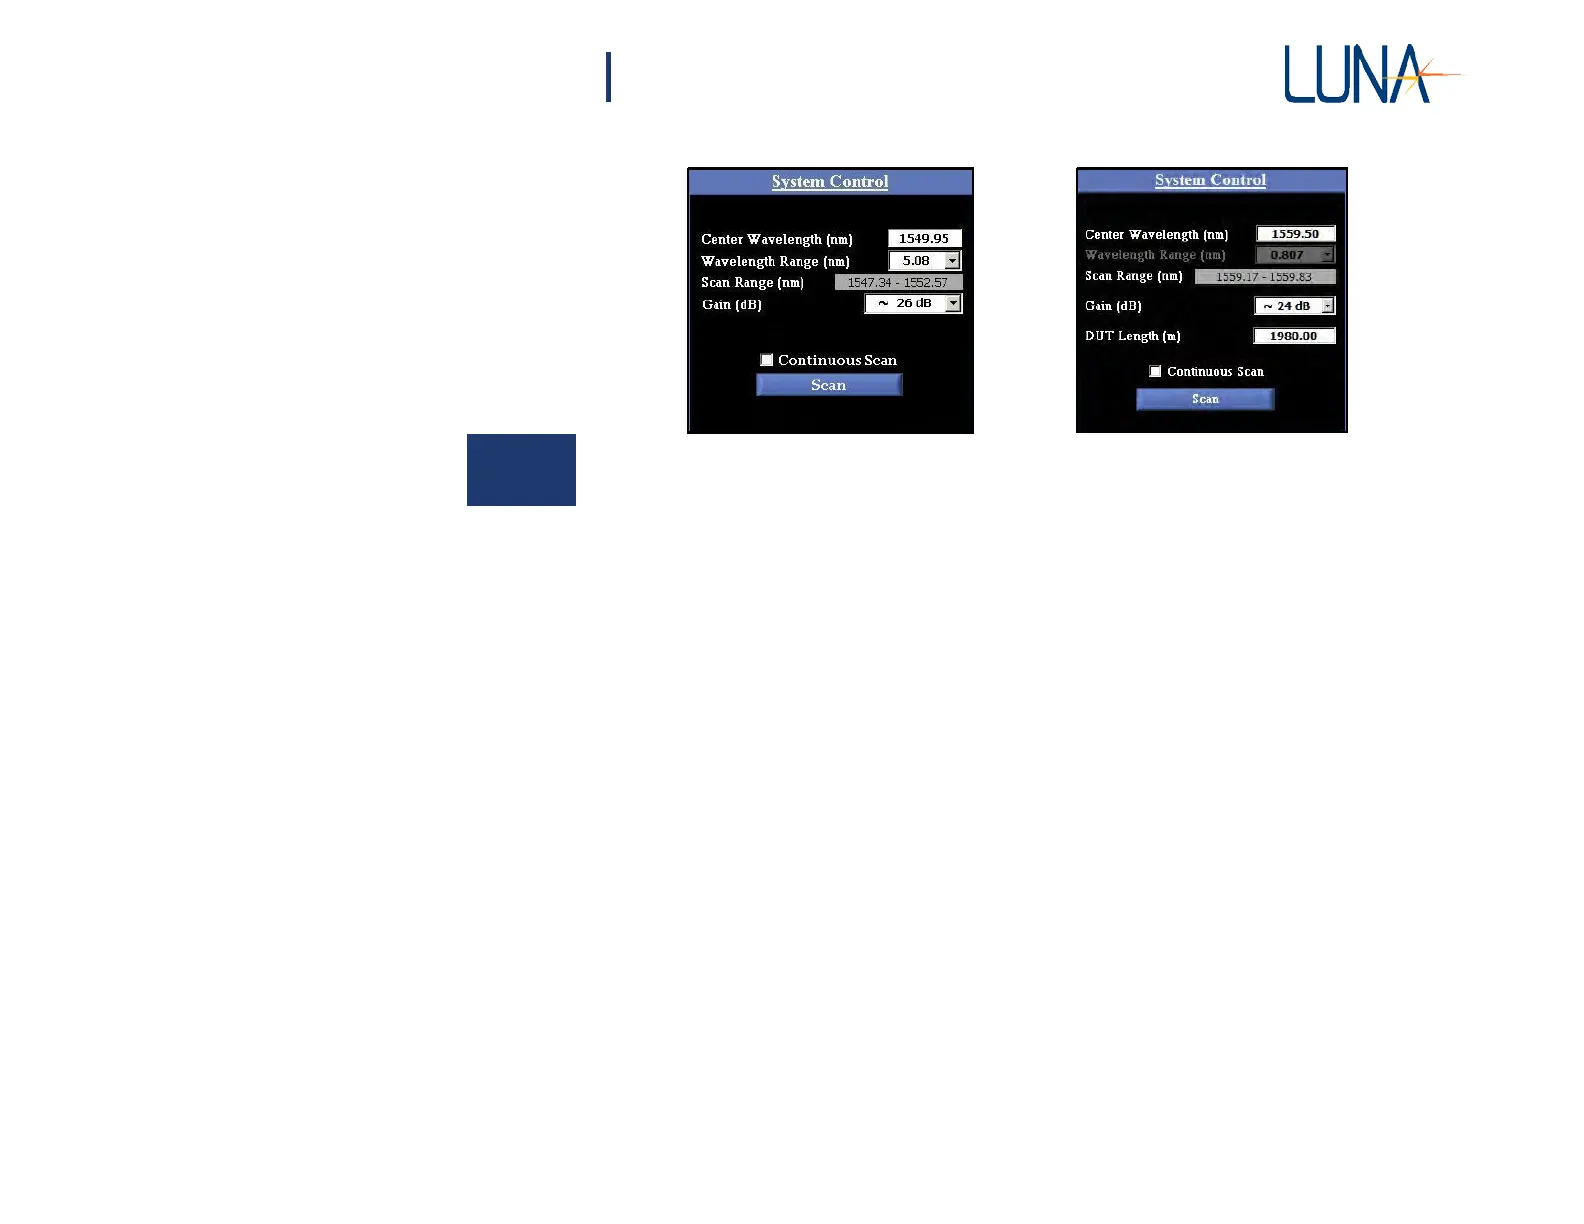
Figure 4-6. The System Control area in the main OBR software window, shown in
Normal (left) and Extended (right) Distance Range modes.
6 In Normal Range mode, select a Wavelength Range from the pull-
down menu. If the desired scan range falls outside the range of the most
recent calibration, either select a smaller scan range or recalibrate the
OBR.
In Extended Range mode, the Wavelength Range is set by the software,
depending on the resolution set by the user (see “Instrument Configuration” on
page 34). As mentioned earlier, Extended Mode is not available unless
purchased as an option.
7 In Extended Range mode, enter the DUT (Device Under Test) Length
in meters. When measuring near the end of the range of DUT Length,
it is important to enter an accurate DUT Length,
±20 m. At the
beginning of the Distance Range, accuracy within 100 meters is
sufficient.
8 Check the Options > Display Options menu for functions to be applied
to the scan, such as Data Decimation (see page 58) and Auto-Update
Lower Graph. These options may also be applied to data after scanning.
However, to apply Frequency Domain Windowing to the data, it must
be turned on before scanning (see page 42).
9 If Distributed Sensing options were purchased, you may wish to adjust
the Options > Temperature and Strain Coefficients (see “Distributed
Sensing Measurements” on page 48).