215585 117 Revision A
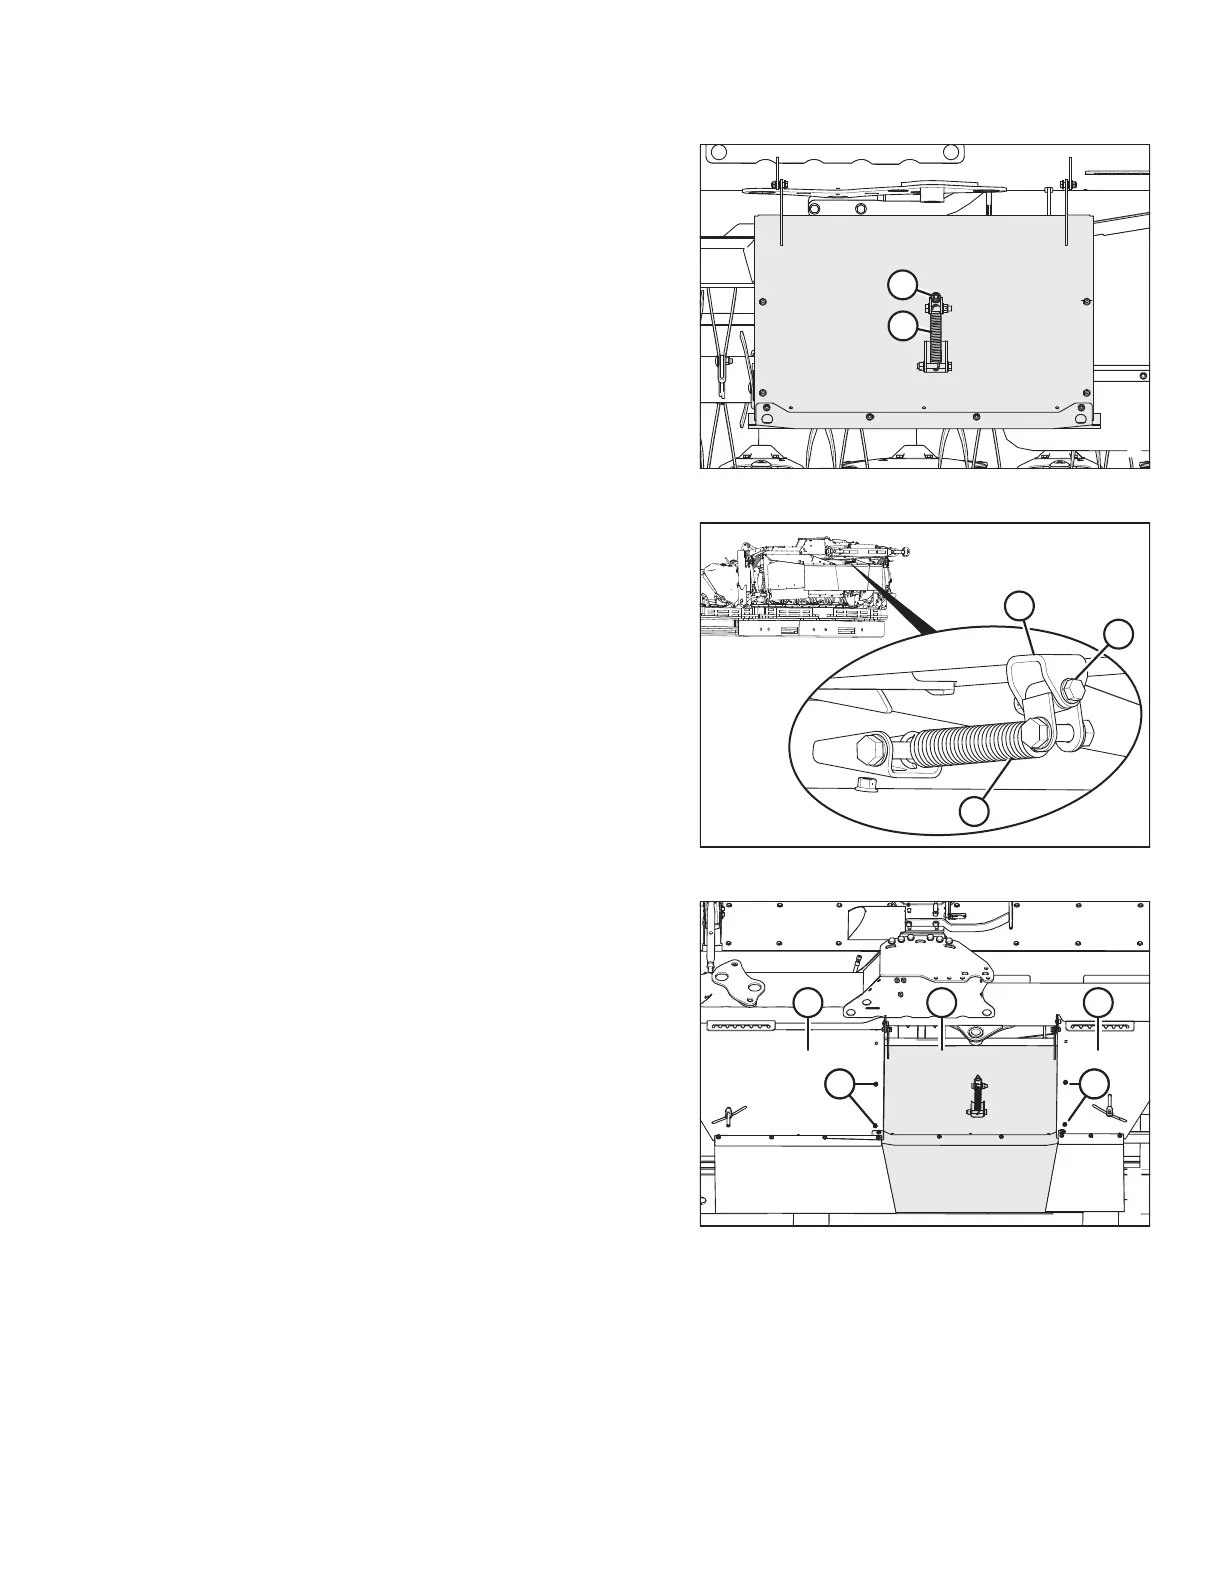
Figure 6.18: Spring on Center Shield
IMPORTANT:
For rotary disc pull-types without the transport system,
proceed to Step 9, page 117.
7. Remove nut, bolt, and washer (A) securing spring
assembly (B) onto the center shield. Retain nut, bolt, and
washer for attaching to transport.
Figure 6.19: Spring Attached to Transport
8. Lift center shield and attach spring assembly (A) to link
bracket (B) on transport with existing bolt, nut, and
washer (C) removed in Step 7, page 117 .
IMPORTANT:
Do NOT bolt center shield to the left and right shields. If the
hardware to attach the center shield to side shields is
installed, remove it and discard.
Figure 6.20: Center Cover Assembly
IMPORTANT:
Only perform this step if NOT installing the transport system.
9. Lift center shield (A) and install four M10 x 20 carriage bolts
and lock nuts (B) (two per side) to secure center shield (A)
to outboard shields (C). Tighten bolts.
COMPLETING ROTARY DISC PULL-TYPE ASSEMBLY
 Loading...


