322
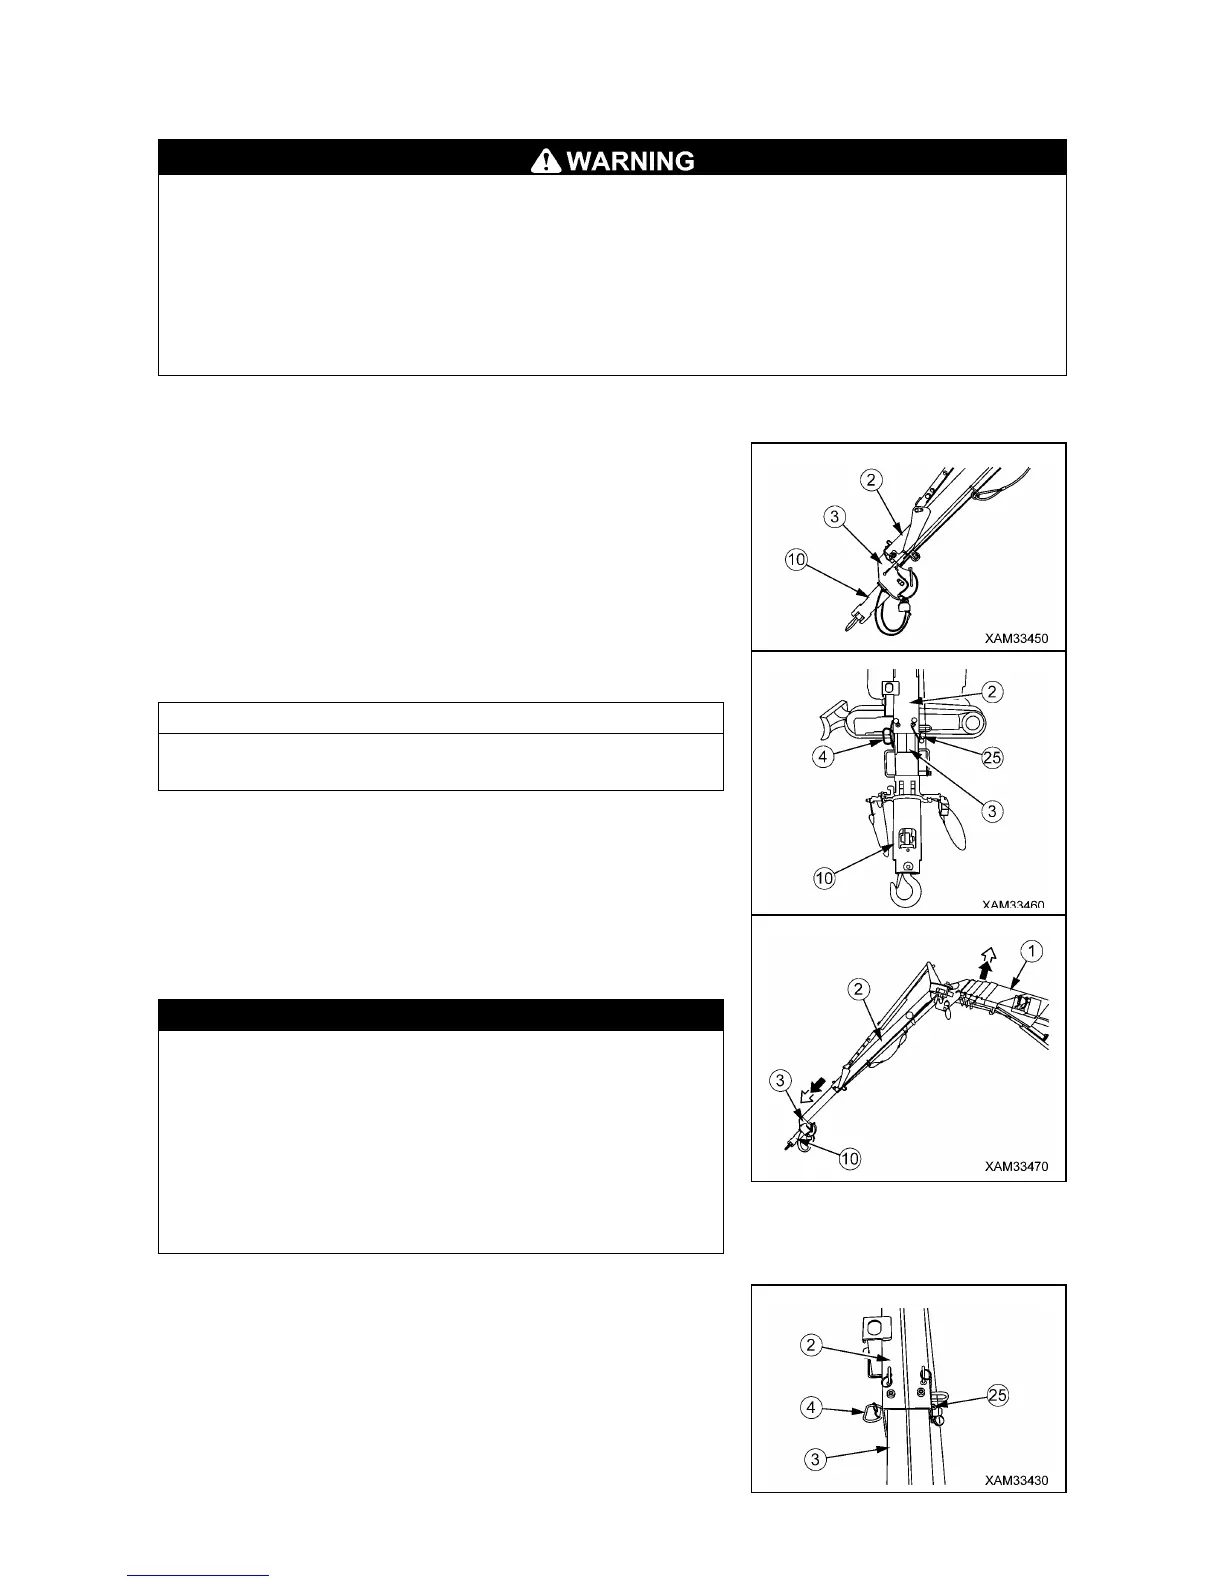
4.3.2 EXTENDING NO.2 FLY-JIB CONFIGURED 40 DEGREES OR 60 DEGREES
TILT ANGLE
• When the Fly-jib angle is set higher, No.2 Fly-jib may rapidly slide out when the position pin
which fixes it is extracted and it may cause a serious accident resulting in death or serious
injury. Before you extract the position pin, always wind up the hook close to the Fly-jib tip to
prevent No.2 Fly-jib from rushing out. In case of this, be careful to avoid your hand or a part of
your body being caught between the No.2 Fly-jib tip and the hook.
• When applying the hook to the Fly-jib tip, do not wind the hook with the override switch left
“ON”. Excessive force can break the Fly-
jib. When winding up the hook, be sure to use the
hook stowage switch.
To extend the No.2 Fly-jib configured at 40 or 60 degrees, follow the instructions below:
1. Keep pressing the hook stowage switch and wind up the hook
(10) slowly, until it lightly touches the No.2 Fly-jib (3) tip.
2. Pull the linchpin (25) out from the position pin (4) in the tip of
No.1 Fly-jib (2) to extract the position pin (4).
Removed position pin (4) will be necessary for the later
operation to secure the extended No.2 Fly-jib (3).
3. While repeating lowering operation of the hook and raising
operation of the boom slowly and alternately, let No. 2 Fly-jib
(3) gradually slide out.
• When the hook is un-wound, the weight of the No.2 Fly-jib
(3) will slide out under it’s own weight. Continuing this
operation will result in No.2 Fly-jib (3) hitting the ground.
To prevent this, raise the boom. Continue these
operations alternately.
• If the the weight of the No.2 Fly-jib (3) cannot make it slide
out, take hold of handles in the both left and right side at
the tip of No.2 Fly-jib (3) and pull the No.2 Fly-jib (3) out.
4. When the No.2 Fly-jib (3) is extended, adjust both side holes
of No.1 Fly-jib (2) and No.2 Fly-jib (3) to insert the position pin
(4). Fit the linchpin (25) to secure the position pin.
5. Un-wind the hook down so that it separates from the No.2
Fly-jib (3).