329
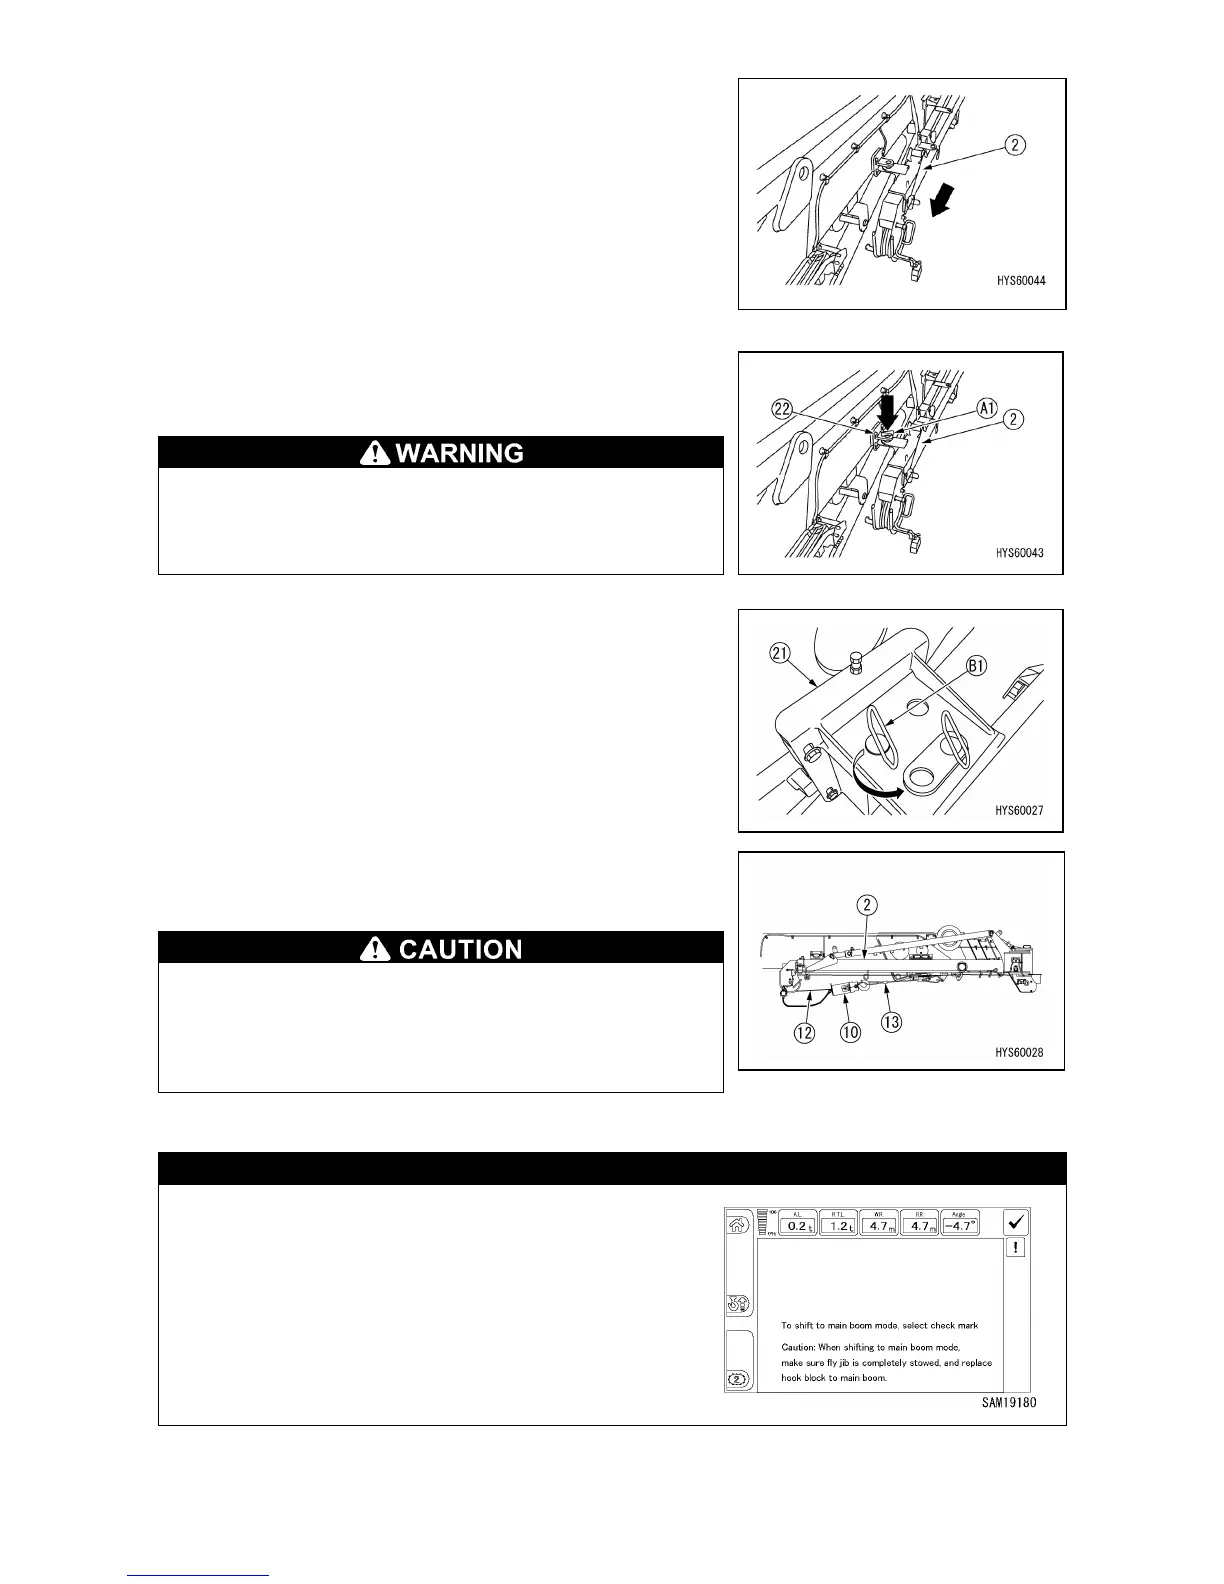
12. Pull the No. 1 Fly-jib (2) toward the tip side.
13. Push the No.1 Fly-jib (2) into the Fly-jib bracket B (22), then
insert the position pin (A1) into the hole of the Fly-jib bracket B
(22). Use the linchpin to secure the position pin.
The position pin (A1) must always be inserted downward
from the upper side. When it is inserted upward from the
underside, the position pin could easily drop down to
cause the Fly-jib to drop and may cause a serious hazard.
14. Pull the linchpin of the position pin (B1) stored in the Fly-jib
stowage bracket A (21) and pull out the position pin (B1).
Insert the position pin (B1) into the hole closest to the front
and insert the linchpin. At this time, be sure to turn over the
ring to lock securely.
15. Hang the single hook (10) on the hook stowage rope (13).
While pressing the hook stowage switch, perform winch
raising operation to remove the slack of the wire rope (12).
Do not perform hook stowage operation with the override
switch left ON. The hook stowage mode is not available
and may result in damage to
stowage wire rope (13), main boom, or wire rope (12).
Always use the hook stowage switch to stow the hook.
In the case of the Fly-jib mode with the Fly-jib in a
stowage condition, the monitor display is as shown
on the right figure.
Either switch to the main boom mode or install the
Fly-jib.
For the detailed operation method, see “5.1.2 Monitor
display when Fly-jib is stowed”.
 Loading...


