328
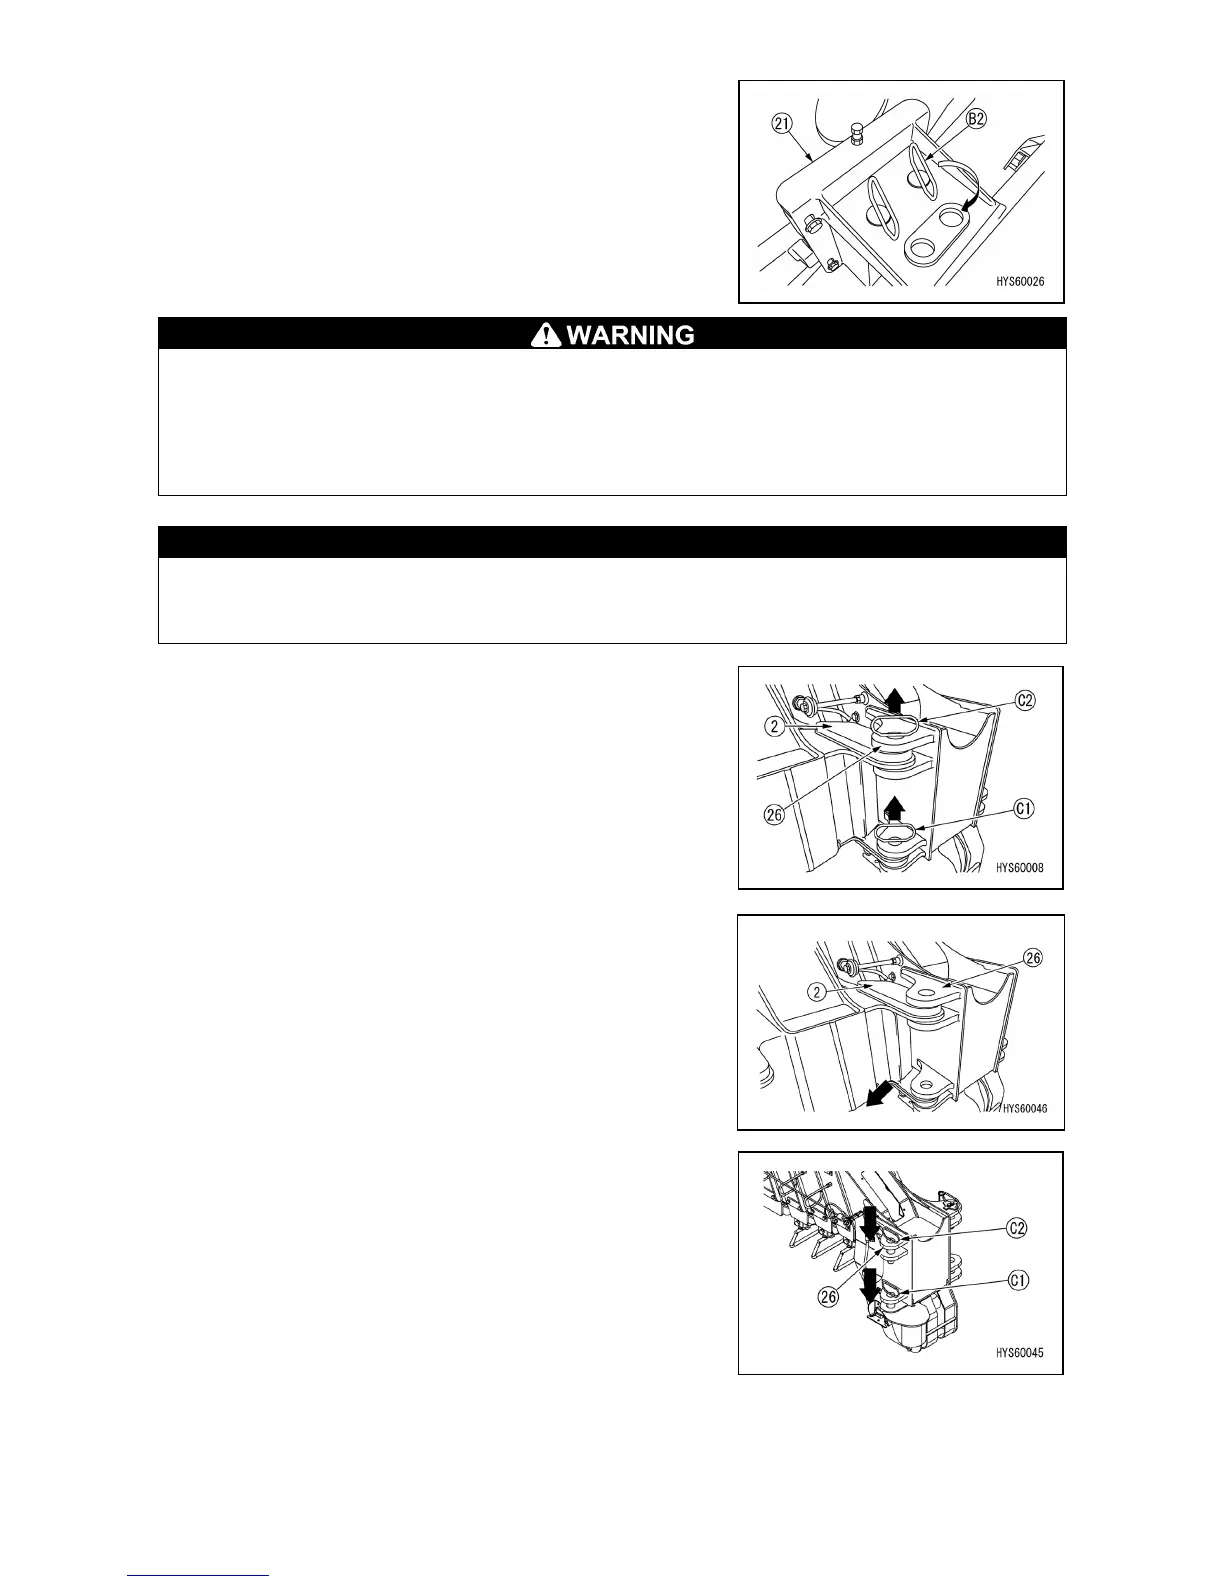
8. When the hole of the No. 1 Fly-jib (2) connection is aligned
with the hole of the Fly-jib stowage bracket A (21), insert the
position pin (B2) into the hole and insert the linchpin. At this
time, be sure to turn over the ring to lock securely.
Do not remove the position pins (C1, C2) from the bracket (26) until the position pin (B2) is
securely inserted into the stowage bracket A (21) hole and the Fly-jib is fixed. Incorrect fitting
order may cause a serious hazard.
• The position pin (B2) must always be inserted downward from the upper side. Otherwise,
where it is inserted upward from the underside, the position pin could easily drop down to
cause the Fly-jib to collapse and may cause a serious hazard.
When the position pins (B2, C1, C2) are fitted in both holes of the bracket (26) on the right side
of the Main boom tip and Fly-jib bracket A (21),
the Main boom telescoping must not be
operated. If operated it will critically damage the Fly-jib and Main boom.
9. Pull the linchpin out from the position pins (C1, C2) placed in
the bracket (26) hole on the right side of the Main boom tip, to
pull out the position pin s (C1, C2).
10. Slide the No. 1 Fly-jib (2) sideways to move it away from
the bracket (26) on the right side of the Main boom tip.
11. Insert the position pins (C1, C2) into the bracket (26) on the
right side of the Main boom tip. At this time, be sure to turn
over the ring of the linchpin to lock securely.
 Loading...


