35
Installation
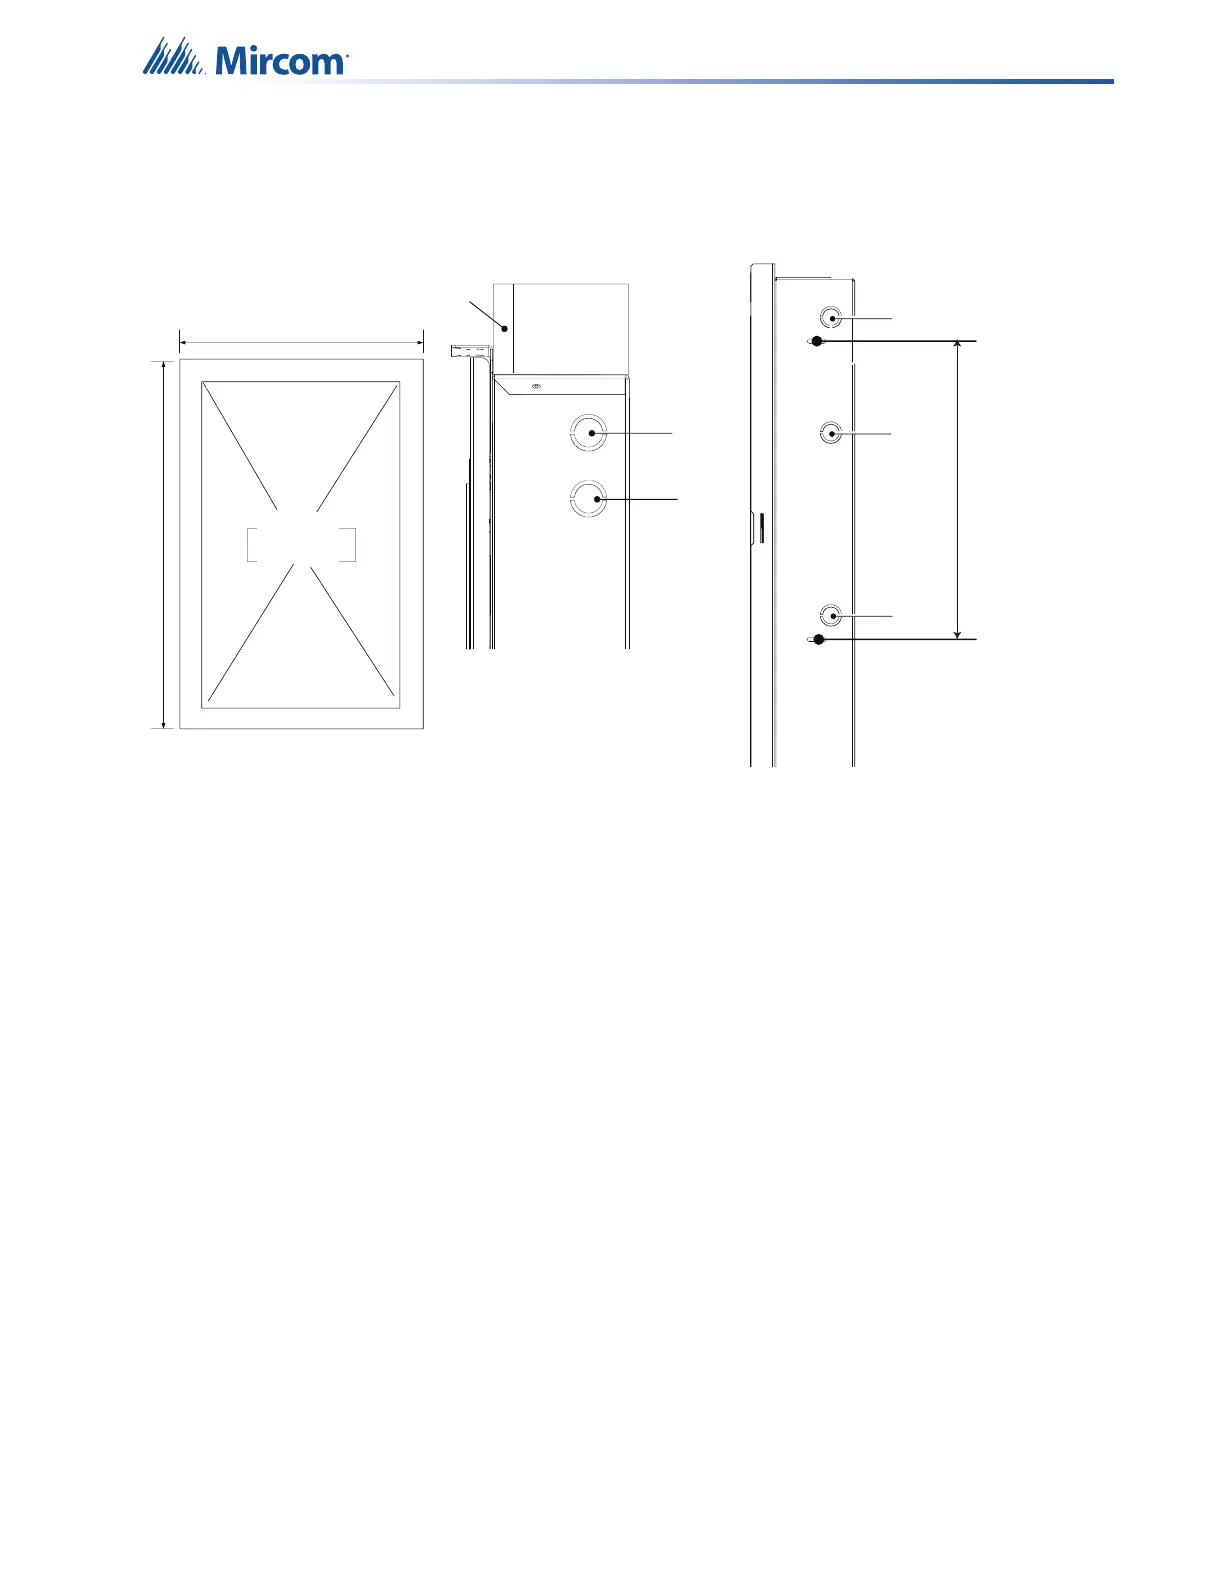
4. Find a suitable mounting location for the QX-mini or QX-mini-BP (next to a wall stud or
supporting structure) and then mark an opening on the wall that matches the dimensions
of the QX-mini backbox.
Figure 7 QX-mini flush mount
5. Cut an opening 0.1” larger than the opening marked in step 4, ensuring that one side is
aligned with the wall stud or supporting structure.
6. Mount the backbox into the wall using two screw knockouts.
Top View
QX-mini Backbox
Flush mount Footprint
Side View
Screw
Knockouts
Screw
Knockouts
Conduit
Knockout
Conduit
Knockout
Conduit
Knockout
Conduit
Knockout
Conduit
Knockout
Wall
Front
Back
Front
Back
15.25”