36
Installation
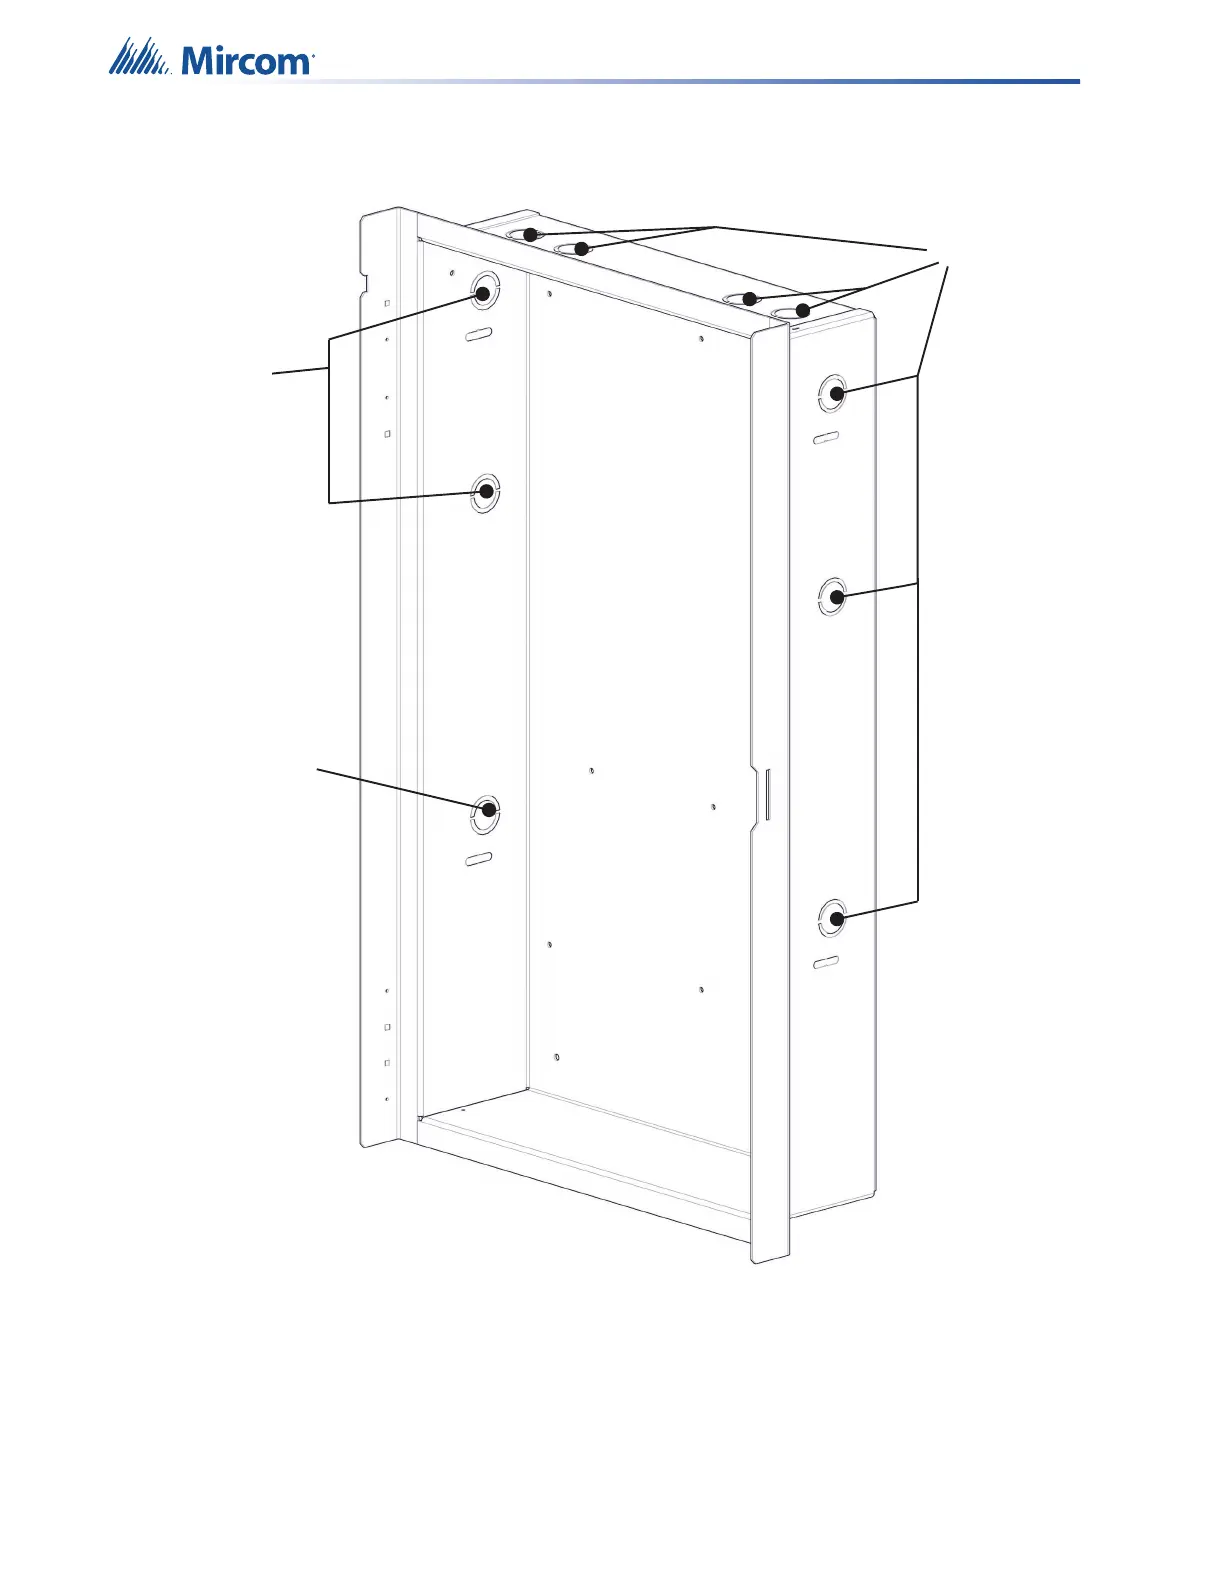
7. Remove necessary knockouts and attach conduit. Reserve knockout on the lower left
side for the dedicated AC Power conduit.
Figure 8 Flush mount conduit
8. Attach the doors to the chassis and then secure the ground straps to the doors using the
wingnuts removed in step 3.
9. Place the backplate on the six mounting bolts and then secure the backplate to the
backbox using the hex nuts removed in step 2.
Knockouts
Dedicated
AC Power
Knockout
and
Conduit
Knockouts