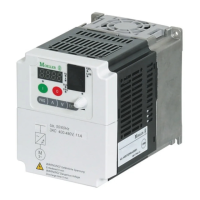
Installation
10/05 AWB8230-1541GB
34
Never unravel the screening or use pigtails to make a connection.
If contactors, maintenance switches, motor protection relays,
motor reactors, filters or terminals are installed in the motor
cabling, interrupt the screen near these components and connect
it to the mounting plate (PES) using a large contact surface
connection. The free, unscreened connecting cables should not be
longer then about 100 mm.
Example: Maintenance switch
In an EMC-compliant control cabinet (metal-enclosed, damped to
about 10 dB), the motor cables do not need to be screened
provided that the frequency inverter and motor cables are spatially
separated from each other and arranged in a separate partition
from the other control system components. The motor cable
screening must then be connected at the control cabinet (PES)
with a large surface area connection.
The control cable and signal (analog setpoint and measured value)
cable screens must be connected only at one cable end. Connect
the screen to ground using low impedance connection to a large
area contact surface. Digital signal cable screens must be
connected at both cable ends, also with large-surface, low-
resistance connections.
Electrical connection
This section describes how to connect the motor and the supply
voltage to the power terminals, and the signal cables to the
control terminals and the signalling relay.
Connecting the power section
To connect the power supply, motor cables and control signal
cables, take off the terminal shroud.
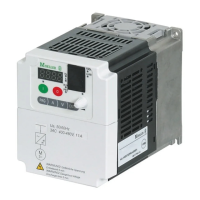
Front cover
The electrical connections of the DF51 are made through plug-in
control signal terminals and combination terminal screws in the
power section, which is normally covered by a terminal shroud.
Figure 32: Inadmissible screen grounding (pigtails)
Figure 33: Maintenance switch, for example T… in an enclosure
a Metal plate, for example MBS-12 (a Installation instructions
AWA1150-2249)
b insulated PE terminal
PES
PES
a
b
Danger!
Carry out the wiring work only after the frequency inverter
has been correctly mounted and secured. Otherwise,
there is a danger of electrical shock or injury.
Danger!
Carry out wiring work only under zero voltage conditions.
Warning!
Use only cables, residual-current circuit-breakers and
contactors with the permissible rating. Otherwise there is
a danger of fire.
Figure 34: Terminal shroud example
a Ue = rated voltage (mains supply voltage) 230 V
50/60 Hz = mains frequency
b 9A = phase current at single-phase connection
c 5.2A = phase current at three-phase connection
d DF51-322-075 = part number
e 3AC = three-phase output voltage in range from zero to mains
supply voltage (Ue) rated current 4 A
f 0.75 kW = assigned motor rating at rated voltage (230 V) or 1 HP
(horse power)
M
Ue, 50/60Hz
1AC 230V, 9A
3AC 230V, 5.2A
DF51-322-075
3AC 0...Ue, 4A
0.75kW (230V)
1HP (230V)
WARNUNG! Gefährliche Spannung
Entladezeit 5 min
WARNING! Dangerous Voltage
Discharge time 5 min
3
a
b
c
d
e
f