10/05 AWB8230-1541GB
Initial starting
51
Initial starting
Observe the following points before you take the frequency
inverter into operation:
• The frequency inverter must be installed vertically on a non-
flammable surface (for example a metal surface).
• Remove any residue from wiring operations – such as pieces of
wire – and all tools from the vicinity of the frequency inverter.
• Ensure that all terminal screws have been tightened sufficiently.
• Make sure that the cables connected to the output terminals are
not short-circuited or connected to earth.
• Make sure that the power lines L1 and N or L1, L2 and L3 and
the frequency inverter outputs U, V and W are connected
correctly.
• The earth terminal must be connected correctly.
• Only the terminals marked as earthing terminals must be
earthed.
• The control lines must be connected correctly.
• Make sure that the frequency inverter and the motor are correct
for the mains voltage.
• Check the position of the microswitches.
• Never operate the frequency inverter with opened power
section covers (without fitted terminal shroud).
• The configured maximum frequency must match the maximum
operating frequency of the connected motor.
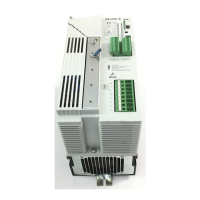
Table 13: Function of the microswitches
By default, the parameters of the DF51 frequency inverters are
configured to fulfill the following requirements:
• Motor ratings: voltage, current and frequency of a normal,
surface-cooled, four-pole three-phase asynchronous motor.
• Maximum speed: 1500 r.p.m. at 50 Hz (DF51-320: 1800 r.p.m.
at 60 Hz).
• Acceleration and deceleration time = 10 seconds.
For settings for more complex applications, see the parameter list
(page 217).
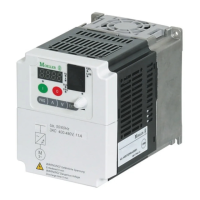
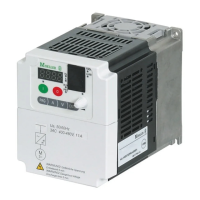
The basic versions of the DF51 frequency inverters contain an
operating state LED.
Caution!
Do not carry out h.v. tests as this could destroy the built-
in overvoltage filters fitted between the mains voltage
terminals and earth. which could be destroyed.
h
Sparkover voltage and insulation resistance tests (megger
tests) have been carried out by the manufacturer.
Figure 51: Default settings of microswitches
Switch
Function Description, default setting DS
SR/SK SR SR = source, positive switching logic. Activate by applying control voltage (+24 V) SR
485/OPE
OPE OPE = operator keypad
(Optional: DEX-KEY-6…, DEX-KEY-10)
OPE
TM/PRG
PRG PRG = program
In this switch position, the control signal and reference value sources set with PNU A001 (A201) and
A002 (A202) are taken into account. In the default configuration, these are input values at the
control signal terminals.
In switch position TM (= control terminals) only control and reference value input signals are
accepted through the control signal terminals, regardless of the value of PNU A001 and A002.
PRG
SR
SK
485
OPE
TM
PRG
I
O
K12 K14 K11
AM
H
O
OI
L
L 5
4 3 2 1
P24
CM2
12 11