10/05 AWB8230-1541GB
Keypad DEX-KEY-10
201
Keypad DEX-KEY-10
The optional keypad DEX-KEY-10 provide access to all inverter
parameters and therefore allows user-specific adjustment of the
settings of frequency inverters DF5, DF51, DV5, DV51, DF6 and
DV6.
LEDs and a backlit LCD indicate the operating status, operational
data and parameter values. With the pushbuttons, you can change
the parameter values and control frequency inverter operation
(Start/Stop).
Connecting LCD keypad to DF51
The keypad allows a remote parameter programming and
operation of the DF51 frequency inverters.
To connect frequency inverter DF51 and keypad, use a
prefabricated connection cable (DEX-CBL-…).
Configuring keypad DEX-KEY-10
Before you configure the keypad, make sure that it is correctly
connected to the frequency inverter or speed control unit, which,
in turn, is connected to its power supply.
X Press and hold the RMT and PRG keys and switch on the
keypad’s power supply.
If the keypad is connected to a frequency inverter, the POWER LED
lights up; if it is connected to a speed control unit, the UV LED
lights up.
h
The DEX-KEY-10… keypads are not included with the
frequency inverter.
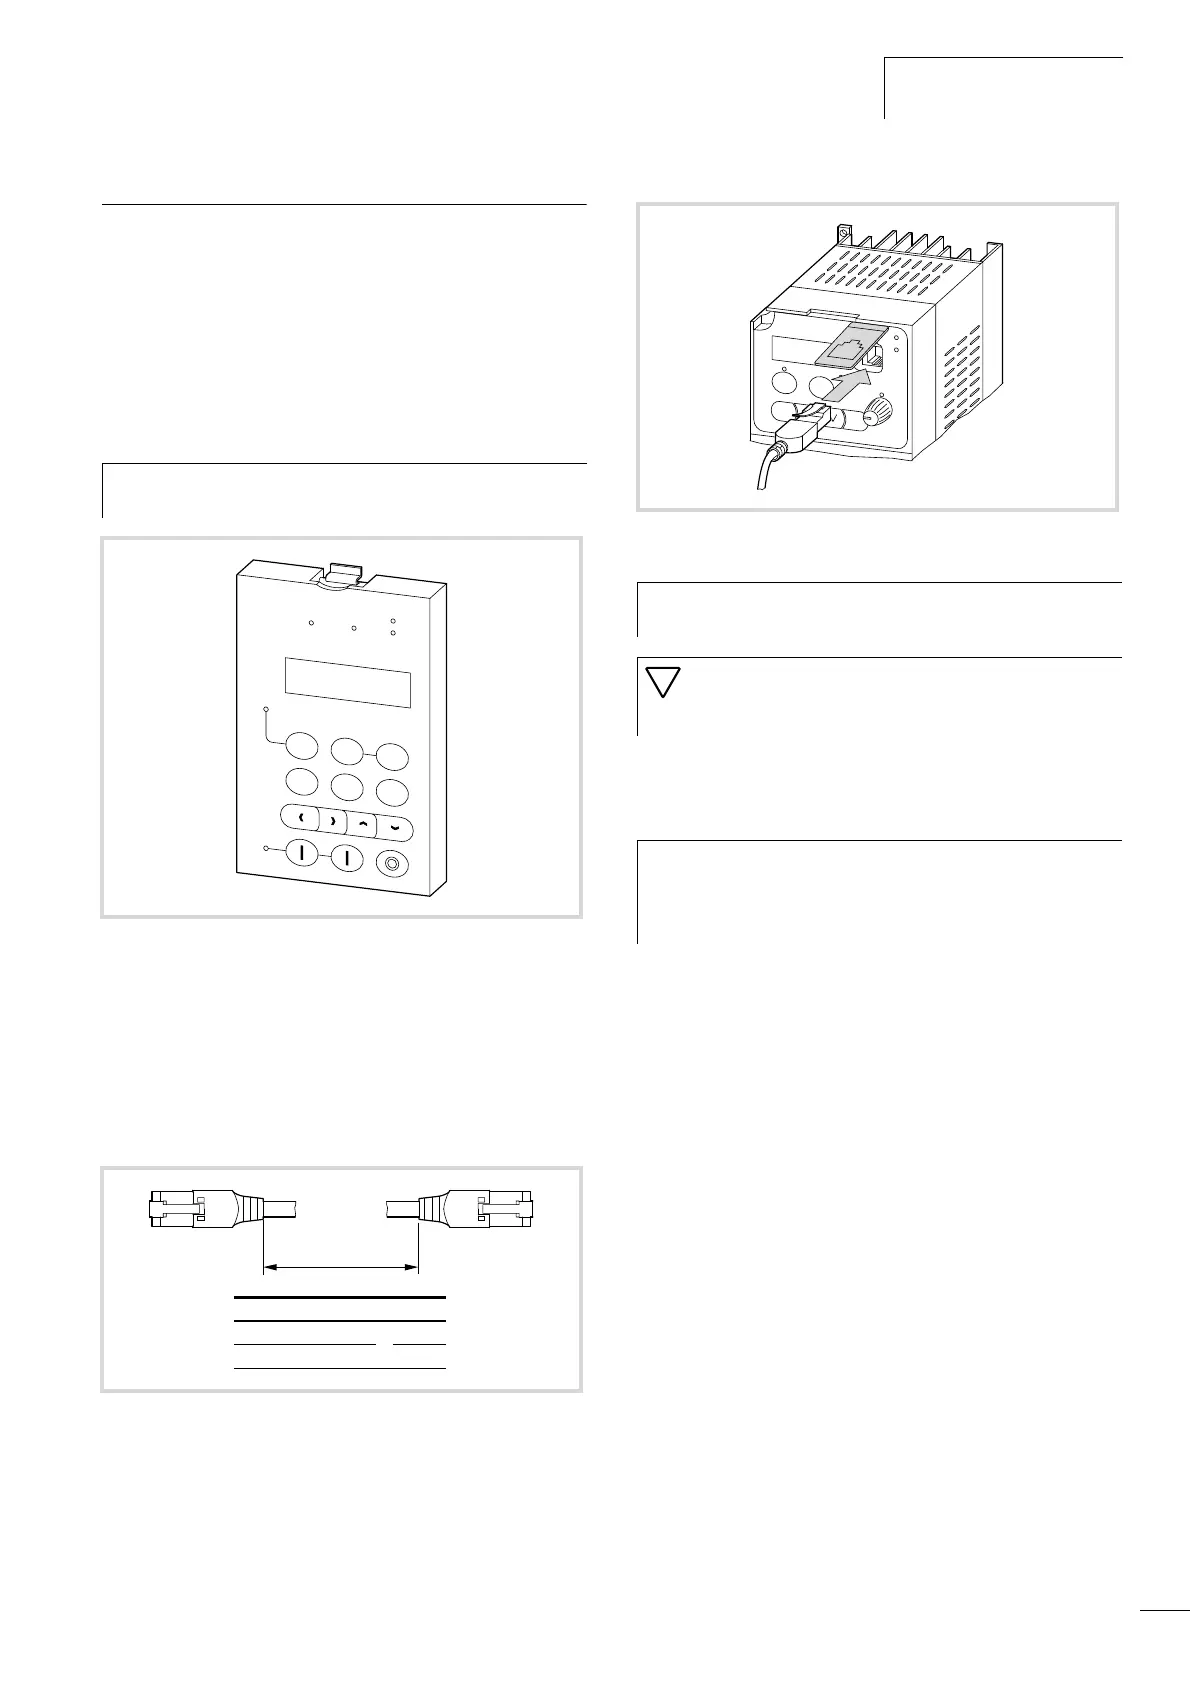
Figure 176:Keypad DEX-KEY-10
Figure 177:DEX-CBL-...-ICS connection cables
RMT
ALARM
FWD
REV
PRG
POWER
RUN
READ
COPY
MNT
PRG
ENTER
l
l
DEX-CBL-1M0-ICS 1 m
DEX-CBL-3M0-ICS 3 m
Figure 178:Connecting keypad DEX-KEY-10… with DF51
h
You do not need any tools to connect the optional
keypad.
Caution!
Connect the keypad and the connection cable only in a
voltage-free state and do not use force.
h
By default, keypad DEX-KEY-10 is configured for use with
frequency inverters DF51, DF6, DV51 and DV6. For the
DF5, DV5 and RA-SP devices and for use with several
different device series, the keypad must be reconfigured.
A
RUN
PRG
Hz
PRG
EN
TER
I
O
POW
ER
ALARM