66 Setup 1: User Type
Standard or Custom Adjustment Methods
1. Print a confirm pattern and check it for printing errors.
2. Print “Rough pattern” and look for a place that is properly adjusted in the printing results of print head 1.
•If you selected “Adjust Print 2: Custom”, select “ALL” or “A” to “F”.
•The number printed under the pattern without alignment errors is the adjustment value.
3. Enter the adjustment values.
4. Follow the same procedure to adjust print head 2 (XPJ-1682SR Only).
5. Print “Fine pattern” and look for a place that is properly adjusted in the printing results of print head 1.
•If you selected “Adjust Print 2: Custom”, select “ALL” or “A” to “F”.
•The number printed under the pattern without alignment errors is the adjustment value.
6. Enter the adjustment values.
7. Follow the same procedure to adjust print head 2 (XPJ-1682SR Only).
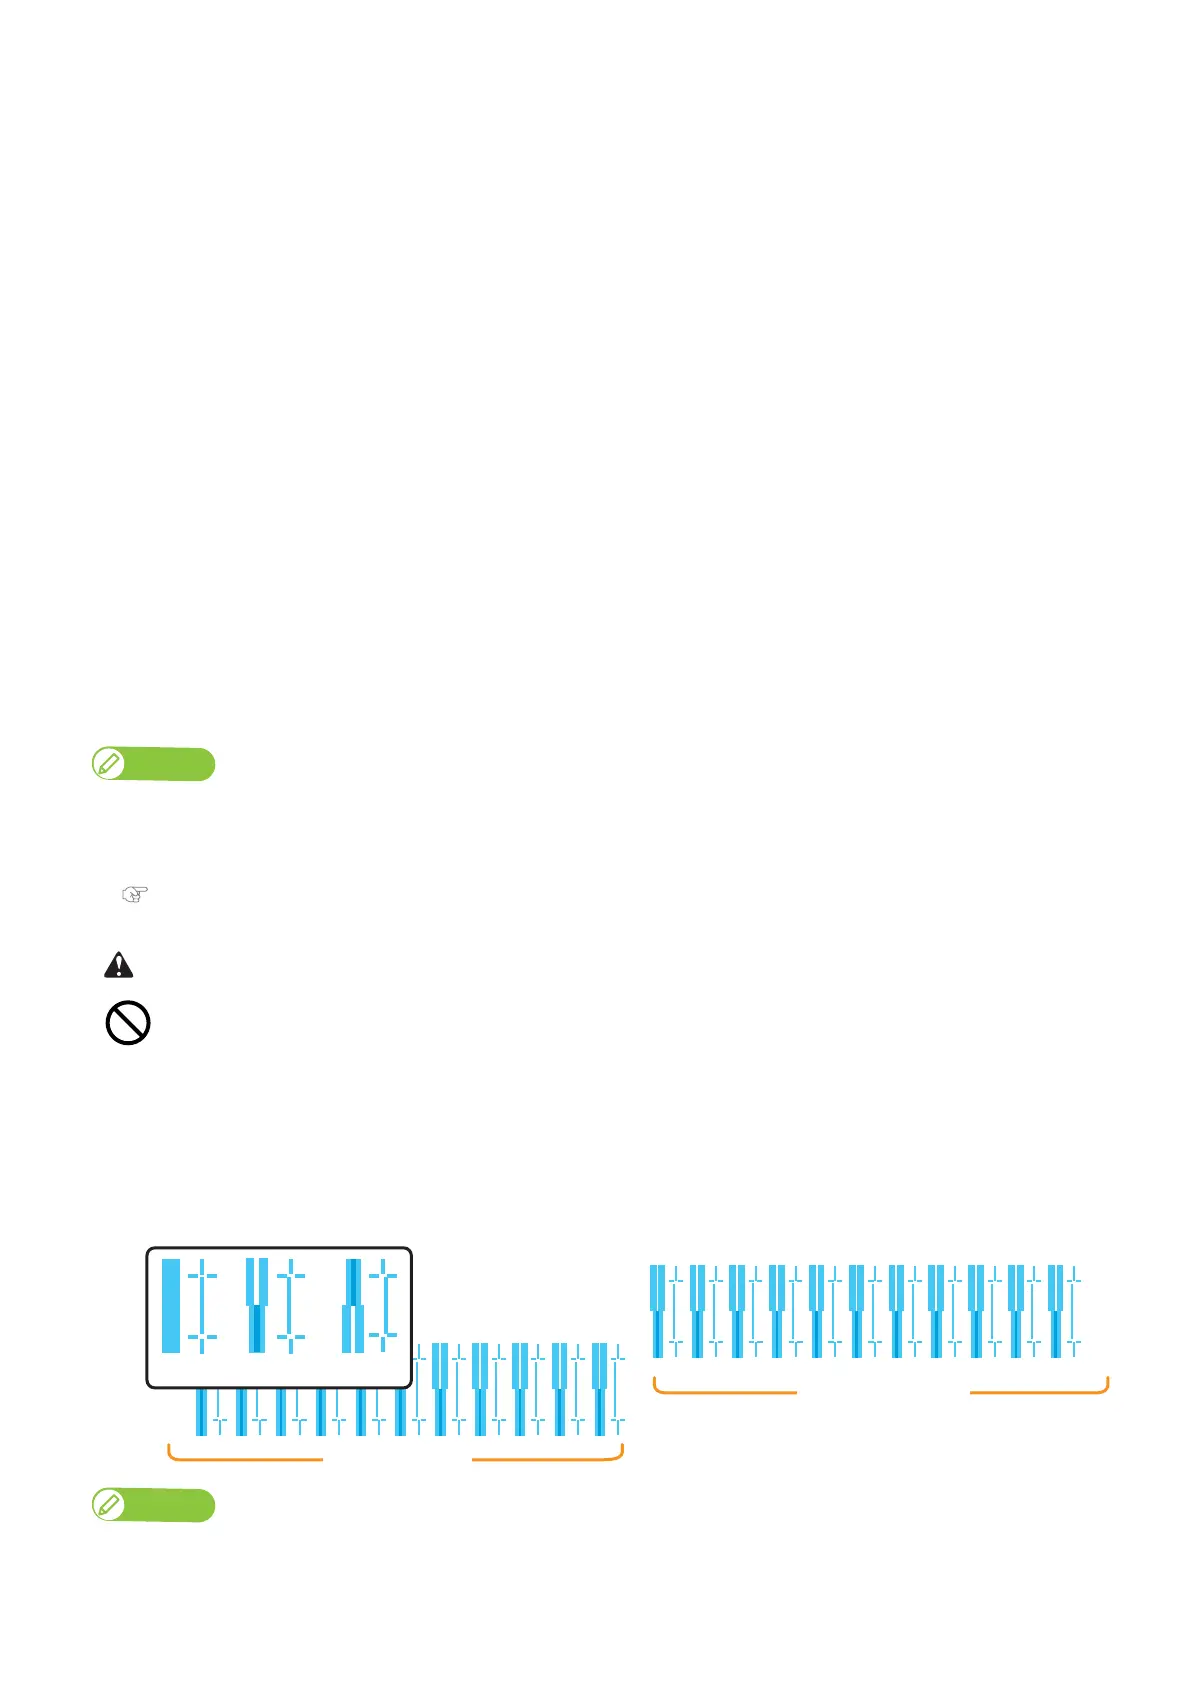
Confirm pattern
• Press the [Enter] key to carry out printing.
• Check the printing results. If there are shifting problems, proceed to rough adjustment pattern printing.
• In the picture below, there are misalignments.
Note
• Warm up the heater before printing the Confirm and Adjustment patterns.
“Skip Heater Warm Up? No” is displayed on the front panel.
• You can start printing while the printer is warming up.
"Starting printing during warming up" P. 45
While “Warming Up” is displayed, do not touch Media guide.
You could burn yourself.
Because XPJ-1682SR has 2 Print heads, 2 rows of confirmation pattern will be printed.
・・・
・・・
Print Head 2
Print Head 1
Good Not good Not good