Setup 1: User Type 67
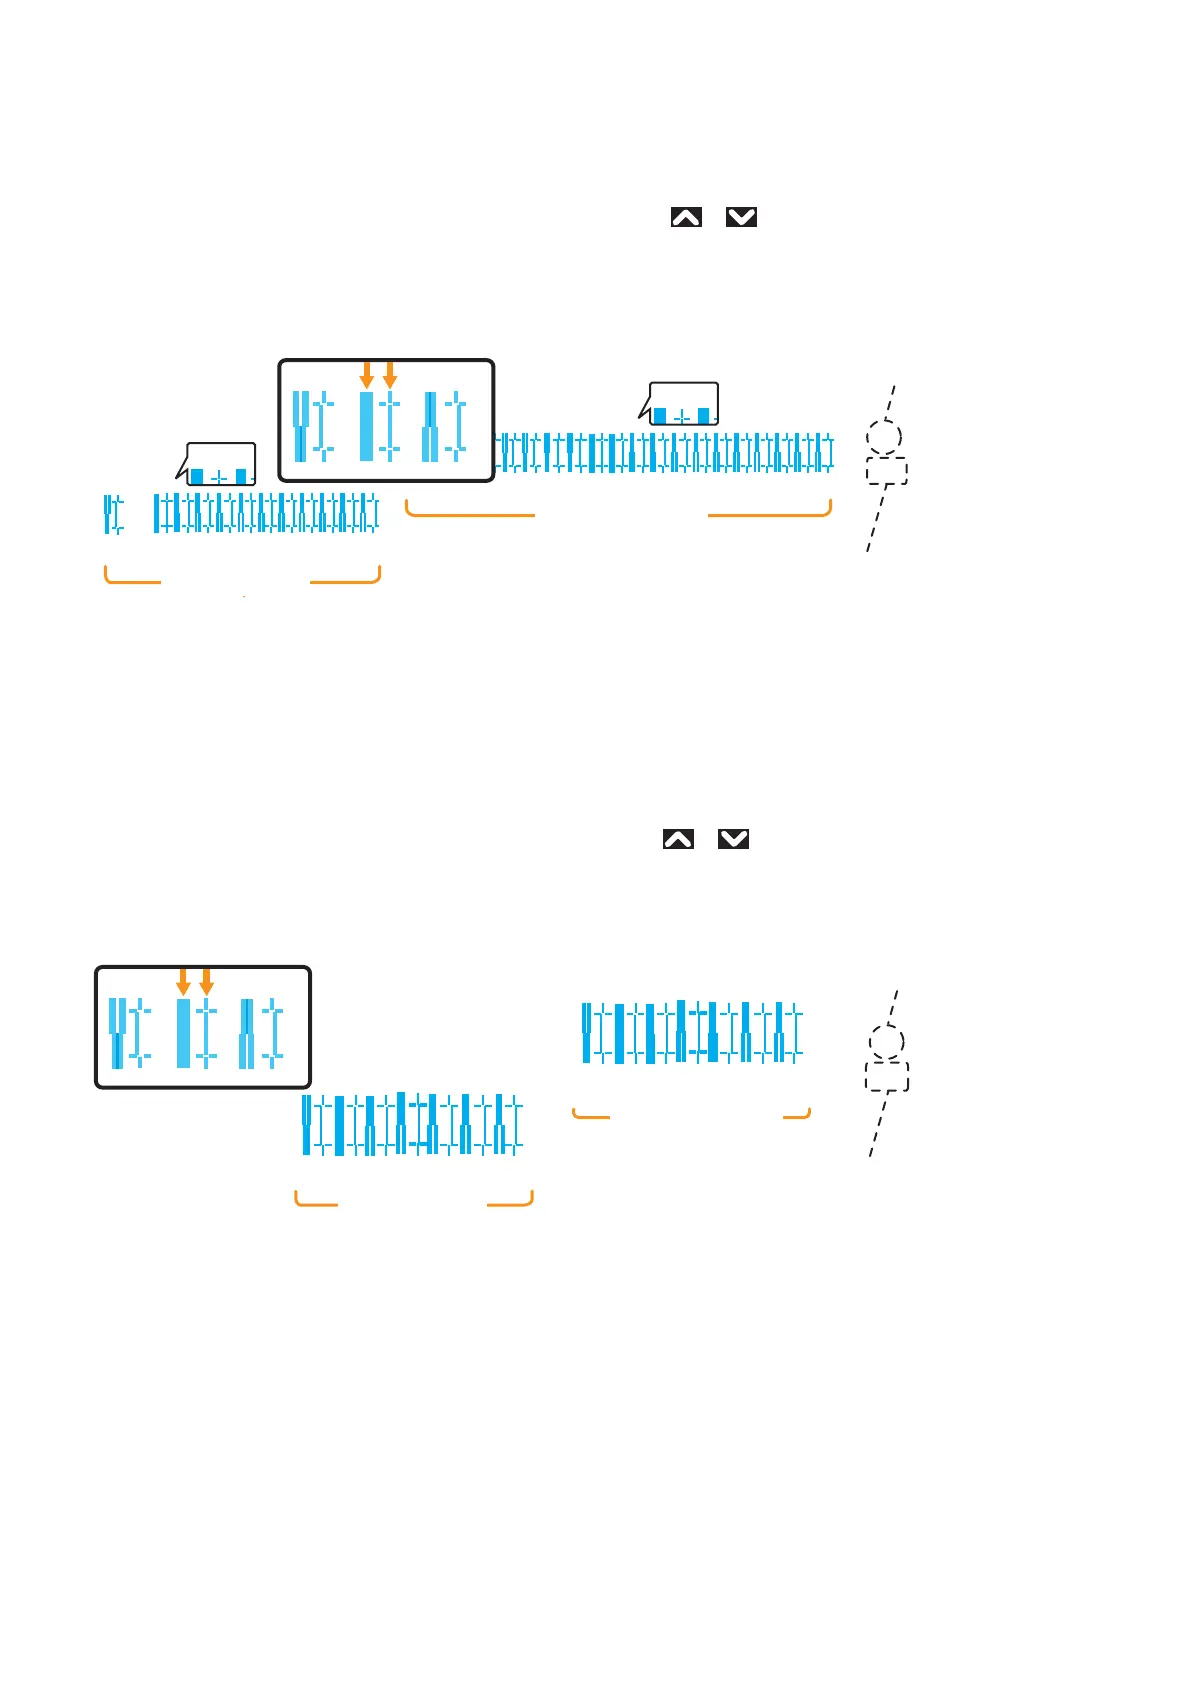
Rough adjustment pattern
• Tap [Enter] to carry out printing.
• For Head 1, check the print results and select the number that looks most aligned between 1 and 21.
• Pattern names such as “Pattern B1: 11” are shown on the display. Use
or to enter the number of the best-adjusted
pattern, and tap [Enter].
• In the case of the picture below, enter “12”, so that the display reads “Pattern B1: 12”.
Follow the same procedure to adjust print head 2 (XPJ-1682SR Only).
Fine adjustment pattern
• Tap [Enter] to carry out printing. For the Fine pattern, the same patterns will be printed repeatedly on both sides and center
of the media.
• For Head 1, check the print results on both sides and center of the media and select the number that looks most aligned
between 1 and 7.
• Pattern names such as “Pattern B1: 4” are shown on the display. Use
or to enter the number of the best-adjusted
pattern, and tap [Enter].
• In the case of the picture below, enter “6”, so that the display reads “Pattern B1: 6”.
Follow the same procedure to adjust print head 2 (XPJ-1682SR Only).
1234567891011
2
・・・
123456789101112131415161718192021
1
21
1
2
111213
B
Q3/Q4
G1/G2
Current Print Mode
(If you carried out the adjustment with Custom settings, the
head height and the printing information will also be printed.)
Print Head 2
Print Head 1
Pattern Name
567
1
1234
567
2
1234
B
567
Q3/Q4
G1/G2
(If you carried out the adjustment with Custom settings, the
head height and the printing information will also be printed.)
Print Head 2
Print Head 1
Pattern Name
Current Print Mode