Chapter 7 Assembly of the Devices
136
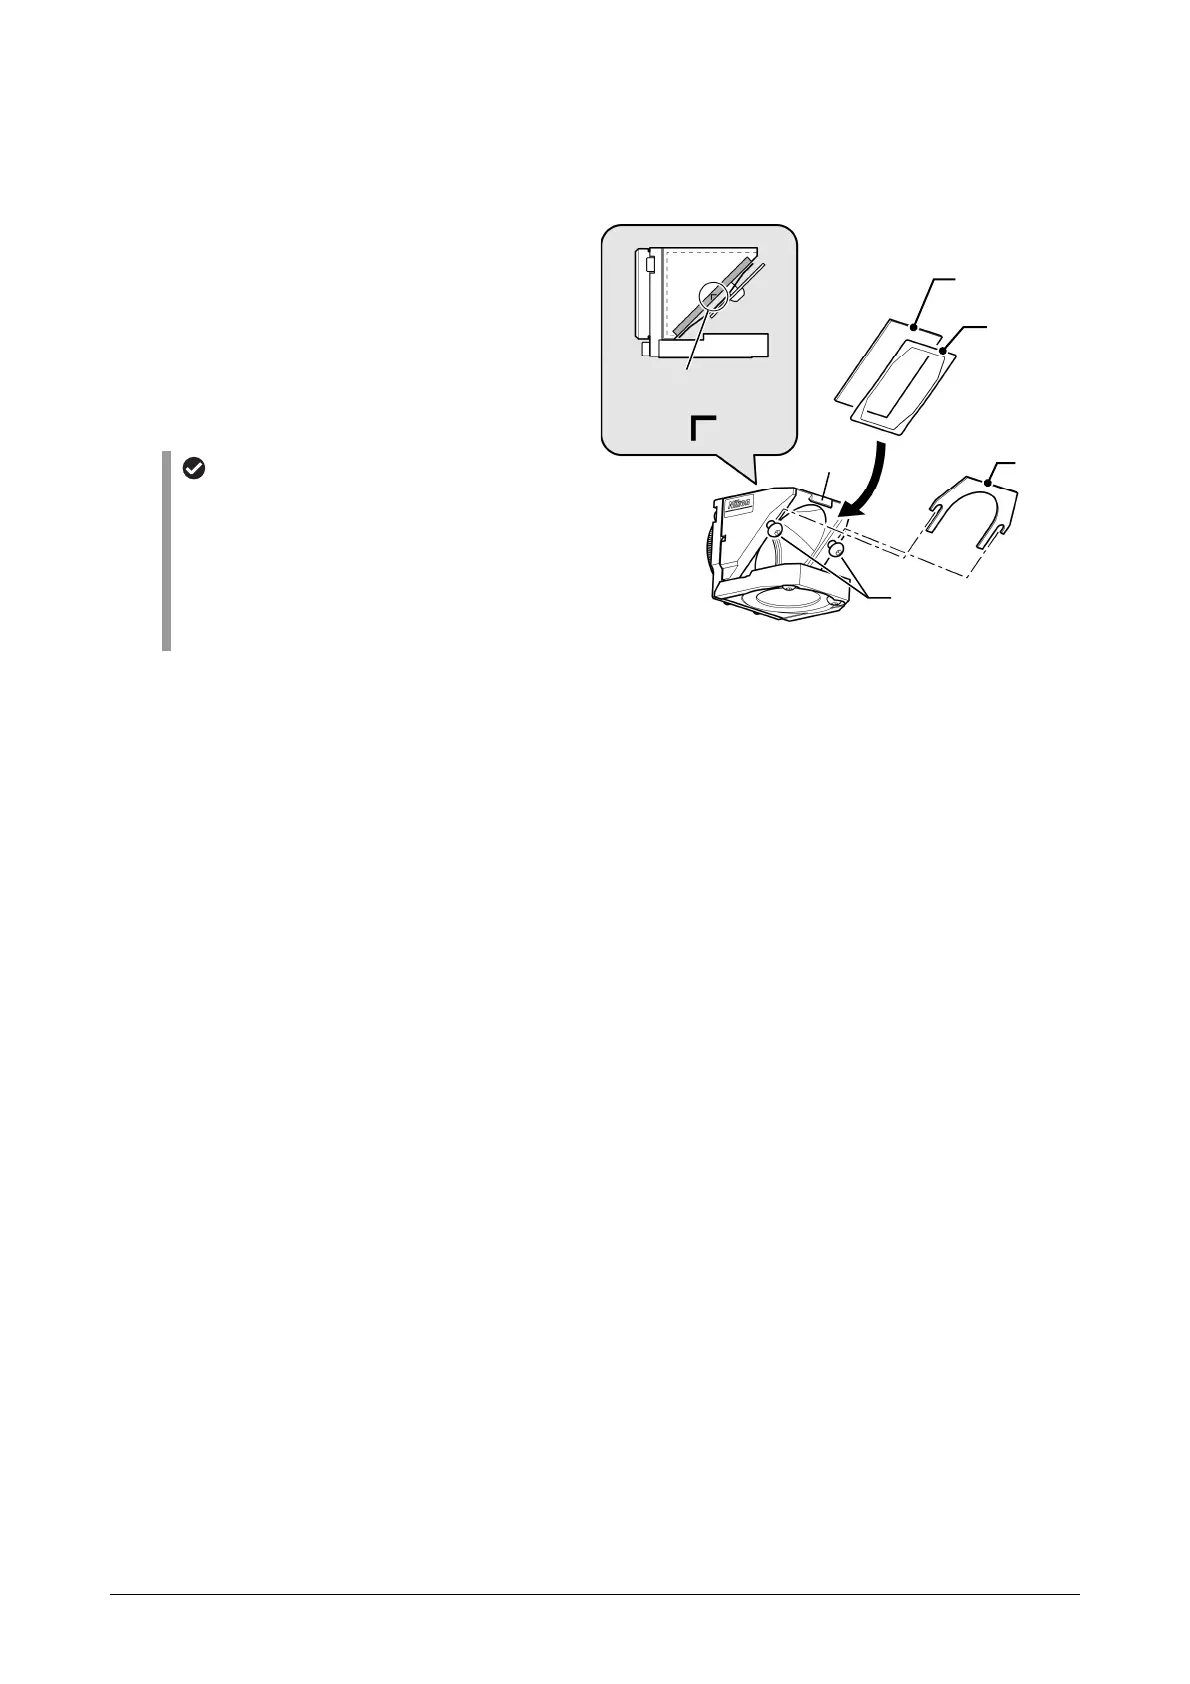
Dichroic mirror attachment
Attach the dichroic mirror to the inclined plane of the filter cube. (Tool: 2 mm hexagonal screwdriver, supplied
with the microscope main body)
1. Loosen the two fixing screws to remove the
fixing plate.
2. Remove the flat spring.
3. Attach the dichroic mirror to the filter cube in
a correct direction.
Align the mirror with the protrusion on the filter
cube.
Attachment direction of the dichroic
mirror
To identify the reflection face, a caret-shape
arrow is marked on the side of the dichroic
mirror.
Attach the mirror so that the caret-shape arrow
points the mirror seating surface (opposite side
of the flat spring.)
4. Attach the flat spring so that it holds both
ends of the dichroic mirror.
Align the flat spring with the protrusion on the
filter cube.
5. Put the fixing plate back to the original
position, and tighten the two fixing screws to
fix the plate.
Attaching the dichroic mirror
* When attaching a non-Nikon dichroic mirror, ask the manufacturer the attaching direction in advance.
Fixing
plate
Flat spring
Dichroic mirro
Orientation of the
caret-shape arrow on
the mirro
Protrusion
Fixing screws
(x 2)