Chapter 7 Assembly of the Devices
145
7.8.3 Attaching a Fixed Filter for Dia-illumination
Desired filters can be attached to the optical path cover for dia-illumination. (Tool: 2 mm hexagonal screwdriver,
supplied with the microscope main body)
Handling of the optical components
Do not touch the surface of optical components such as the filter with bare hands.
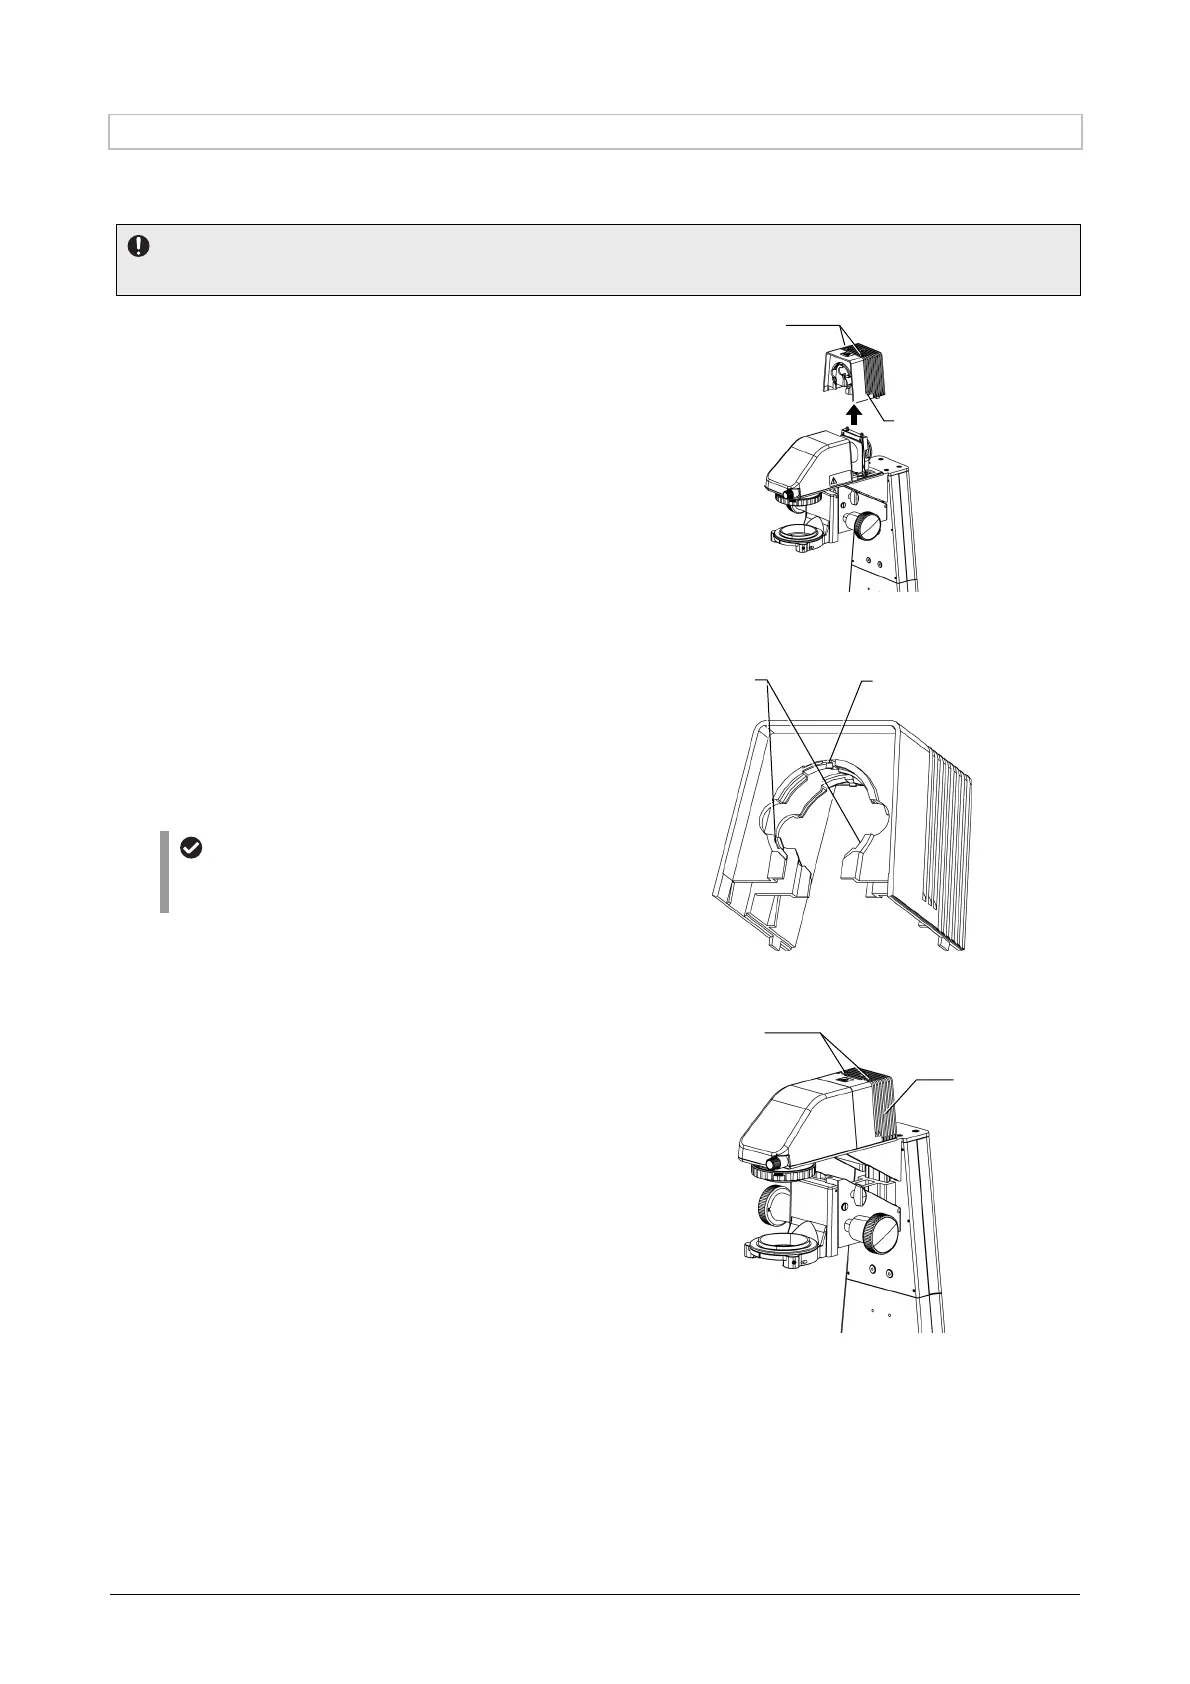
1. Insert a hexagonal screwdriver into the hole
on the top of the illumination pillar, and
remove the optical path cover by loosening
the two M3 hex socket head cap screws.
Removing the optical path cover
2. Attach required filers inside the optical path
cover.
Two filters can be attached.
The filter mounting hole inside the optical path
cover has three stoppers to keep the filter from
falling.
Combining with the LED lamphouse
Attach the ND filter (ND32) supplied with the
LED lamphouse.
Attaching a filter
3. Return the optical path cover to the original
position, and affix the cover by tightening
the two M3 hex socket head cap screws on
the top of the optical path cover.
Attaching an optical path cover
Optical path
cover
Pinch this stoppe
.
Hex socket head
cap screws (M3, x 2)
Remove the optical path
cover.
Hex socket head cap
screws (M3, x 2)
Stoppers to keep the
filter from falling