Table of Contents
VIII
P/N 7105144G
2008 Nordson Corporation
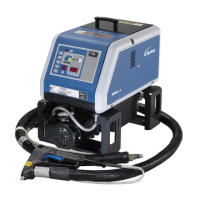
VersaBlue_NW
Troubleshooting (contd.)
Troubleshooting Tables 6-14. . . . . . . . . . . . . . . . . . . . . . . . . . . . . . . . . . .
Melter not Functioning 6-14. . . . . . . . . . . . . . . . . . . . . . . . . . . . . . . . .
One Channel does not Heat 6-14. . . . . . . . . . . . . . . . . . . . . . . . . . . . .
Control panel does not function 6-15. . . . . . . . . . . . . . . . . . . . . . . . . .
No Material (Motor does not Rotate) 6-16. . . . . . . . . . . . . . . . . . . . .
No Line Speed Signal (Voltage / Current / Frequency) 6-17. . . . . .
No Material (Motor Rotating) 6-18. . . . . . . . . . . . . . . . . . . . . . . . . . . .
Too Little Material or Irregular Feeding 6-18. . . . . . . . . . . . . . . . . . . .
Material Pressure too High 6-19. . . . . . . . . . . . . . . . . . . . . . . . . . . . . .
Material Pressure too Low 6-19. . . . . . . . . . . . . . . . . . . . . . . . . . . . . .
Incorrect Motor Rotation in Key-to-line Mode 6-19. . . . . . . . . . . . . .
Material Residue in Tank 6-20. . . . . . . . . . . . . . . . . . . . . . . . . . . . . . .
Material Hardens in Tank 6-20. . . . . . . . . . . . . . . . . . . . . . . . . . . . . . .
Filling Valve (Option) 6-21. . . . . . . . . . . . . . . . . . . . . . . . . . . . . . . . . . .
Others 6-21. . . . . . . . . . . . . . . . . . . . . . . . . . . . . . . . . . . . . . . . . . . . . . .
I/O Board 6-23. . . . . . . . . . . . . . . . . . . . . . . . . . . . . . . . . . . . . . . . . . . . .
Frequency Input 6-23. . . . . . . . . . . . . . . . . . . . . . . . . . . . . . . . . . . .
Analog Inputs 6-23. . . . . . . . . . . . . . . . . . . . . . . . . . . . . . . . . . . . . . .
Digital Inputs/Outputs (LEDs) 6-23. . . . . . . . . . . . . . . . . . . . . . . . .
I/O Board #1: Digital Inputs (24 VDC) 6-24. . . . . . . . . . . . . . . . . .
I/O Board #1: Digital Outputs (30 V, 2 A) 6-24. . . . . . . . . . . . . . .
I/O Board #2: Digital Inputs (24 VDC) 6-25. . . . . . . . . . . . . . . . . .
I/O Board #2: Digital Outputs (30 V, 2 A) 6-25. . . . . . . . . . . . . . .
LEDs of Temperature Control Board 6-26. . . . . . . . . . . . . . . . . . . . . .
LEDs of Motor Controller 6-27. . . . . . . . . . . . . . . . . . . . . . . . . . . . . . .
LED of Overflow Protection Evaluator 6-27. . . . . . . . . . . . . . . . . . . .
LED of Proportional Valve 6-27. . . . . . . . . . . . . . . . . . . . . . . . . . . . . .
LED’s of 5-point Sensor Evaluator 6-28. . . . . . . . . . . . . . . . . . . . . . .
LEDs of IPC 6-29. . . . . . . . . . . . . . . . . . . . . . . . . . . . . . . . . . . . . . . . . .
Checking Transmitted Field Bus Data 6-30. . . . . . . . . . . . . . . . . . . . . . .
Repair 7-1. . . . . . . . . . . . . . . . . . . . . . . . . . . . . . . . . . . . . . . . . . . . . . . . .
Risk of Burns 7-1. . . . . . . . . . . . . . . . . . . . . . . . . . . . . . . . . . . . . . . . . . . .
Observe Before Performing Repairs 7-1. . . . . . . . . . . . . . . . . . . . . . . .
Relieving Pressure 7-1. . . . . . . . . . . . . . . . . . . . . . . . . . . . . . . . . . . . . . .
Control Panel 7-2. . . . . . . . . . . . . . . . . . . . . . . . . . . . . . . . . . . . . . . . . . . .
Detaching Control Panel 7-2. . . . . . . . . . . . . . . . . . . . . . . . . . . . . . . .
Replacing Memory Board 7-3. . . . . . . . . . . . . . . . . . . . . . . . . . . . . . .
Installing/Replacing the Communication Assembly 7-4. . . . . . . . .
Please Observe! 7-4. . . . . . . . . . . . . . . . . . . . . . . . . . . . . . . . . . . .
Replacing Motor Controller 7-5. . . . . . . . . . . . . . . . . . . . . . . . . . . . . . . .
Replacing CAN Module of Motor Controller 7-5. . . . . . . . . . . . . . . .
CAN Bus Terminating Resistor 7-6. . . . . . . . . . . . . . . . . . . . . . . .
On the Control Panel: Allocating Replaced
Motor Controllers (MC) to their Motors 7-6. . . . . . . . . . . . . . . . . . . .
Replacing Pressure Sensor 7-8. . . . . . . . . . . . . . . . . . . . . . . . . . . . . . .
CAN Bus Terminating Resistor 7-8. . . . . . . . . . . . . . . . . . . . . . . . . .
Procedure 7-8. . . . . . . . . . . . . . . . . . . . . . . . . . . . . . . . . . . . . . . . . . . .
Replacing Gear Pump 7-9. . . . . . . . . . . . . . . . . . . . . . . . . . . . . . . . . . . .
Tank Isolation Valve 7-9. . . . . . . . . . . . . . . . . . . . . . . . . . . . . . . . . . . .
Detaching Gear Pump 7-9. . . . . . . . . . . . . . . . . . . . . . . . . . . . . . . . .
Attaching Gear Pump 7-10
. . . . . . . . . . . . . . . . . . . . . . . . . . . . . . . . . .
Important Regarding Coupling 7-11. . . . . . . . . . . . . . . . . . . . . . . .
 Loading...