- 27 -
2. Print
5
Select [Multi Purpose Tray] from [Source].
6
Select [Landscape] from [Orientation].
7
Change other settings if necessary, and then click [OK].
8
Click [Print] on the [Print] screen.
9
Open the output tray and remove the fuser unit, and then remove the envelope
lever.
For details, see "Removing the Envelope Lever".
For Windows PS Printer Driver
1
Open the file to print.
2
Select [Print] from the [File] menu.
3
Click [Preferences].
4
Click [Advanced] on the [Layout] tab and select the envelope size from [Paper
Size].
5
Click [OK].
6
Select [Landscape] from [Orientation] on the [Layout] tab.
7
Select [Multi-Purpose Tray] from [Paper Source] on the [Paper/Quality] tab.
8
Change other settings if necessary, and then click [OK].
9
Click [Print] on the [Print] screen.
10
Open the output tray and remove the fuser unit, and then remove the envelope
lever.
For details, see "Removing the Envelope Lever".
For Mac OS X
1
Open the file to print.
2
Select [Print] from the [File] menu.
3
Select the envelope size from [Paper Size] and select the orientation from
[Orientation].
4
Select [Multi-Purpose Tray] for [All Pages From] on the [Paper Feed] panel.
5
Change other settings if necessary, and then click [Print].
6
Open the output tray and remove the fuser unit, and then remove the envelope
lever.
For details, see "Removing the Envelope Lever".
If setting details are not displayed in the print dialog, click [Show Details] at the bottom of the dialog.
Removing the Envelope Lever
When all the envelopes are printed, remove the envelope lever from the fuser unit.
1
Remove the fuser unit from the machine.
For details, see "Replacing the Fuser Unit".
2
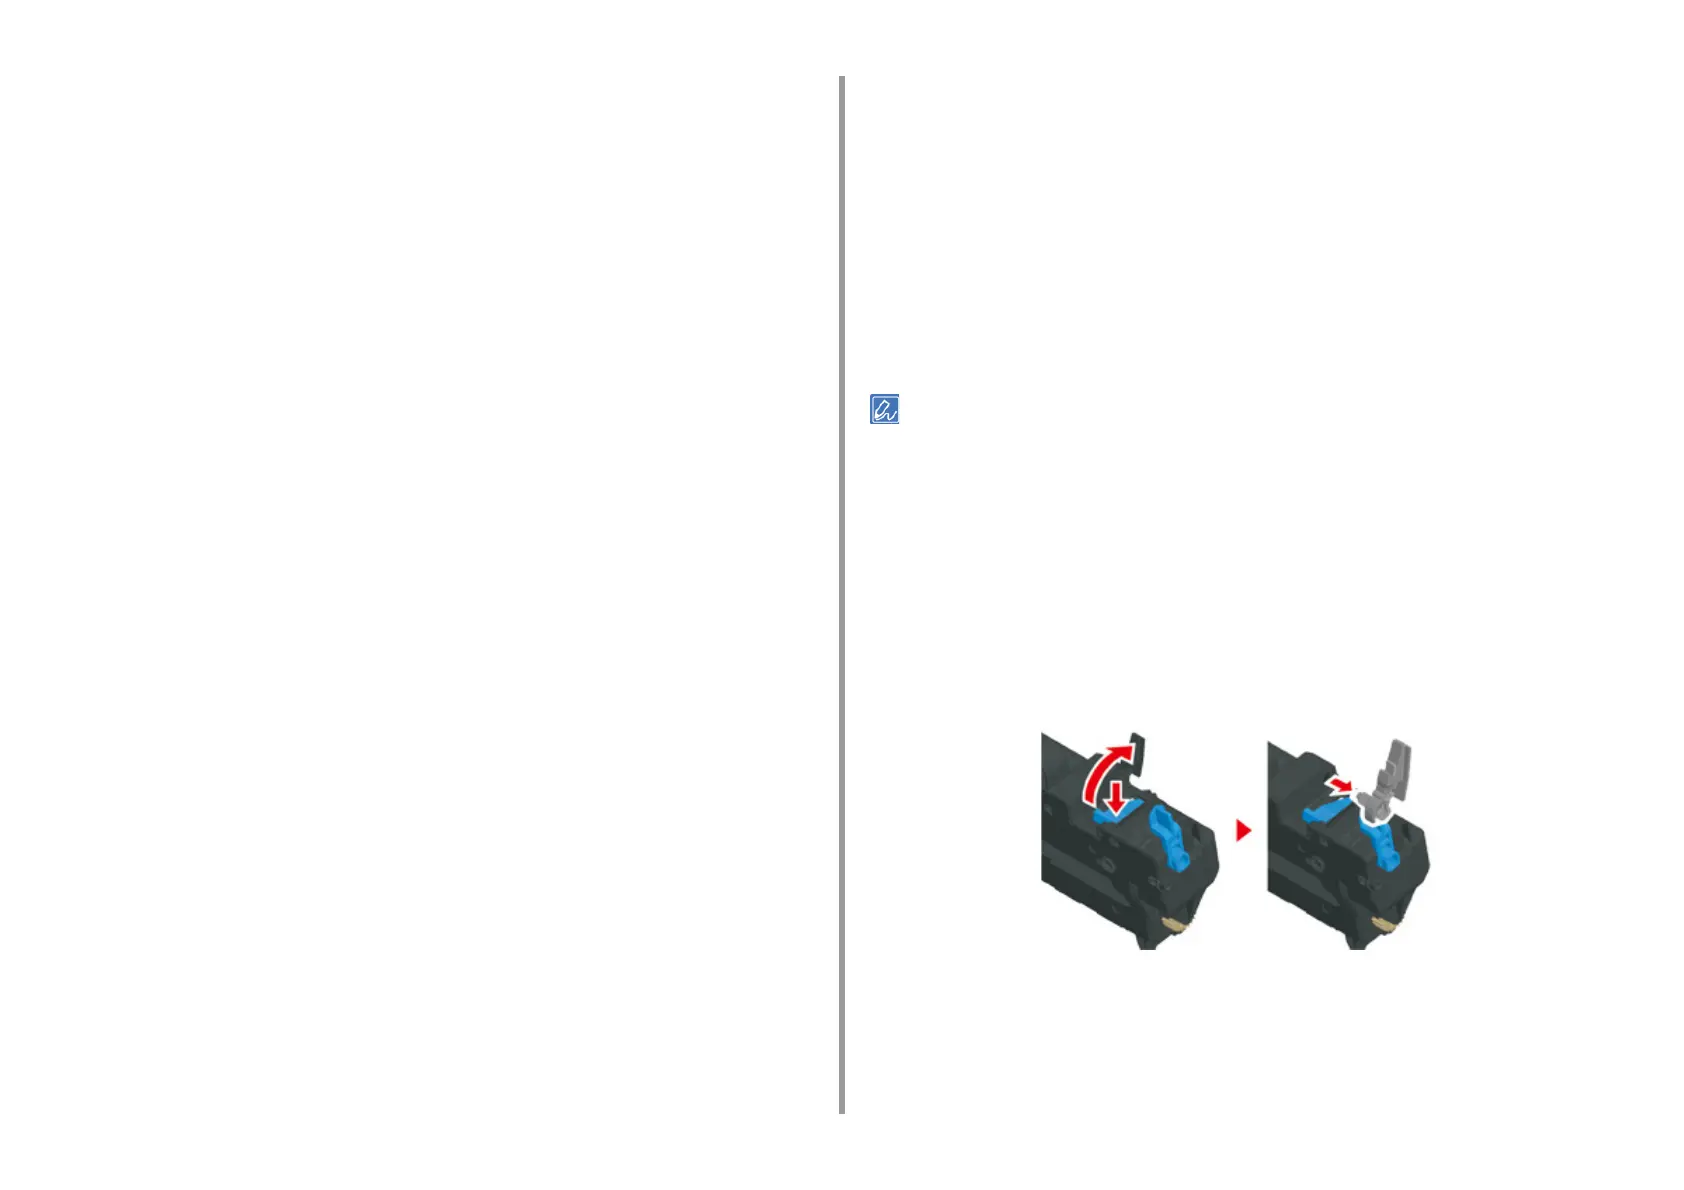
Press the jam release lever and lift the envelope lever, and then remove it.
3
Replace the fuser unit to the machine.
For details, see "Replacing the Fuser Unit".
4
Attach the envelope lever to the MP tray.