121
8. Maintenance
Be careful not to over-loosen any bolts and not to overtighten them.
Only adjust one stand at a time.
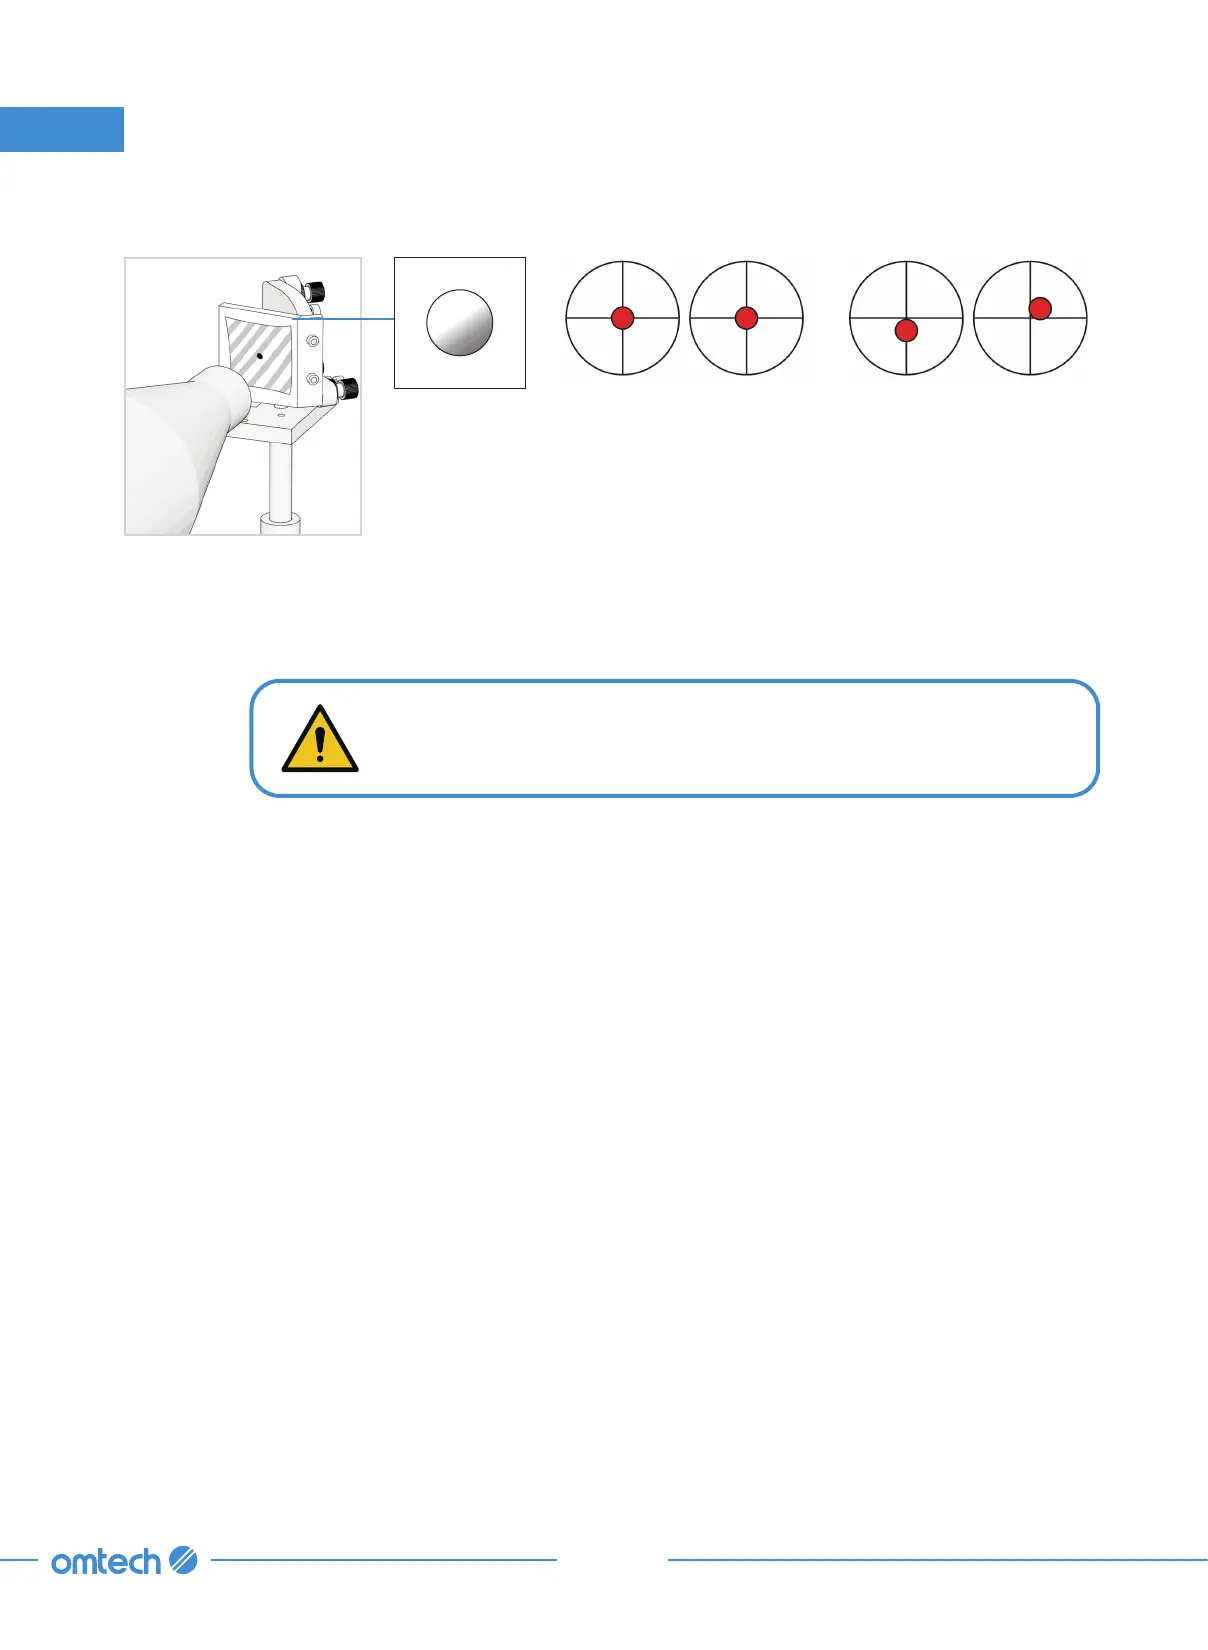
Step 7. Check that the burnt hole on the tape is at its center.
These marks are OK. These marks require adjustment.
If not,
a. Cut the power to your laser.
b. Carefully adjust the laser tube in its brackets by loosening its bolts.
c. Use rubber shims to elevate or remove the existing shim to lower the laser’s position
on the bracket.
d. Once the laser tube’s elevation is adjusted, you will need to check the alignment of
Mirror 1, 2, and 3.
e. When finished with adjusting the tube, repeat steps 2–8 until the burnt hole falls
perfectly at the center of the tape.