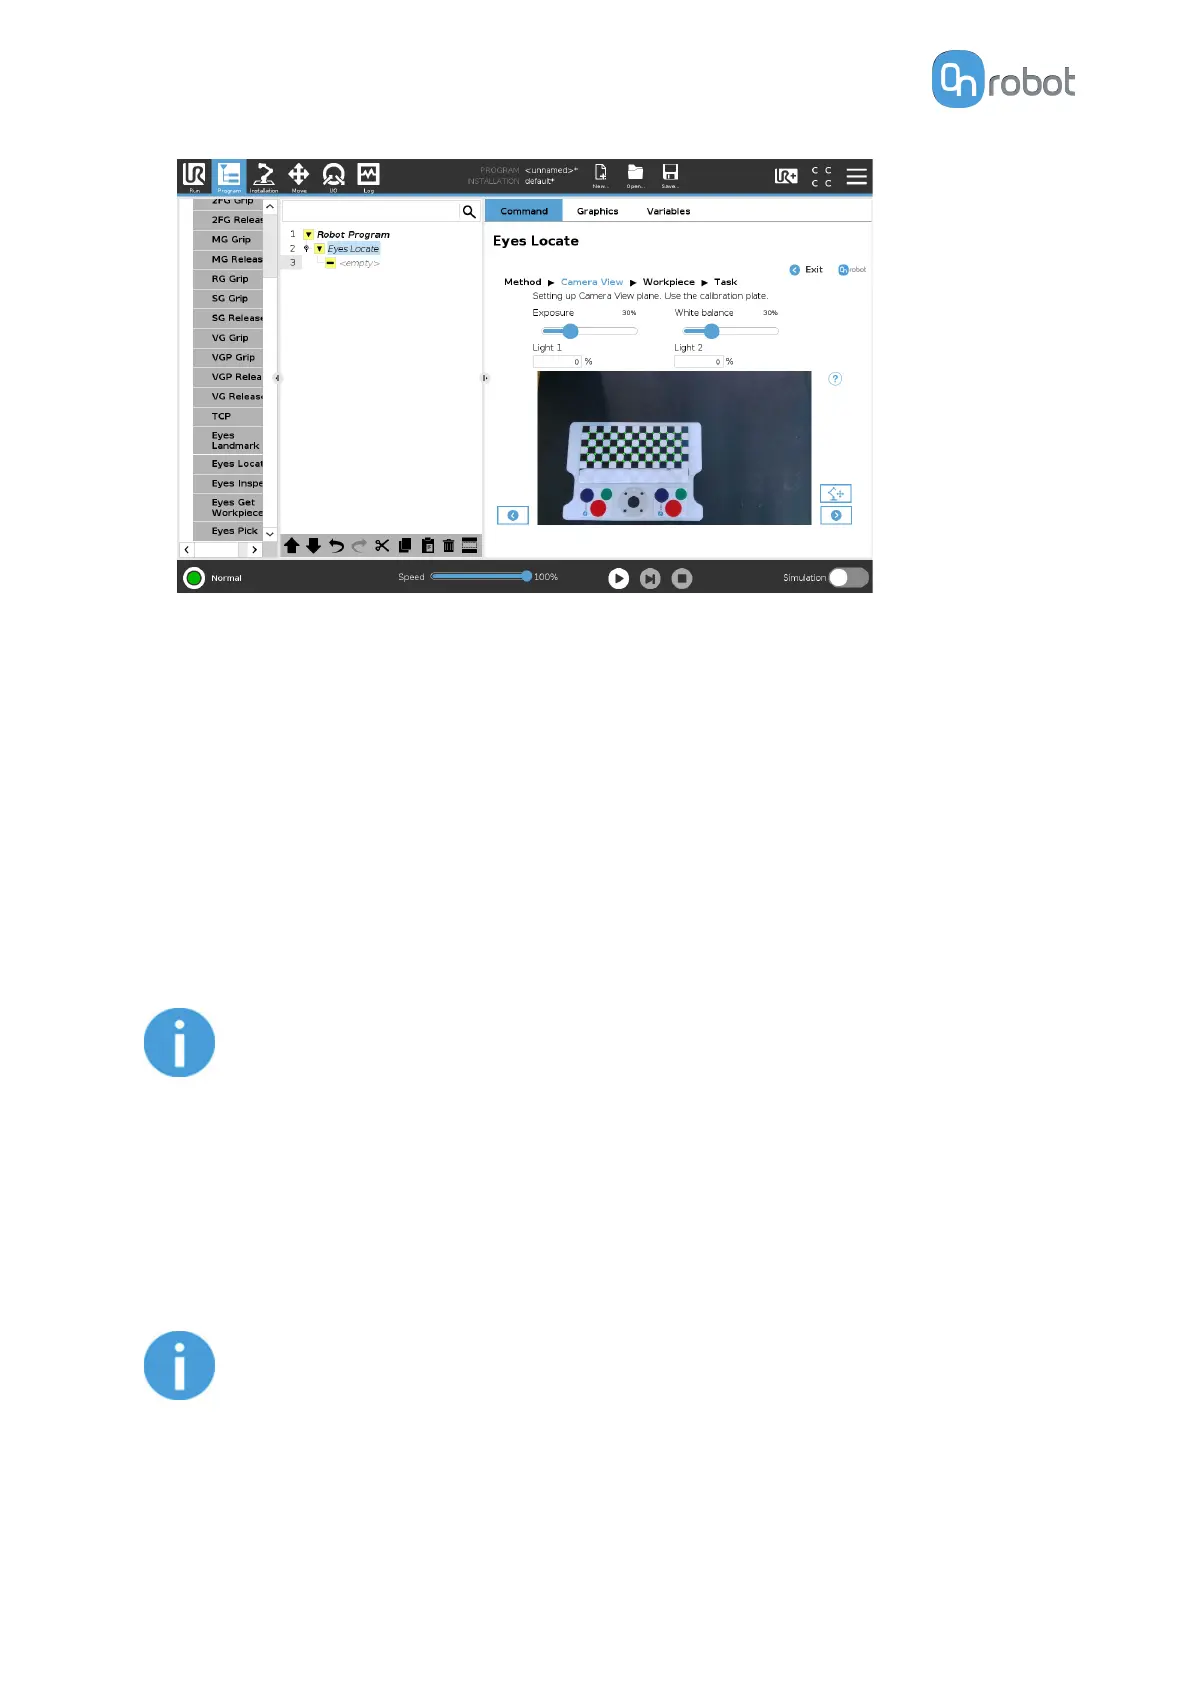
You can adjust the image using the Exposure and the White balance parameters, if
needed. For example, the pattern is not detected or the color of the image does not reflect
what is seen. Use the input fields to change the parameters.
•
Set the Exposure and the White balance parameters, and observe the eects on the
camera feed.
•
Set the Exposure parameter so the image is neither saturated nor underexposed (non-
white objects do not appear white, non-black objects do not appear black) and the
brightness of the background and the calibration plate roughly reflects how it is seen.
•
Set the White balance parameter so the colors look similar in the image as in reality.
If you use the Eyes Lighting Kit, the intensity of the two lights can be adjusted
independently to improve the illumination conditions in the application. Use Light 1 and
Light 2 parameters to adjust the intensity of the lights.
NOTE:
To avoid drawing excessive power from the Eye Box, the combined
intensity of the two lights is limited to 100%. If the intensity of one light
exceeds the maximum level, the intensity of the other light will be lowered
automatically.
Using the Eyes Lighting Kit for location can provide the following:
•
Reducing dependency on ambient light sources.
•
Eliminating shadows casted by the operators or by the objects.
NOTE:
When working with shiny objects or background, it is recommended to
mount the light externally to the camera.
You might need to readjust the Exposure and White balance after you
changed the intensity of the lights. Exposure values can get very low for
strong light intensities.
OPERATION
49
 Loading...