•
Pick priority: This option defines in which order the workpieces will be picked, based
on their position in the image. The first workpiece is marked with white in the image.
•
Use fixed orientation: If enabled, the orientation of the detected items will be fixed to
the selected camera view plane. This can be used to avoid unnecessary rotations of
the gripper when the objects can be picked with any orientation.
•
Press
.
•
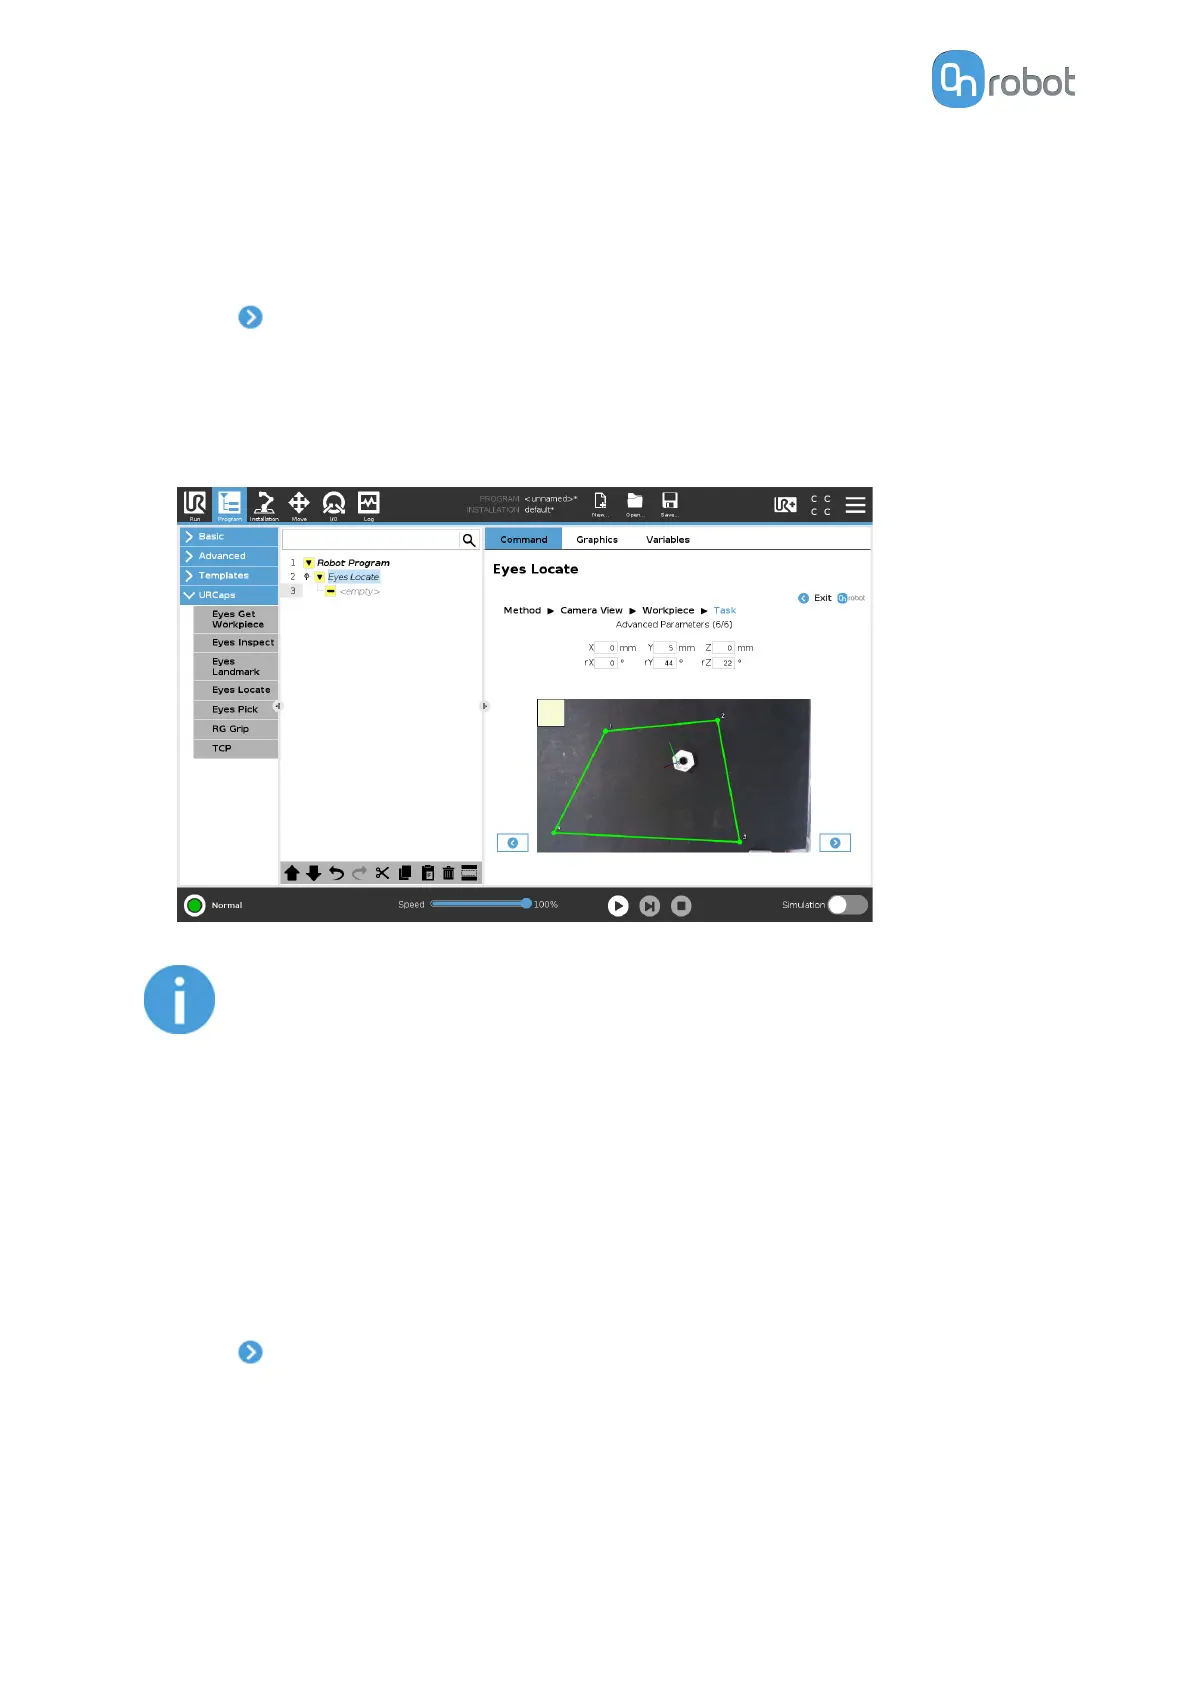
Adjust the picking
oset and the rotation for all workpieces. If the workpieces are placed
inside the region of interest, the picking position and the orientation are visualized in the
image feed. Axes X, Y, Z are represented by red, green, and blue lines, respectively. If
parts of the axis are covered by the workpiece in the 3D space, the color of that part of the
axis will be darker.
NOTE:
The osets are applied in the original frame of the detected workpieces.
For this reason, it is more intuitive to adjust the picking osets first, and the
picking orientation afterwards.
You can adjust the region of interest, which is marked by a yellow rectangle in the image.
To change the region of interest, adjust the corners by clicking and dragging each of the
points to its new position. The green region moves first, then the yellow follows, indicating
that you successfully changed the region of interest.
It is recommended to test the task on the whole workspace by moving the workpiece
inside the region of interest and checking that it is correctly detected and sorted in all
positions.
•
Press and go to first page of Task Using Detection by Color and Size.
II/4.2 Task Using Detection by the Workpiece's Inner Features
•
You can see the detected workpieces with axes and the workpiece number in the camera
feed.
OPERATION
57
 Loading...