HTTP server functions/web pages
FP Web-Server V2.810 EN 103
In general, there are three ways of defining an input field:
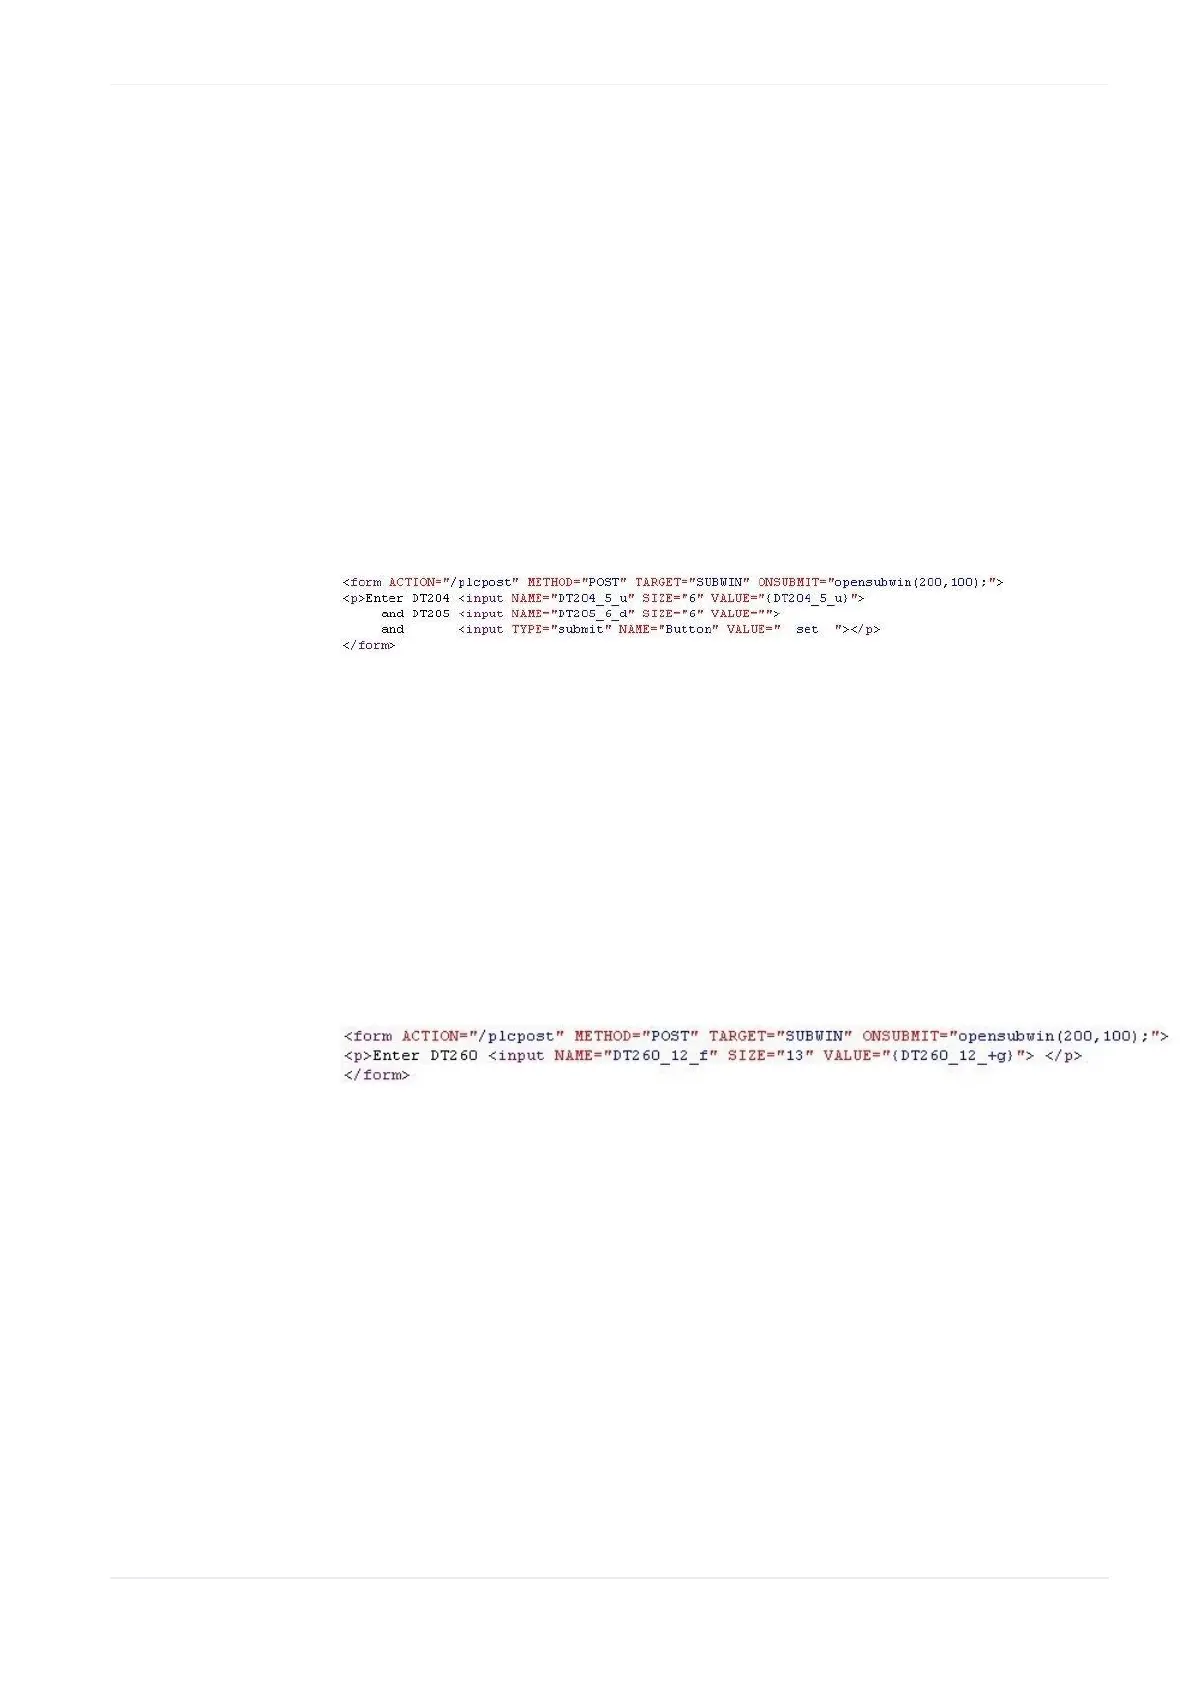
A) Send input with button:
Several input fields can be summed up in one 'input field' and sent to the
PLC with a separately defined button. A confirmation dialog box (OK or
ERROR) is generated. In the following HTML code, the current value of
DT204 is written into the first input field before and after the input editor is
started. The inputs for DT204 and DT205 can be edited and then sent to
the PLC by clicking [SET]. The input for DT204 is interpreted as an
unsigned decimal number. The input for DT205 is interpreted as a signed
decimal number (<ENTER> has no function here).
B) Send input with <ENTER>:
A single input field—it is also possible to use several input fields in one
HTML page—does not necessarily need a button of its own; it can be sent
to the PLC immediately by pressing <ENTER>. A confirmation dialog box
(OK or ERROR) is generated. In the following HTML code, the current value
of DT260 is displayed in the input fields initially; after that the input editor
is started. The input can be edited and then sent to the PLC by pressing
<Enter>. The input is interpreted as a 32-bit floating point number:
C) Send a bit command with button:
The HTML [SUBMIT] fields can also be used to send bit information via a
button. The type "hidden" is used to specify the send command. An "input
field" need not be entered. A separately defined button will start sending
the bit. A confirmation dialog box (OK or ERROR) is generated. In the
following HTML code, the TRUE status is written into the PLC address R1F:
<form action="/plcpost" method="post" target="SUBWIN"
onsubmit="opensubwin(200,100);">
<input type="hidden" name="R1E_100_u" value="1">
<input type="submit" name="Send" value="Setzen"></form>