118 KENR6932
Disassembly a nd Assembly Section
i02654539
Rocke r Shaft - D isas semble
Disassembly Pr
ocedure
Start By:
a. Remove the rocker shaft assembly. Refer to
Disassembly and Assembly, “Rocker Shaft and
Pushrod - Remo
ve”.
NOTICE
Keep all parts clean from contaminants.
Contaminants
may cause rapid wear and shortened
component life.
Personal inju
ry can result from being struck by
parts propelled by a released spring force.
Make sure to w
ear all necessary protective equip-
ment.
Follow the re
commended procedure a nd use all
recommended tooling to release the spring force.
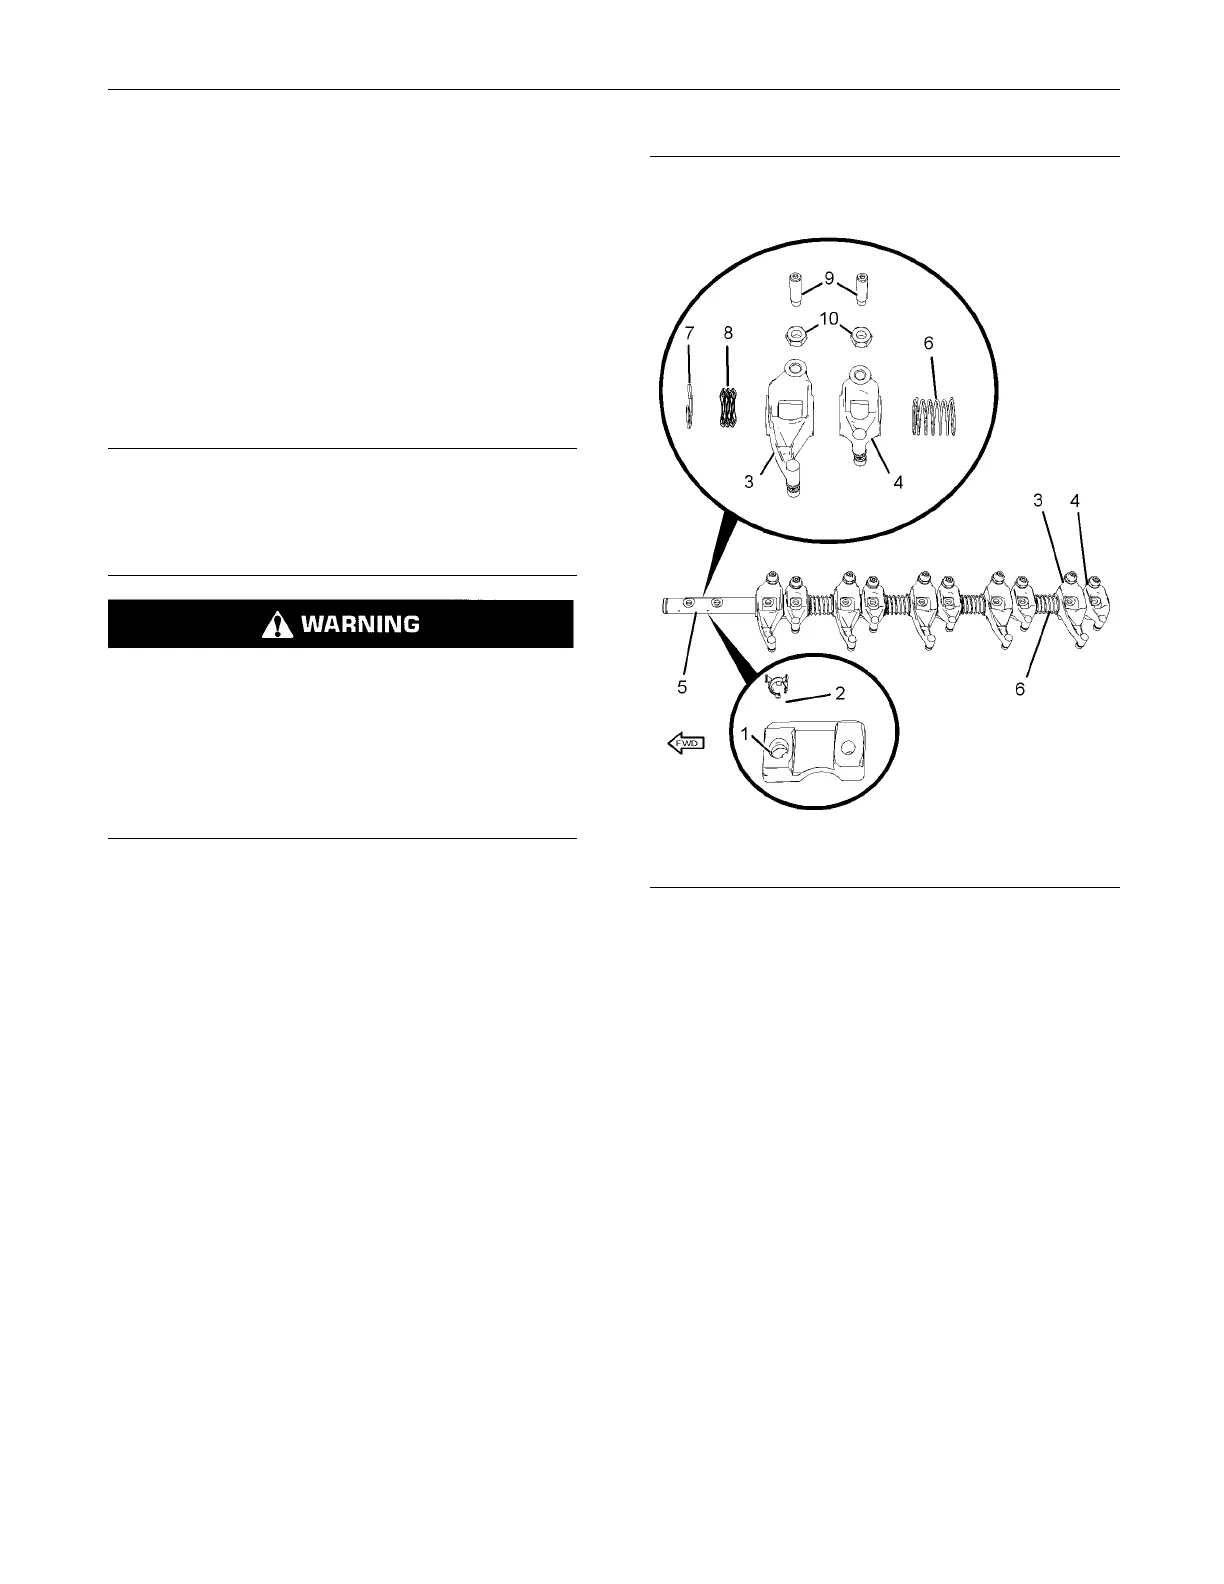
1. Make an ident
ification mark on each rocker arm
assembly in order to show the location.
Note: The com
ponents must be reinstalled in the
original location. Do not interchange components.
g01340047
Illustration 232
2. Remove pedestals (1) from rocker shaft (5). It is
not necessary to remove locators (2) from the
pedestals.
3. Remove rocker arm assembly (4) for the exhaust
valve from rocker shaft (5). Remove rocker arm
assembly (3) for the inlet valve from rocker shaft
(5). Begin at the rear of the rocker shaft assembly.
Note: The rocker arm assembly for the inlet valve is
longer than the rocker arm assembly for the exhaust
valve.
4. Remove spring (6) from rocker shaft (5).
5. Repeat Steps 3 and 4 in order to remove the
remaining rocker arms from rocker shaft (5).

 Loading...


