KENR6932 163
Disassembly and Assembly Section
i02654464
Cranksh aft Gear - Remo ve a n d
Insta ll
Removal Procedure
Table 78
Required Tools
Tool
Part
Number
Part Description Qty
-
Bearing Puller 1
-
Puller 1
-
Crossblock 1
A
-
Puller Leg 2
Start By:
a. Remove the front housing. Refer to Disassembly
and Assembly, “Housing (Front) - Remove”.
b. Removetheengineoilpump.Referto
Disassembly and Assembly, “Engine Oil Pump
- Remove”.
NOTICE
Keep all parts clean from contaminants.
Contaminants may cause rapid wear and shortened
component life.
Note: The crankshaft gear may be a sliding fitonthe
crankshaft or an interference fit on the crankshaft.
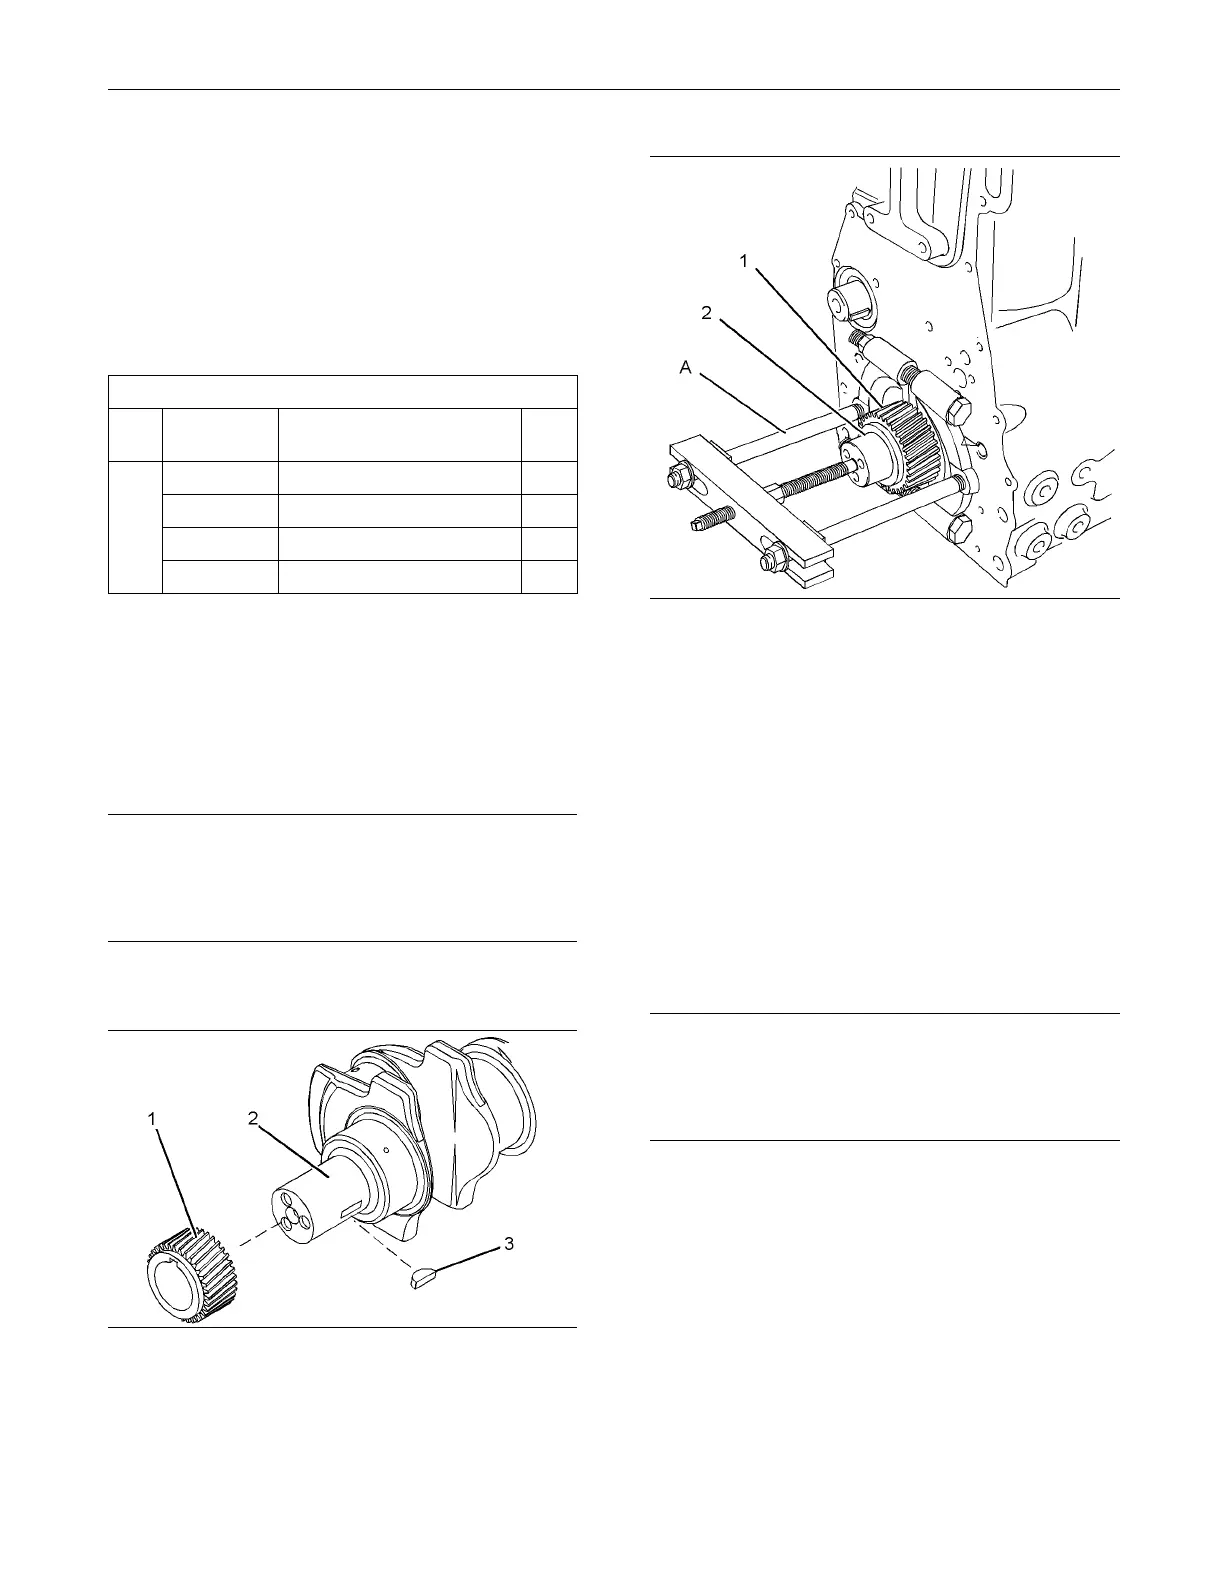
g01341481
Illustration 330
Typical exam p le
g01341488
Illustration 331
Typical example
1. If the crankshaft gear is a sliding fitonthe
crankshaft, remove crankshaft gear (1) from
crankshaft (2).
If the crankshaft gear is an interference fitonthe
crankshaft, use Tooling (A) in order to remove
crankshaft gear (1) from crankshaft (2).
2. If necessary, remove key (3) from crankshaft (2).
Note: Do not remove the key from the crankshaft
unless the key is damaged.
Installation Procedure
NOTICE
Keep all parts clean from contaminants.
Contaminants may cause rapid wear and shortened
component life.
1. Ensure that all components are clean and free
from wear or damage. If necessary, replace any
components that are worn or damaged.

 Loading...


