146 KENR6932
Disassembly a nd Assembly Section
Installation P
rocedure
Table 67
Required Tools
Tool Part
Number
Part Descripti
on
Qty
A
21825576
Crankshaft Turning Tool
1
27610291
Barring Device Housingl 1
A
27610289
Gear 1
Note: Either Tooling (A) can be used. Use the Tooling
that is most suitable.
NOTICE
Keep all parts clean from contaminants.
Contaminants may cause rapid wear and shortened
component life.
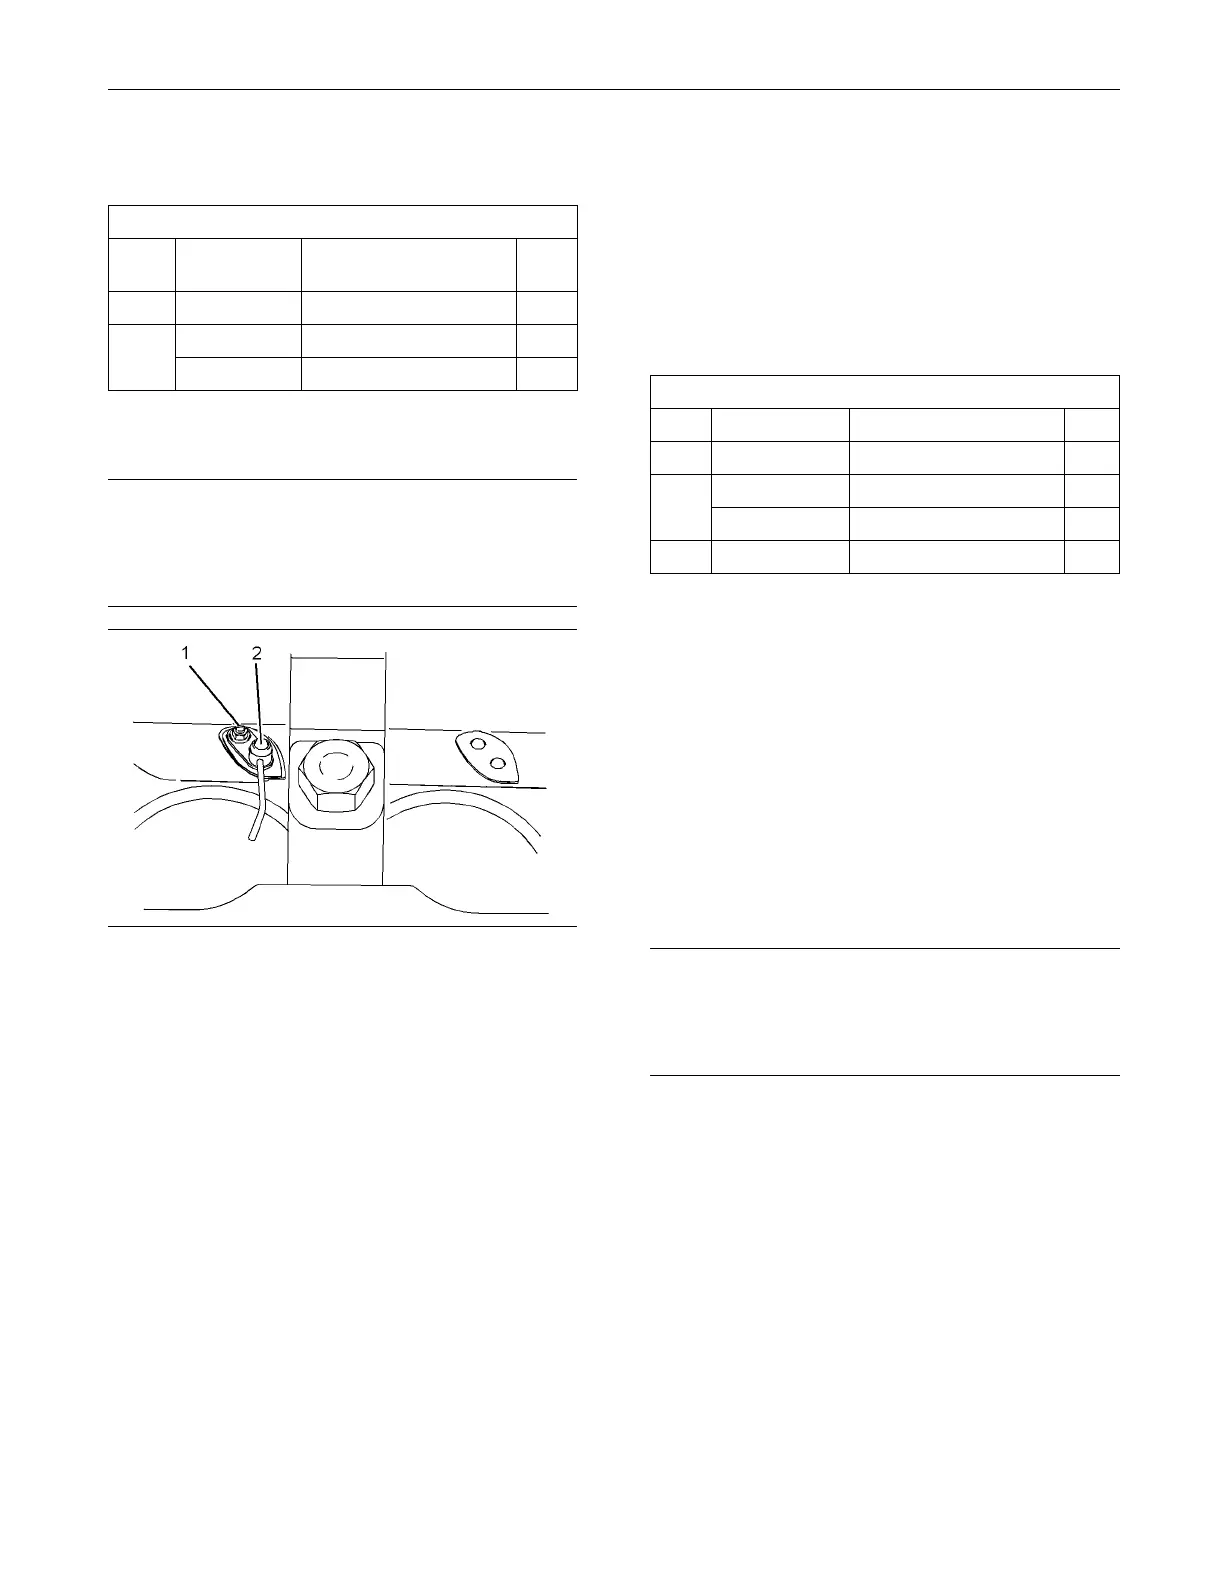
g01340940
Illustration 295
1. Clean the piston cooling jets and inspect the
piston cooling jets for damage. Ensure that the
valve is fre
etomovewithineachpistoncooling
jet. Replace any damaged piston cooling jets. The
procedure for checking the alignment of the piston
cooling je
ts is described in Specifications, “Piston
Cooling Jet Alignment”.
2. If the cran
kshaft is installed, use Tooling (A)
to rotate the crankshaft in order to access the
mounting flange for the piston cooling jet.
3. Position piston cooling jet (2) in the cylinder block.
Install bolt (1). Tighten bolt (1) to a torque of 9 N·m
(80lbin)
.
4. Repeat steps 2 through 3 for the remaining piston
cooling j
ets.
End By:
a. Install the engine oil pump. Refer to Disassembly
and Assembly, “Engine Oil Pump - Install”.
i02654533
Pistons and Connecting Rods
-Remove
Removal Procedure
Table 68
Required Tools
Tool Part Number Part Description Qty
A
21825576
Crankshaft Turning Tool 1
27610291 Barring Device Housing 1
A
27610289
Gear 1
B
27610274
Ridge Reamer 1
Start By:
a. Remove the cylinder head. Refer to Disassembly
and Assembly, “Cylinder Head - Remove”.
b. Remove the engine oil pump. Refer to
Disassembly and Assembly, “Engine Oil Pump
- Remove”.
c. Remove the piston cooling jets. Refer to
Disassembly and Assembly, “Piston Cooling Jets
- Remove and Install”.
Note: EitherTooling(A)canbeused.UsetheTooling
that is most suitable.
NOTICE
Keep all parts clean from contaminants.
Contaminants may cause rapid wear and shortened
component life.
1. Use Tooling (A) to rotate the crankshaft until the
crank pin is at the bottom center position.
2. Use Tooling (B) to remove the carbon ridge from
the top inside surface of the cylinder bore.

 Loading...


